Building Design and BIM at the Building-Floor Level
Posted 09/20/2023 in Education
Building Design can be tricky, it sometimes seems a slow exercise of trial and error. Not being able to calculate the metrics for your project until you are done designing it can be a nuissance. If only we could wish for the some features in our project and have a design and its metrics in a few seconds… Oh! Wait. It turns out you can… Read on to find out how Architechtures can boost your efficiency.
How to customize the parameters for Automated Building Design and BIM Modeling.
As explained previously, at the Site Planner Level there are some options allowing us to change the size of buildings. However, the main function of the site planner is to place them on the plot, customizing them is done at the Building Level.
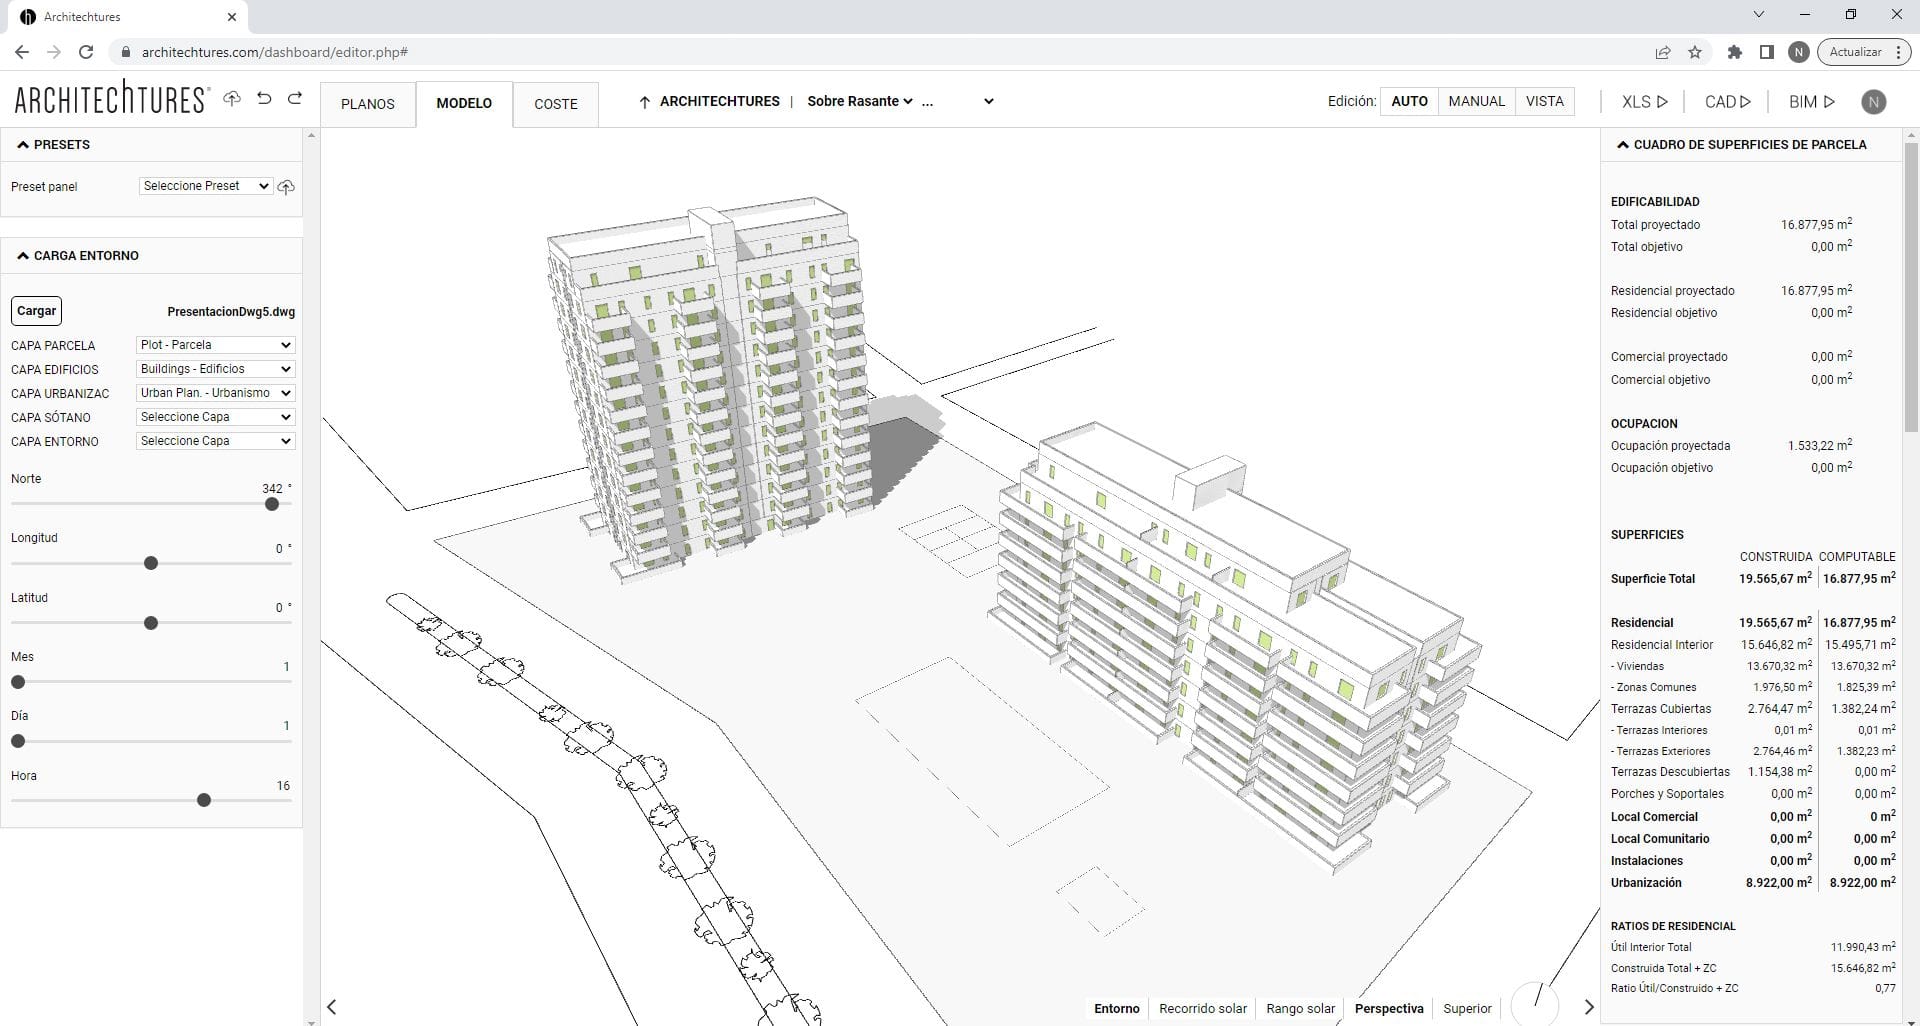
View Modes and Breadcrumb Levels
In the Floor Plan view mode, there are different levels in the breadcrumb: plot, building, floor, and unit. When accessing the floor level, the default view is the typical floor plan; however, you can switch to any floor of the building using the breadcrumb.
In the Model and Cost view modes the Floor view level is not reached. The limit of the Model and Cost view modes is the Building view mode.
Edit Modes Priorities
In the Site view there is no distinction between Auto, Assisted or Manual editing mode. In the Building view, however, the distinction between editing modes is of primary importance.
To avoid losing some of the work done we must progress from Auto to Assisted to Manual mode, never the other way around. We must exhaust the configuration options in the Auto editing mode before moving on to Assisted. And again, exhaust those in Assisted mode before moving on to Manual. To do this, it is necessary to understand what kind of design options are found in each editing mode.
Building – Data Panel
In the Building view we still have available all the sections already seen in the Site view. This allows us to see how the changes we make at the Building level affect the project as a whole.
In addition to the sections already seen in the Site view, two new ones are added in a familiar format:
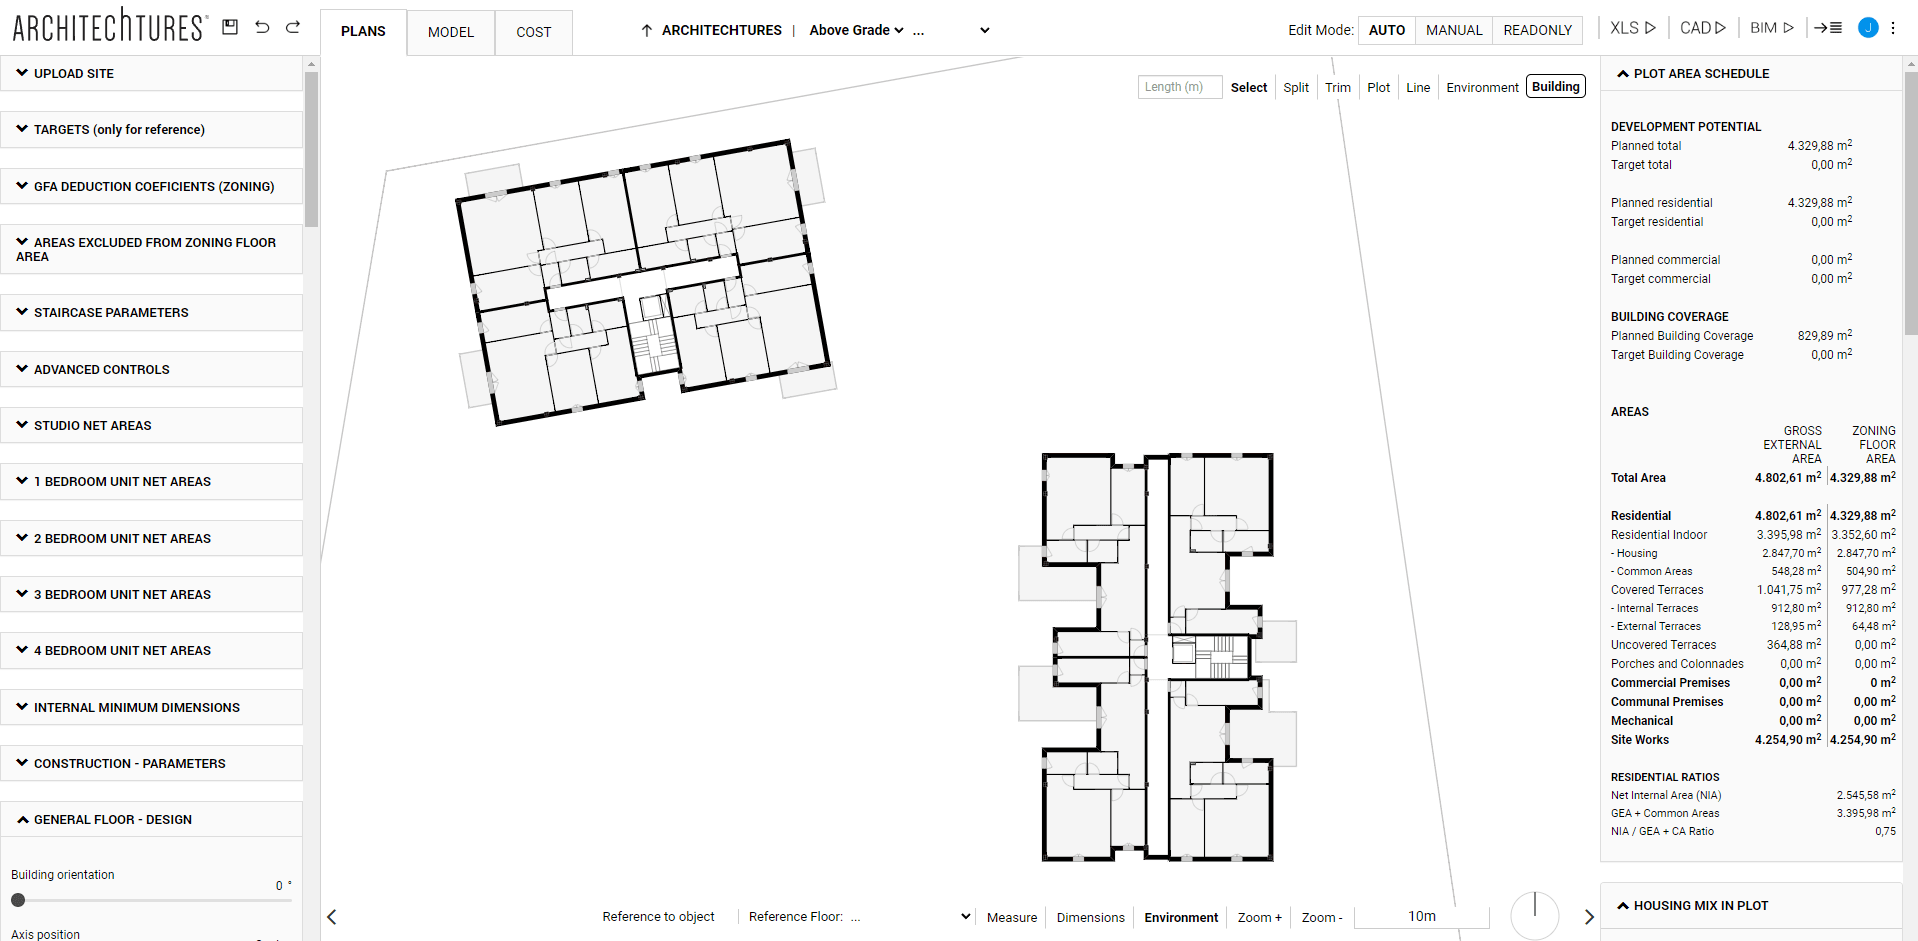
The Building´s Area Schedule
This has exactly the same format as the Plot Area Schedule. Except that only the areas of the currently selected building are displayed.
The Building´s Housing Mix
The upper half is the same as in the Site view: An account of the total dwelling units grouped by number of bedrooms. But the bottom half is different. At the site level there is an account of dwellings grouped by number of bedrooms, both by building and for the whole plot. Whereas at the building level it compares the housing mix obtained in the selected floor with the one required by the user.
Finally, a new section is added. It consists of a list of all the typologies present in the selected floor with their most relevant areas and ratios.
Building – Input Panel – Editing Mode Auto – AI Powered:
Net Areas
Here is where the composition and size of the target dwellings is defined. We have one for each flat typology, from 0 (studio) to 4 bedrooms.
There are two types of configuration options:
Design Criteria
In these, we define which rooms we want to have in the dwelling and some aspects of proximity relationships between rooms, such as the possibility of an indoor kitchen.
Target Areas
These are used to define the ideal target area for each room.

Internal Minimum Dimensions
The Minimum Dimensions are the regulation requirements that the project must comply with at the geometric level. Some examples would be the diameter of the minimum inscribed circle in the room or the minimum width of the corridors. This is where we introduce all these types of requirements related to regulatory requirements.
We must keep in mind that the minimum size requirements take precedence over the surface size requirements for net areas. In the event of a conflict between them, the room will be sized to meet the minimum required size. This is the case when the area resulting from inscribing the minimum diameter circle is greater than the area required by the user.
Construction – Parameters
Here we define globally for the building the thickness of the construction elements, for both vertical walls and horizontal slabs.
The setting of this section has a dramatic impact on the calculation of areas and efficiency ratios. Therefore it is recommended to customize them immediately after creating the building.
It is also very useful for customizing our BIM model in a way that makes it easy for us to progress to a higher definition. So if you are going to request the download of a BIM model it is important to make sure that this section is properly customized.
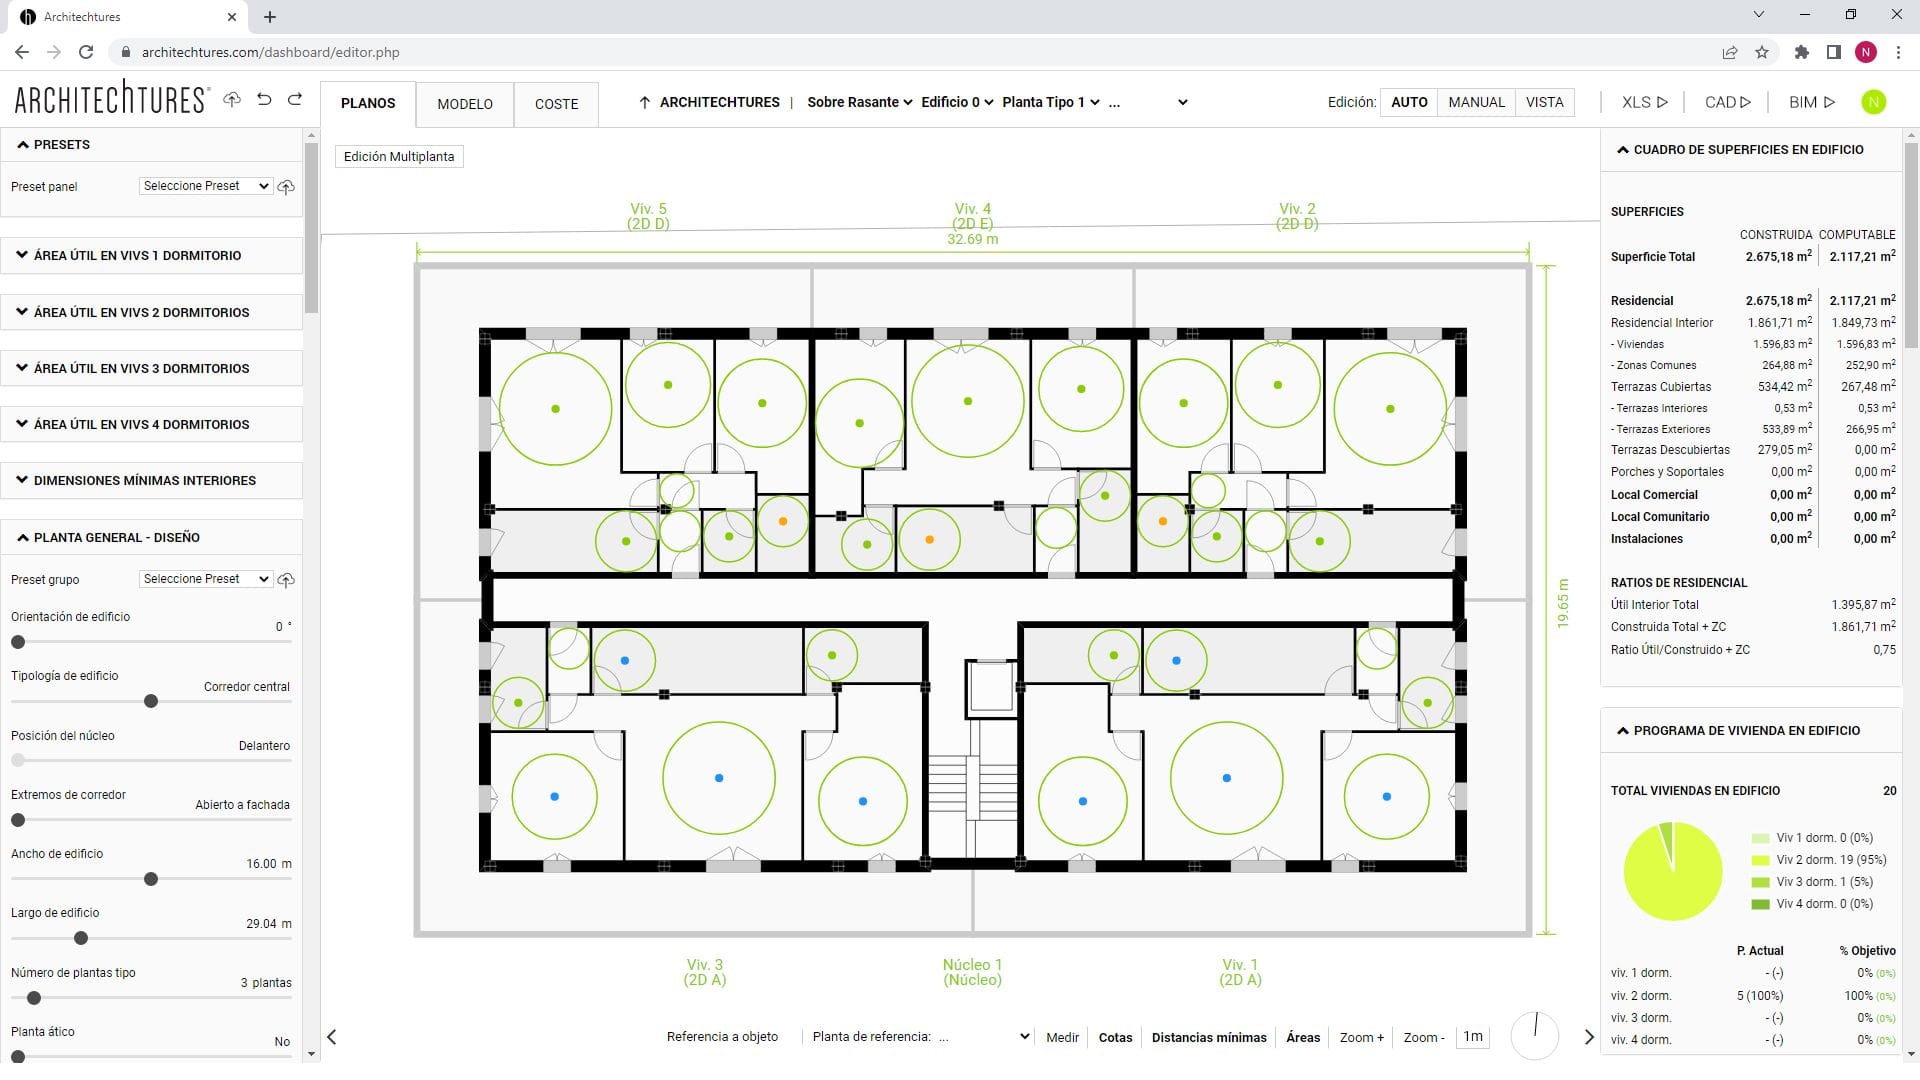
General Floor – Design
Most of the customisation options in this section can be grouped into two categories:
Building typology selection
Building typology, Core position or Corridor ends. These define the building typology and the sub-variety that the IA will use to create a layout for the building.
Building Size
Such as Widthand Length of the building, or others referring to the height, such as Number of standard floors, the Heights of ground and standard floors or of the lift overhead space, or whether we want a Penthouse Floor or not.
Housing Mix in Standard Floor
Here we define the target housing mix for the standard floors. For each typology from 0 (studio) to 4 bedrooms we can customize the housing mix percentage.
The IA will try to stick as closely as possible to this mix within the limitations imposed by the geometry Given the net area and the size of the target dwellings, the resulting number of dwellings may not be a whole integer multiple of the requested mix. It is therefore convenient to think of the housing mix as a guideline. It is an interactive process that can be adjusted quickly according to the results we get.
This is true not only for the standard floor plan but especially when considering the building as a whole. Normally on the ground floor and penthouse floors there are different layouts to those of the standard floor due to the particular characteristics of each floor. We often adjust the layout on the standard floor to take into account the variations that occur on other floors.
Common Areas Dimensions
Here are the configuration options for the common areas, the vertical communication core, stairs and lifts.
Things like the number of lifts, whether we want the staircases to be fire-protected or if split landings are allowed, the minimum widths of communal corridors or access portals to the building, the width of the flights of stairs, the width and length of the lift shaft, etc…
Terraces – General Floor
Here there are different configuration options, such as the minimum width of access to an exterior terrace, minimum terrace width, or the dimension of the flight.
We can also enable or disable the existence of terraces for each of the building's facades.
Exterior Enclosure – Parameters
Here we define globally for the building the size of the windows according to the room in which they are. This is done by customizing them with two parameters (per room window): the height of the sill and the width of the opening.
This can be useful to ensure compliance with certain regulatory requirements, particularly lighting and ventilation requirements.
Sections of the Input Panel for specific floors
There are certain sections that do not appear in the standard floor plan view which is the default view of a building. Their content refers specifically to floors other than the standard one and to customize them we must go to that specific floor. Once there, we can see these new sections in the input panel along with their configuration options. Also, we will be able to see how the changes we made through them take effect.
Ground floor gardens
Similar to the section on terraces on the standard floor but simplified, this allows us to change the size of the Gardens on the ground floor dwellings.
Penthouse floor housing mix
Similar to the housing mix section in the standard floor plan, it allows us to control the housing mix on the penthouse floor.
Penthouse floor setbacks
It allows us to control independently for each facade the setbacks that the penthouse floor must have with respect to the standard floors.
Terraces on the penthouse floor
Similar to the section on terraces on the standard floor but simplified, it allows us to control the size of the terraces on the attic floor.