Basement – Automated AI Design for Parking Garages
Posted 09/24/2023 in Education
Generating basement parking plan is tough. Combining correctly the building position, structure and cores to maximize parking places in the basement floors is not easy. Luckily, AI Design tools excel at optimizing multiple variables to maximize a result. Read on and learn how to automate the garage design of your projects.
AI Design considerations for Parking Garage and Basement Design using Architechtures
An architecture design program would be incomplete without a floorplanner for parking garages. That’s why at Architechtures we have automated the parking garage design process to streamline the ENTIRE design process.
At the Site Level in the breadcrumb there are two views available:
Above Grade – Site
Which we have already seen before in the Site View section.
Below Grade
Which we are going to explain in this section.
The control of the editing modes via the Auto and Manual buttons only applies to buildings. However, the three editing modes and their associated phases apply nonetheless, they are simply not controlled by those buttons anymore. The correct order however still is:
Auto, Assisted and Manual
Rules governing the relationship between editing modes in Parking View
The rules governing the relationship between one mode and another are very similar:
With any change done in the Auto mode we will lose any modifications made in Assisted mode.
Elements added in Manual mode do not interact with the design generated by the previous two phases. Therefore, once again, changes made in Manual mode should be the last ones.
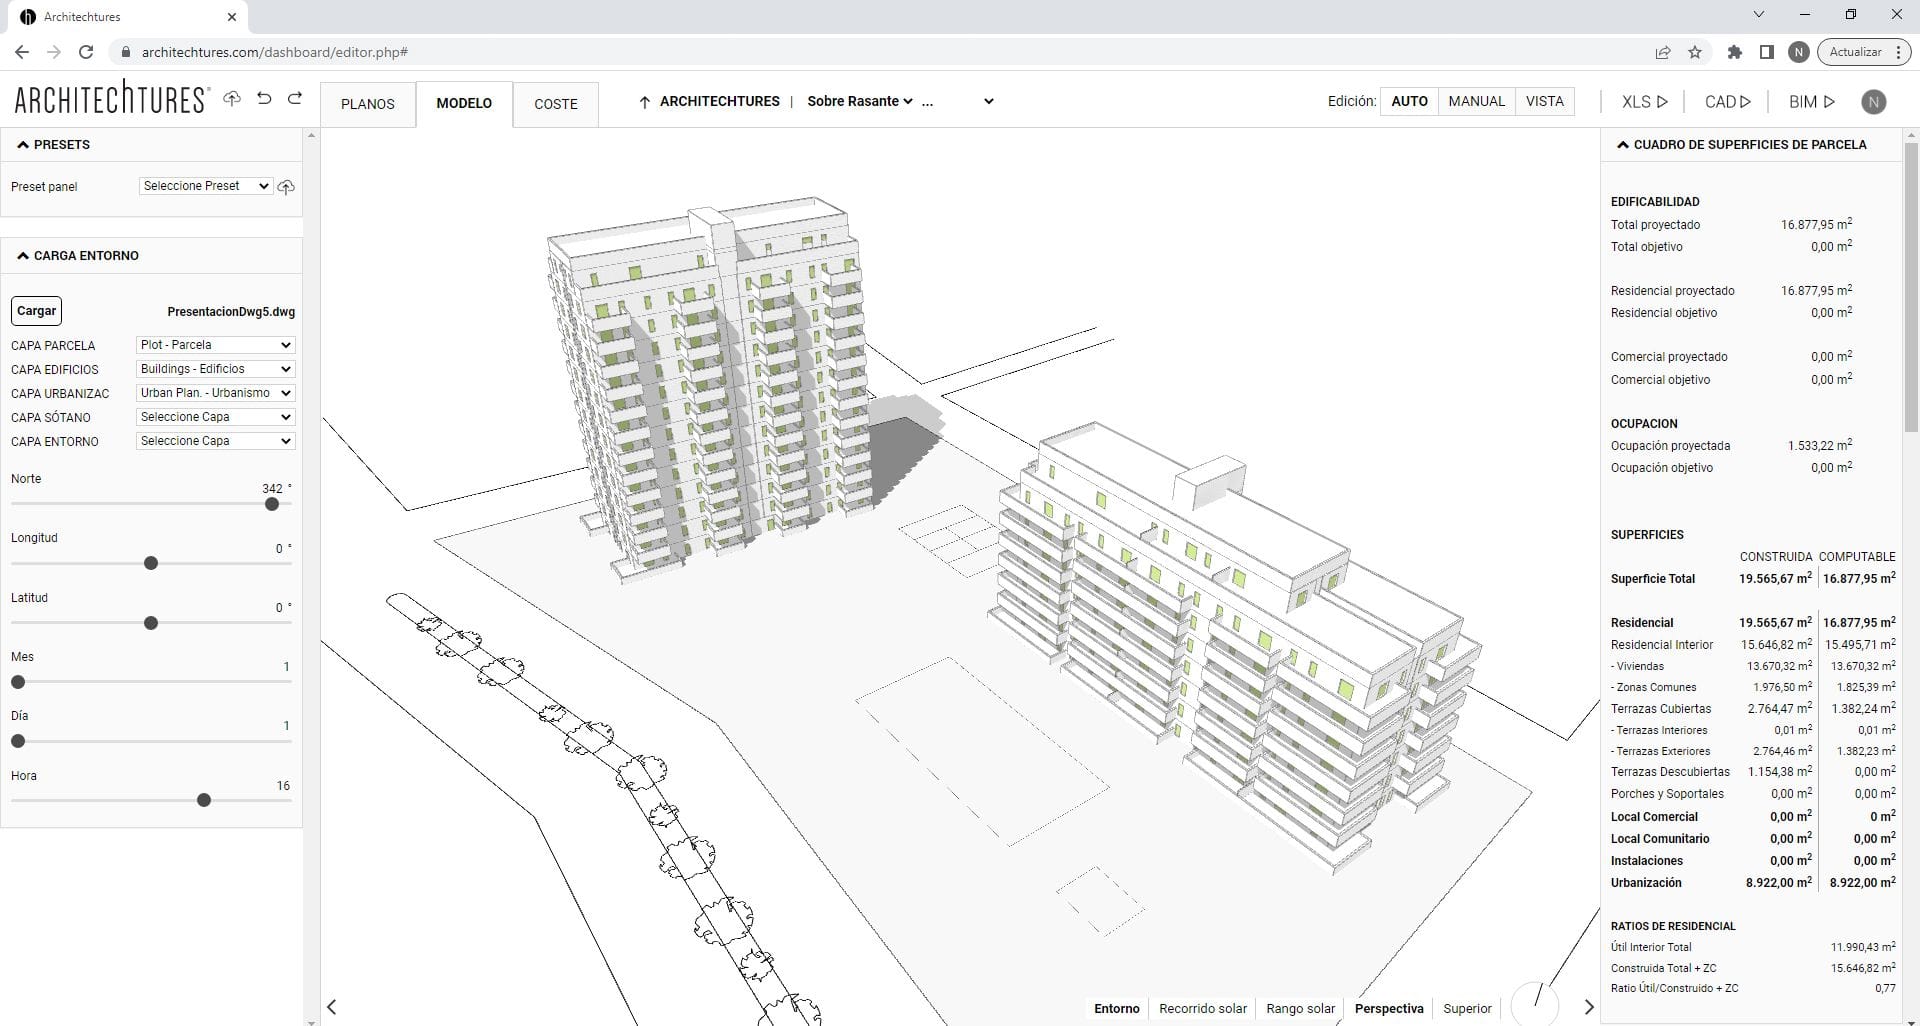
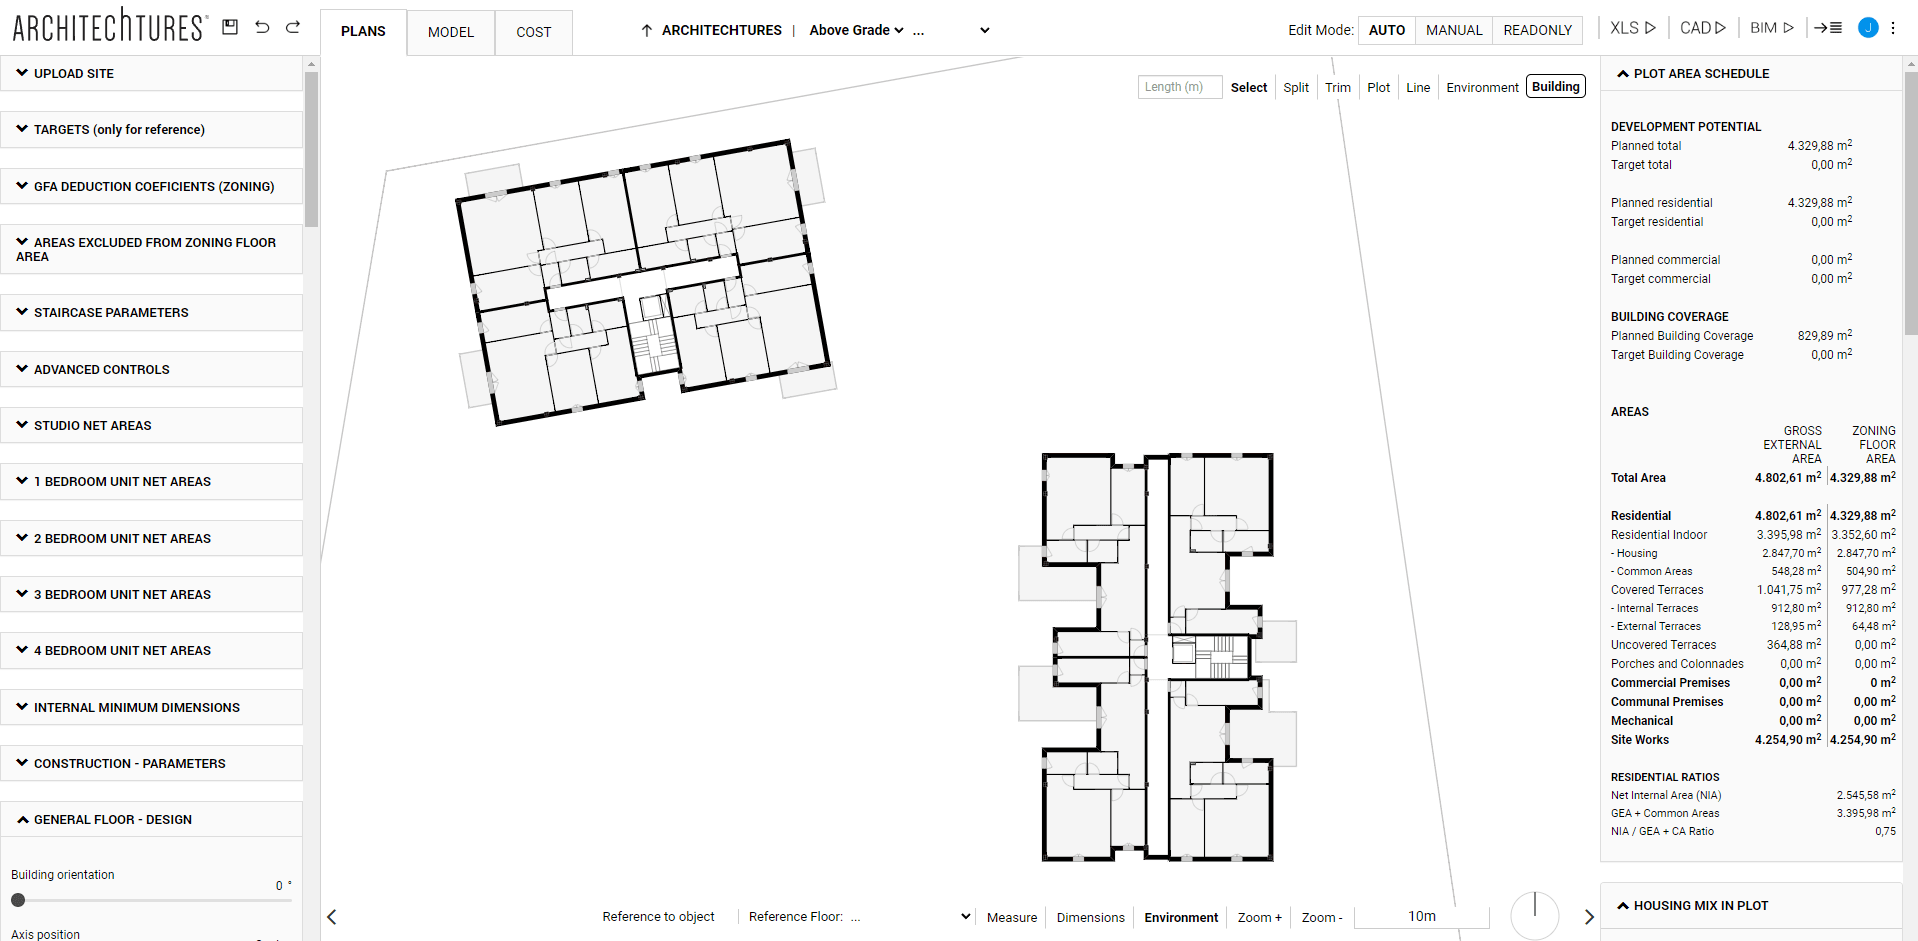
Parking View – Data Panel
In the data panel there are the same sections as in the site view except for the housing mix section.
In Below Grade Areas and Ratios some of the metrics offered are ratios of parking spaces or storage rooms per dwelling. Such as the number of parking places or storage rooms per dwelling unit. If we want to comply with regulatory requirements related to this metric, it is logical to set up the parking once we have created at least the right number of dwellings for the project.
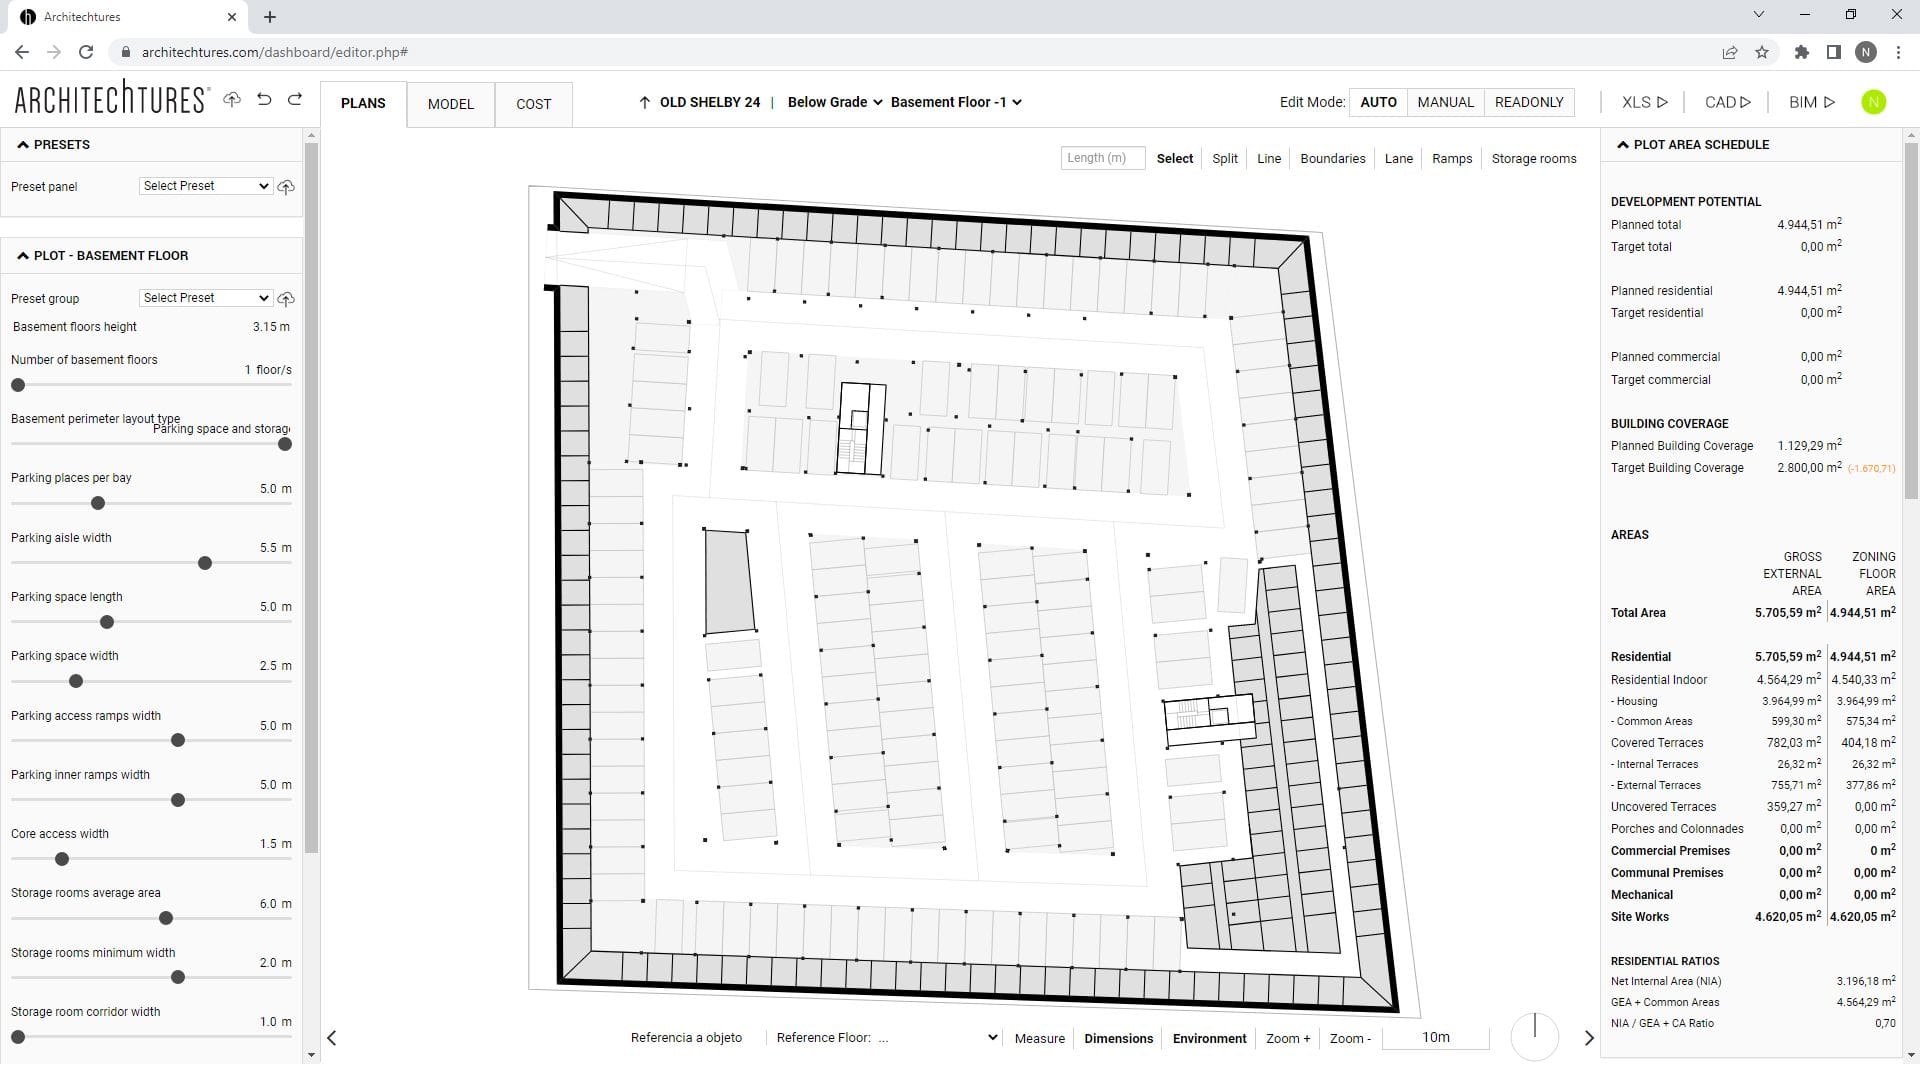
Auto Mode
The Auto mode includes all the configuration options present in the Input panel and also the definition of the basement´s shape through the central window.
Below Grade – Input Panel
In the Input panel there are two types of configuration options:
Design or Layout configuration options.
Such as the type of basement perimeter, which allows us to define the type of element we want to have in the basement floors. The available options are: traffic lane, storage rooms, parking spaces, or storage rooms + parking spaces.
Element Size
These include options such as the number of basement floors, or minimum dimensions of the different elements that make up the basement. These include: parking spaces, lanes or storage rooms, or thicknesses of the different walls, among others.
Below Grade – Central Window
In the upper right corner of the Central window we find the Manual editing menu.
There are several elements that we can create and edit in Auto mode in the below-grade view: lane, ramps, storage rooms, and perimeters.
Perimeters
With the 'Boundary' tool, we can create the outer perimeter of our basement floors, and with the 'Crop' tool, we can create an inner perimeter to remove a surface from it.
We can always edit the created outlines in the same way as other linear elements, dragging their axis and vertices to position them or selecting them for editing.
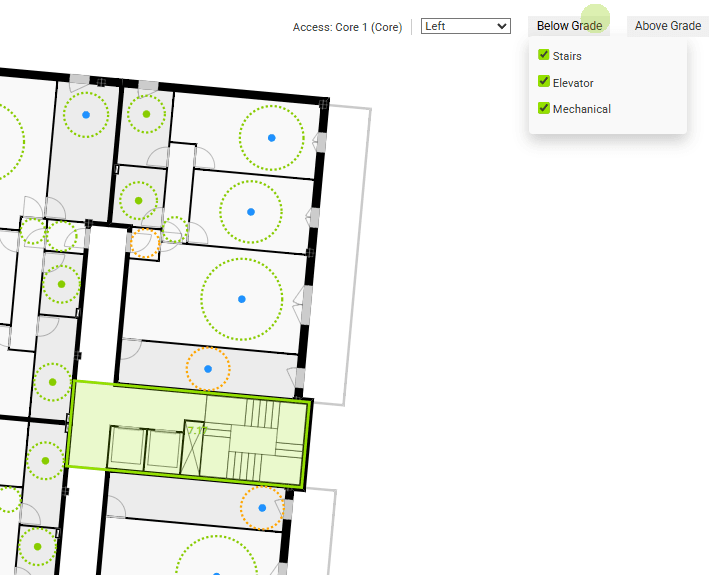
Any changes to them will trigger a recalculation of the basement floor distribution, just as any changes to the building will trigger a recalculation of the basement floors. Of course, this includes configuring access to basement floors for communication elements of the cores.
Initial lane layout
Taking into consideration the size and layout configuration options of the Input panel, the outer perimeter and geometry of the buildings defined in the central window, the AI will generate a layout automatically.
Any change in these elements will trigger a recalculation of the basement layout by redefining the initial lane layout. Changes made to the basement in Assisted mode will be lost. If we had added elements in Manual mode, these elements will not be taken into consideration in the new layout and their position may now be inappropriate.
Problems of generating initial layouts in small basements
When creating relatively small basement parking plan with respect to the building, it is possible that no lanes are generated in the initial layout. This can be avoided or fixed in several ways by understanding how the layout creation algorithm works.
The algorithm starts by calculating the position of the perimeter lane based on the basement´s boundary and the type of basement perimeter. If we ask for the lane perimeter type, the lane will be immediately against the outer contour. On the other hand, if we ask for the storage room + parking space perimeter type, the lane will be much further away from the boundary. This is because more space is needed to accommodate the storage rooms and parking spaces.
The layout of the rest of the basement parking plan is then calculated. In cases where the position of these perimeter lanes falls within the buildings themselves or in some other specific cases, no lanes will be generated, leaving the basement blank.
We can fix this in several ways, by moving the basement floors boundary away from the buildings until sufficient space is generated, or by selecting in the input panel a basement perimeter type that places the perimeter lane closer to the basement outline.
Finally, we can always create lanes ourselves with the lane tool from the manual tools menu in the upper right corner of the central window:

Assisted Mode
Once the lanes have been created, we can move them in Assisted mode to customize the distribution of the parking aisles.
To configure the position of the lanes we have the same options as for any other linear element, we can drag its axis to move it parallel to its axis, or we can drag its vertices to change its orientation.
Manual Mode
In manual mode there are two types of tools for the creation of two types of elements:
Linear Elements.
Such as Lanes and Ramps, they are used by drawing the axis of the linear element with a series of clicks and the element is generated by pressing the Enter key.
We have previously described how the Lane tool works.
There are two types of Ramps, the outer ramp can only be generated on the basement floors -1 and connects this basement floors with the ground floor. The inner ramp is used to connect basement floors with each other, they must be drawn on the lower floor of the two floors to be connected, for example, drawing an inner ramp on basement floors -2 will result in a ramp connecting basement floors -2 with basement floors -1.
Area Elements
Such as Boundary, Crop or Storage Rooms and Facilities
These elements are generated with a series of clicks and define an area for a certain use, therefore they require that the drawn area is closed, and when it is closed the surface of the selected type is generated.
In Storage Rooms we find the Storage Rooms tool itself, which generates Areas of Storage Rooms. Using the configuration options for storage rooms in the Input panel we can customize them.
Finally, also under Storage Rooms we find the Mechanical and Commercial tool that allows us to create Mechanical rooms.