Creating our first building with ARCHITEChTURES
Posted 02/16/2024 in Education
Here we will carry out, using a practical example, a simulation of how to approach a project with our platform; focusing on creating a new project, importing CAD files using "Upload Site", setting goals, the Housing Program, and drawing buildings with different characteristics. Later, we will explore the options available within the Model and Cost viewing modes.
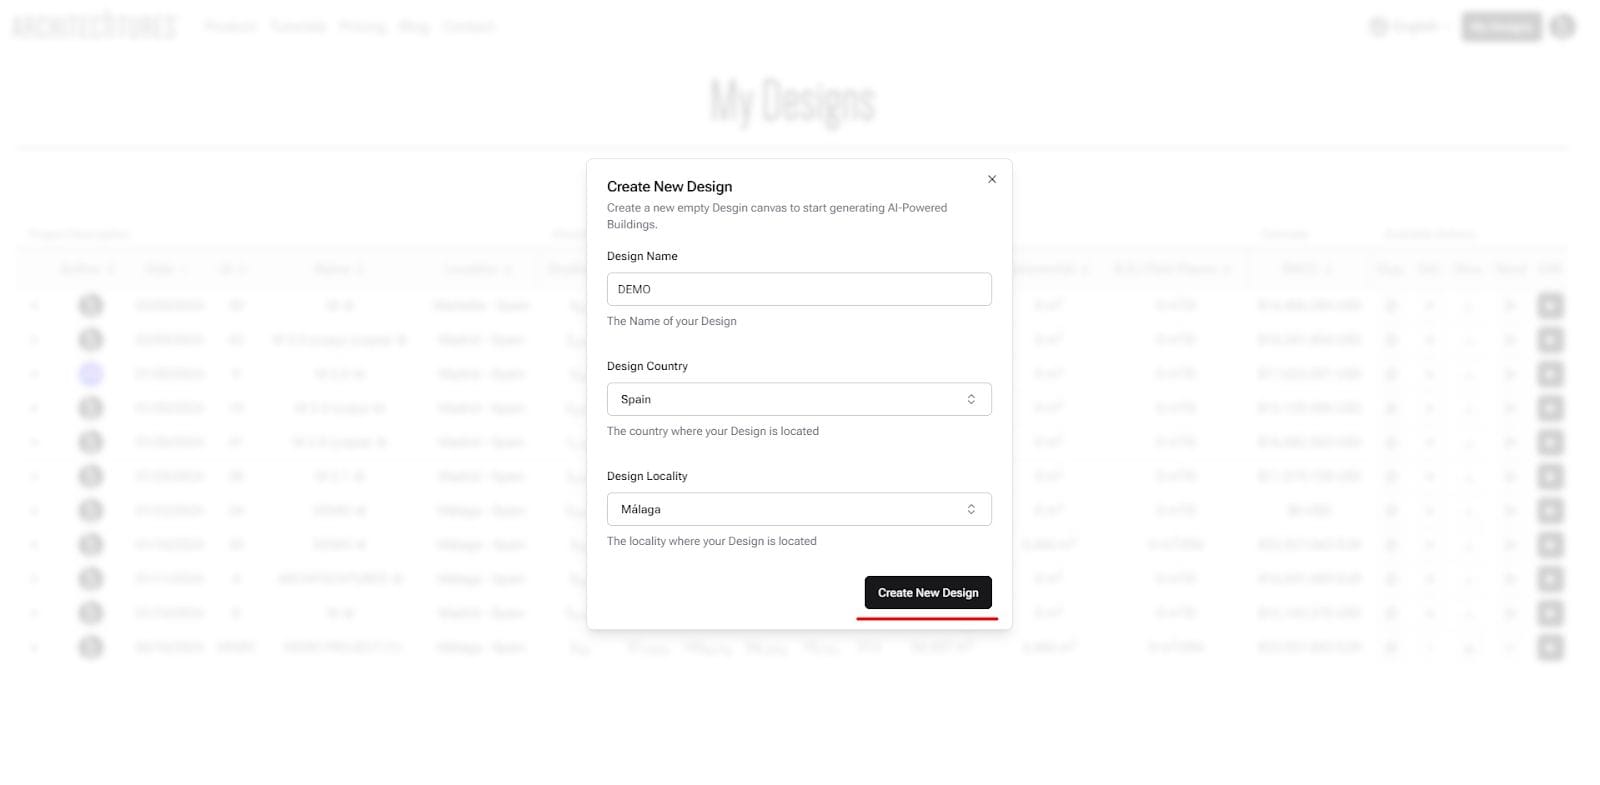
Form to create a new project in ARCHITEChTURESWe will perform a complete, step-by-step example to serve as a guide applied to a specific case:
Creating a first project using a CAD template.
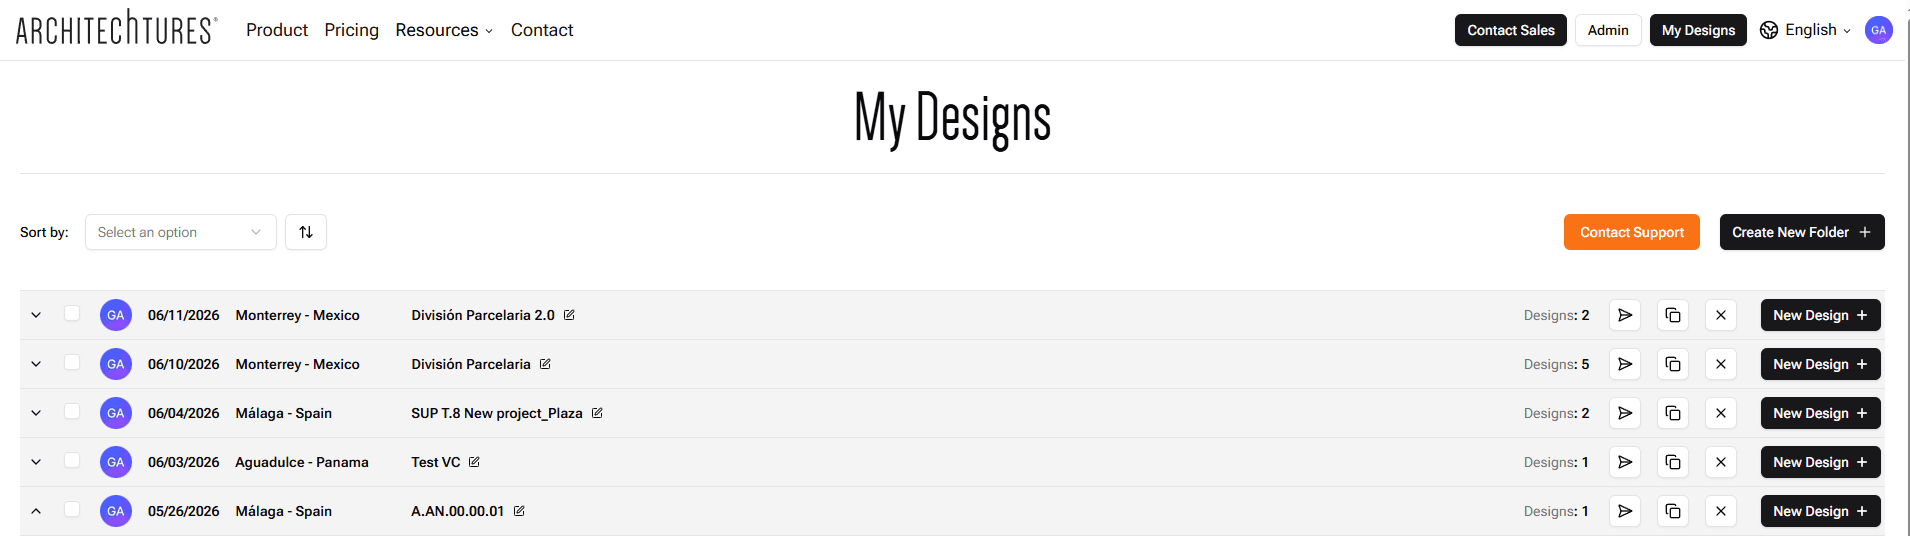
We will start by creating a new project from the "My Design" dashboard by clicking on the black "Create New Design" button.

A first pop-up will be enabled where we must indicate a name and location of the design. In this case we will name the project "DEMO" and we will locate it in the city of Malaga, Spain.
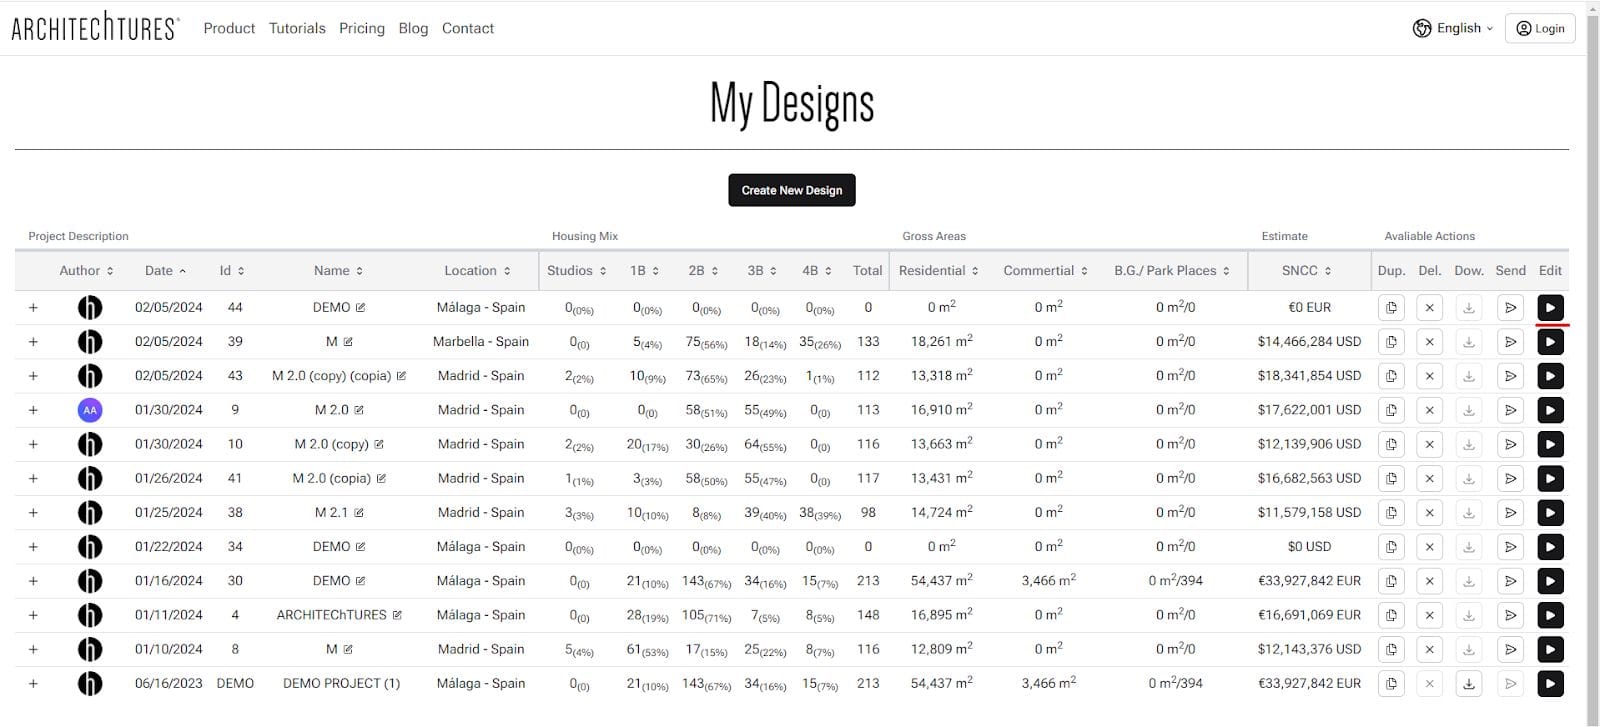
Automatically, the project will appear at the top of the panel. To access it, click on the black button that links to the editor.
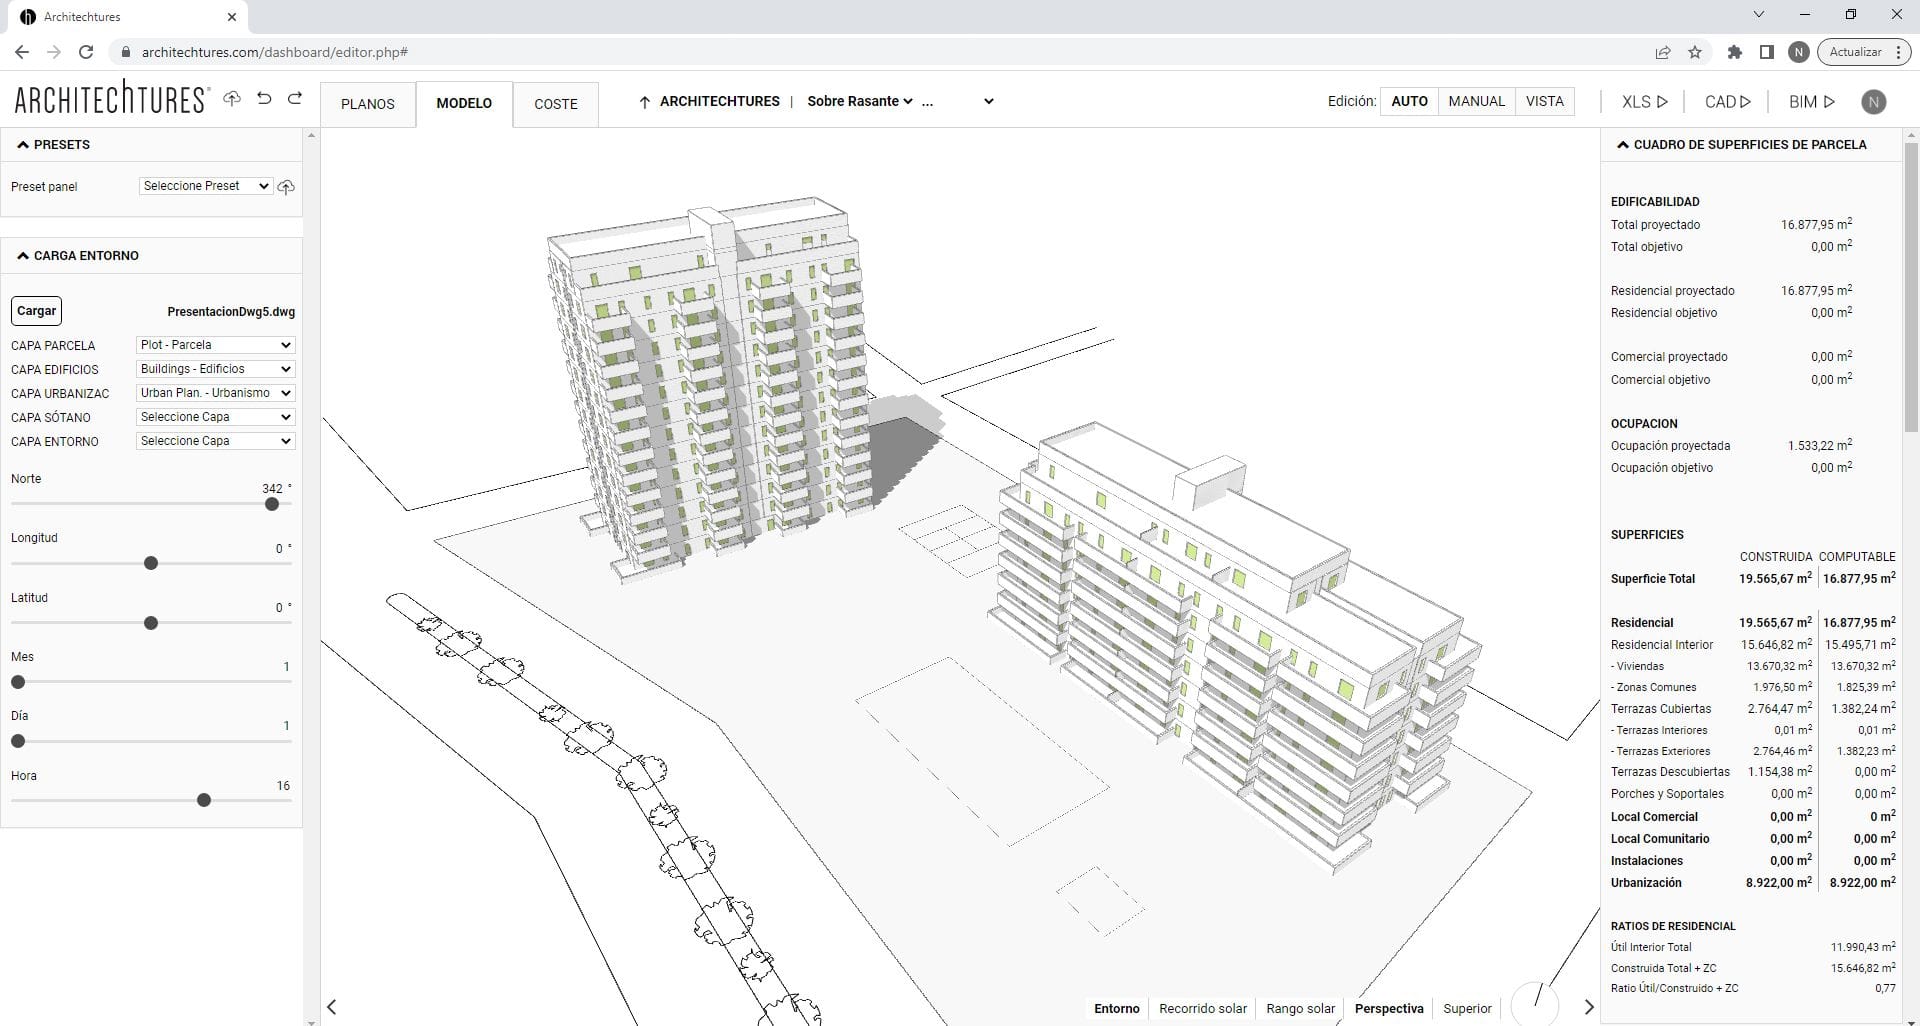
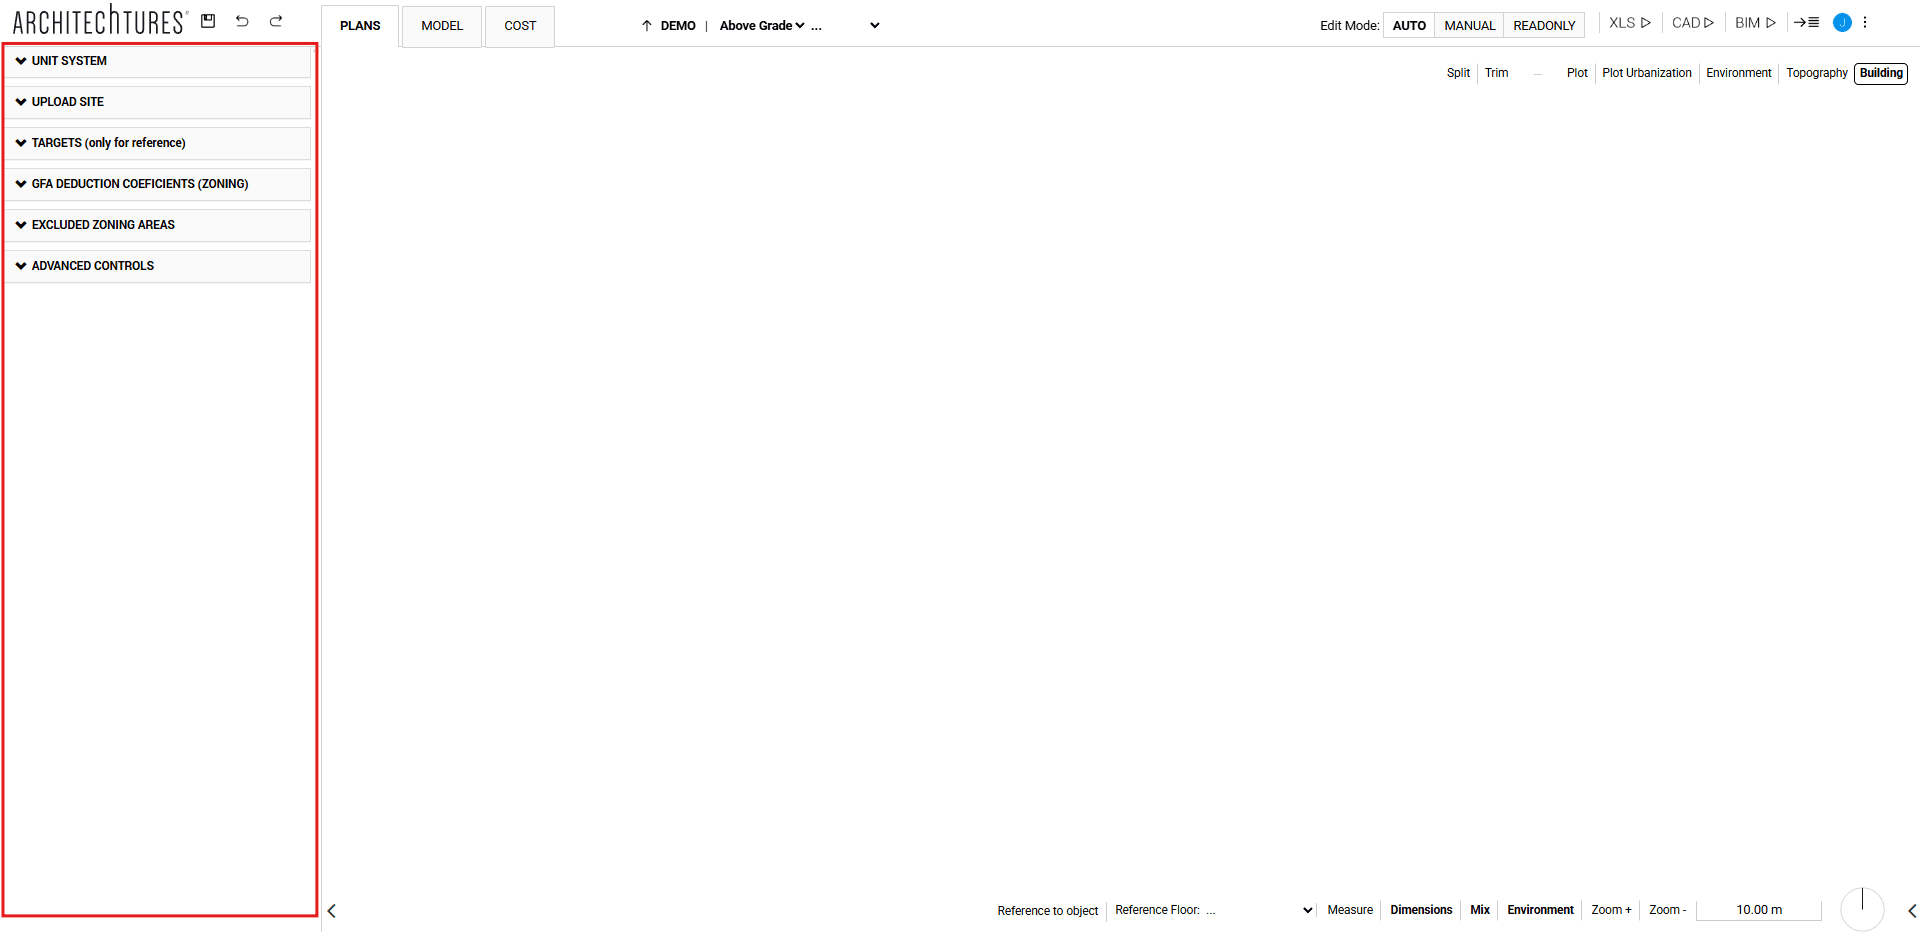
Once in the editor, let's start by preparing the project environment, focusing mainly on the input panel.
Upload site
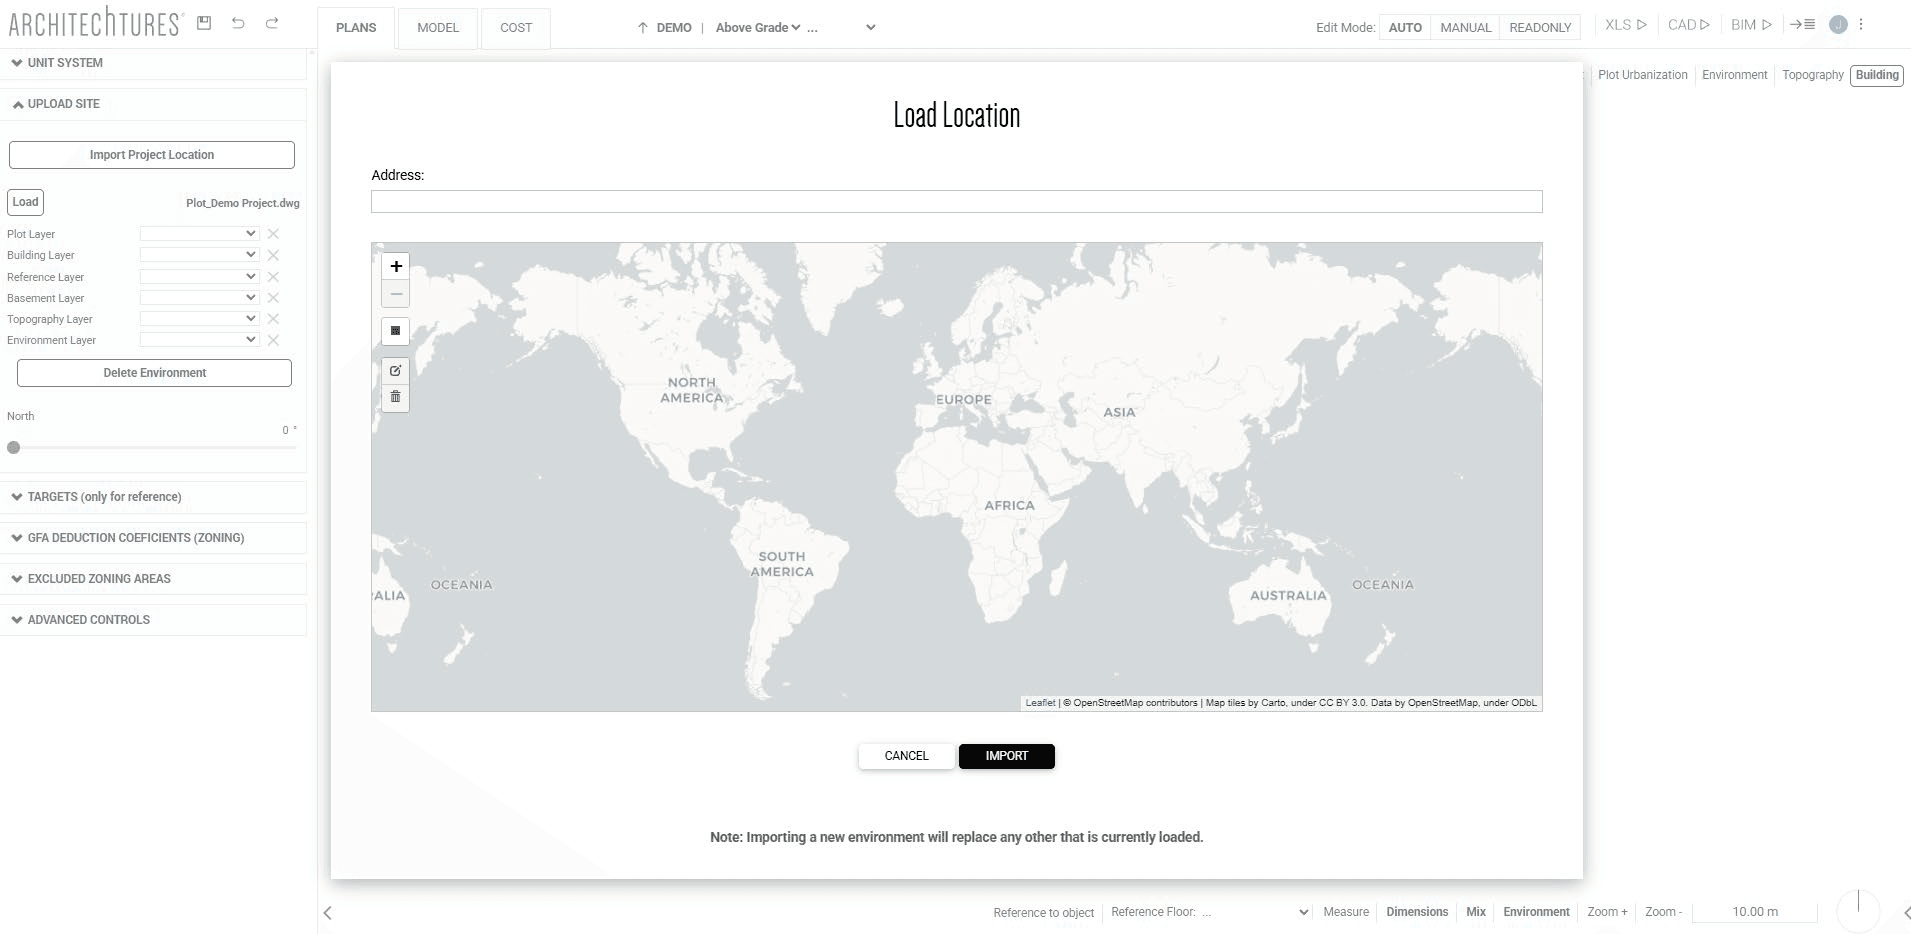
Currently, there are two ways to add an environment to your project: by importing a location from OpenStreetMap or by uploading a CAD file. In either case, keep in mind that importing a new environment will replace any previously loaded one.
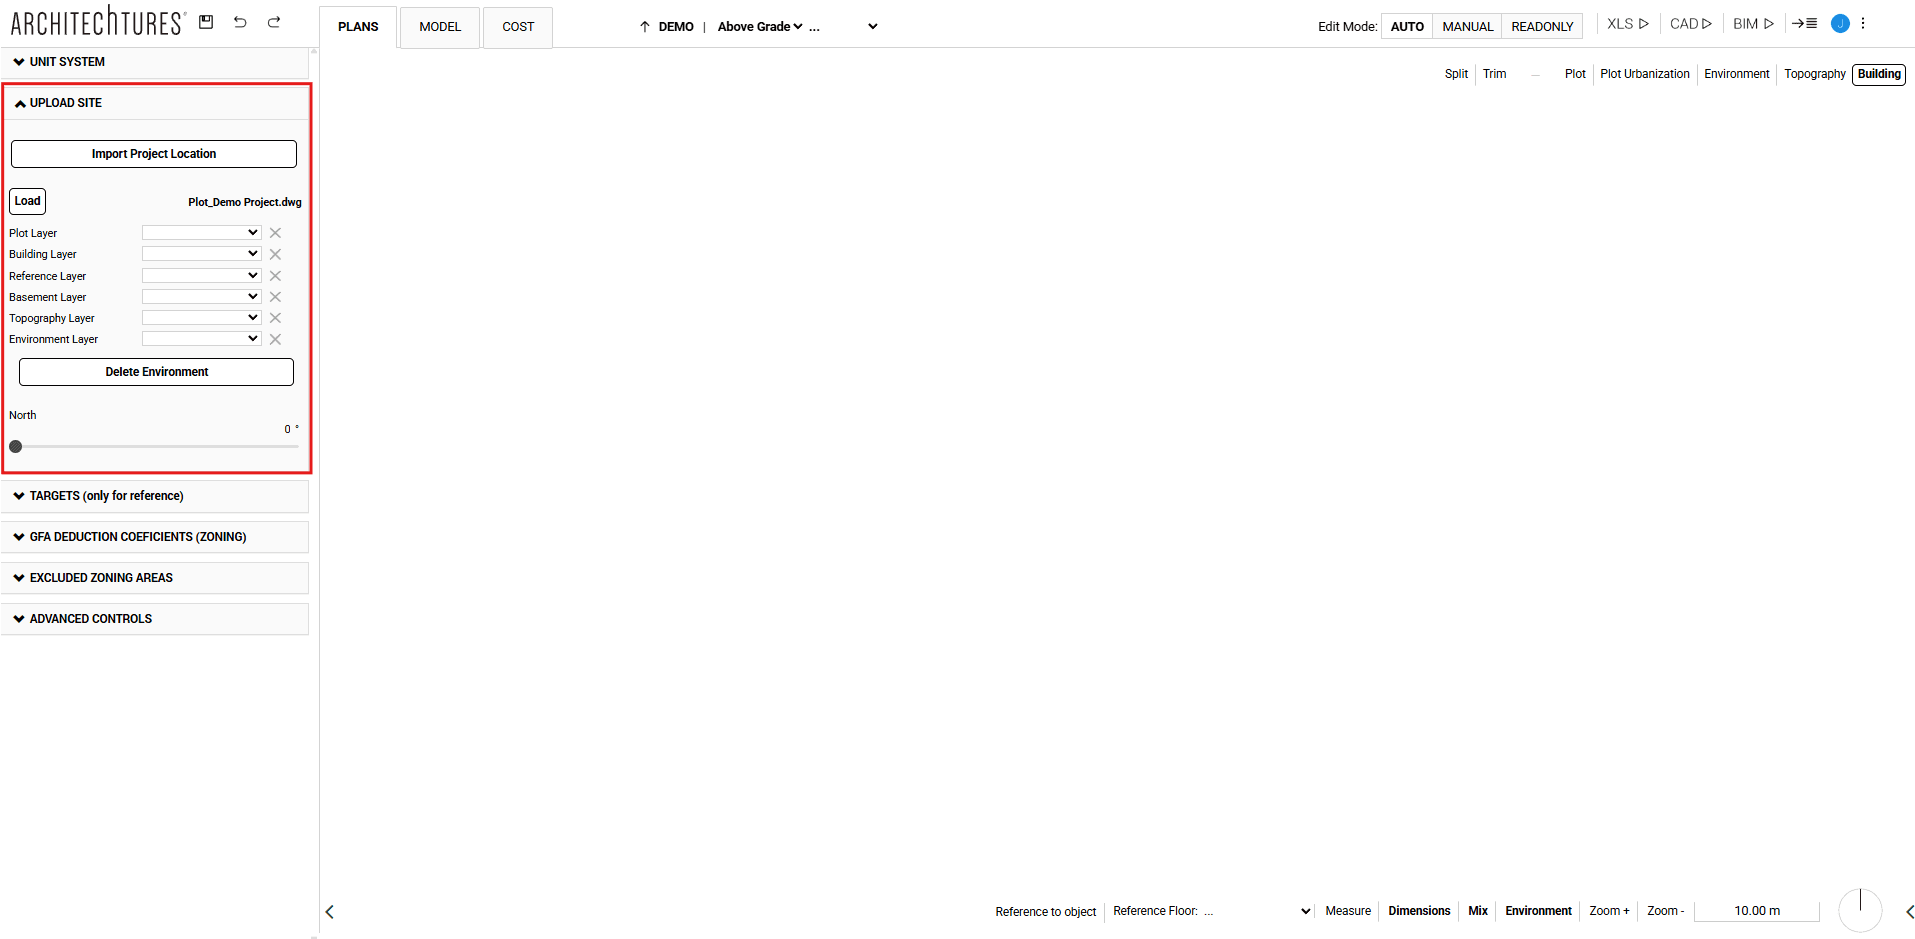
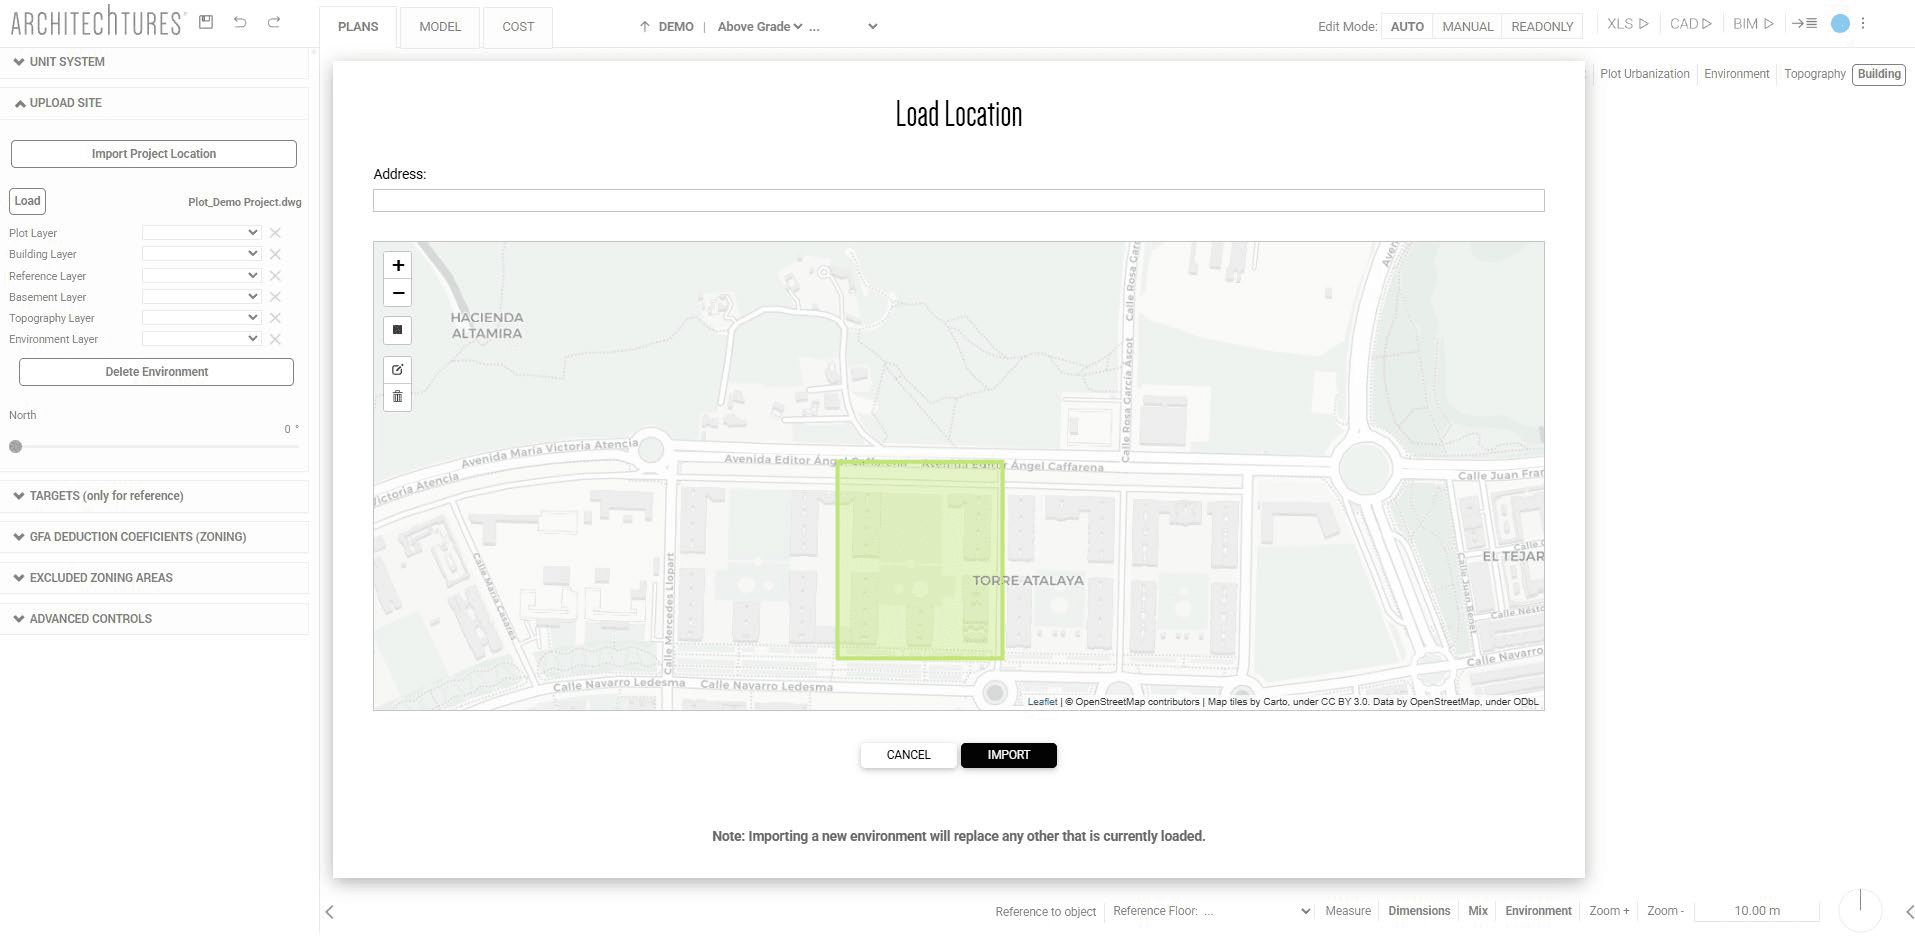
Clicking the “Import Project Location” button will open a pop-up window with a navigable map, allowing you to select a specific area to import.
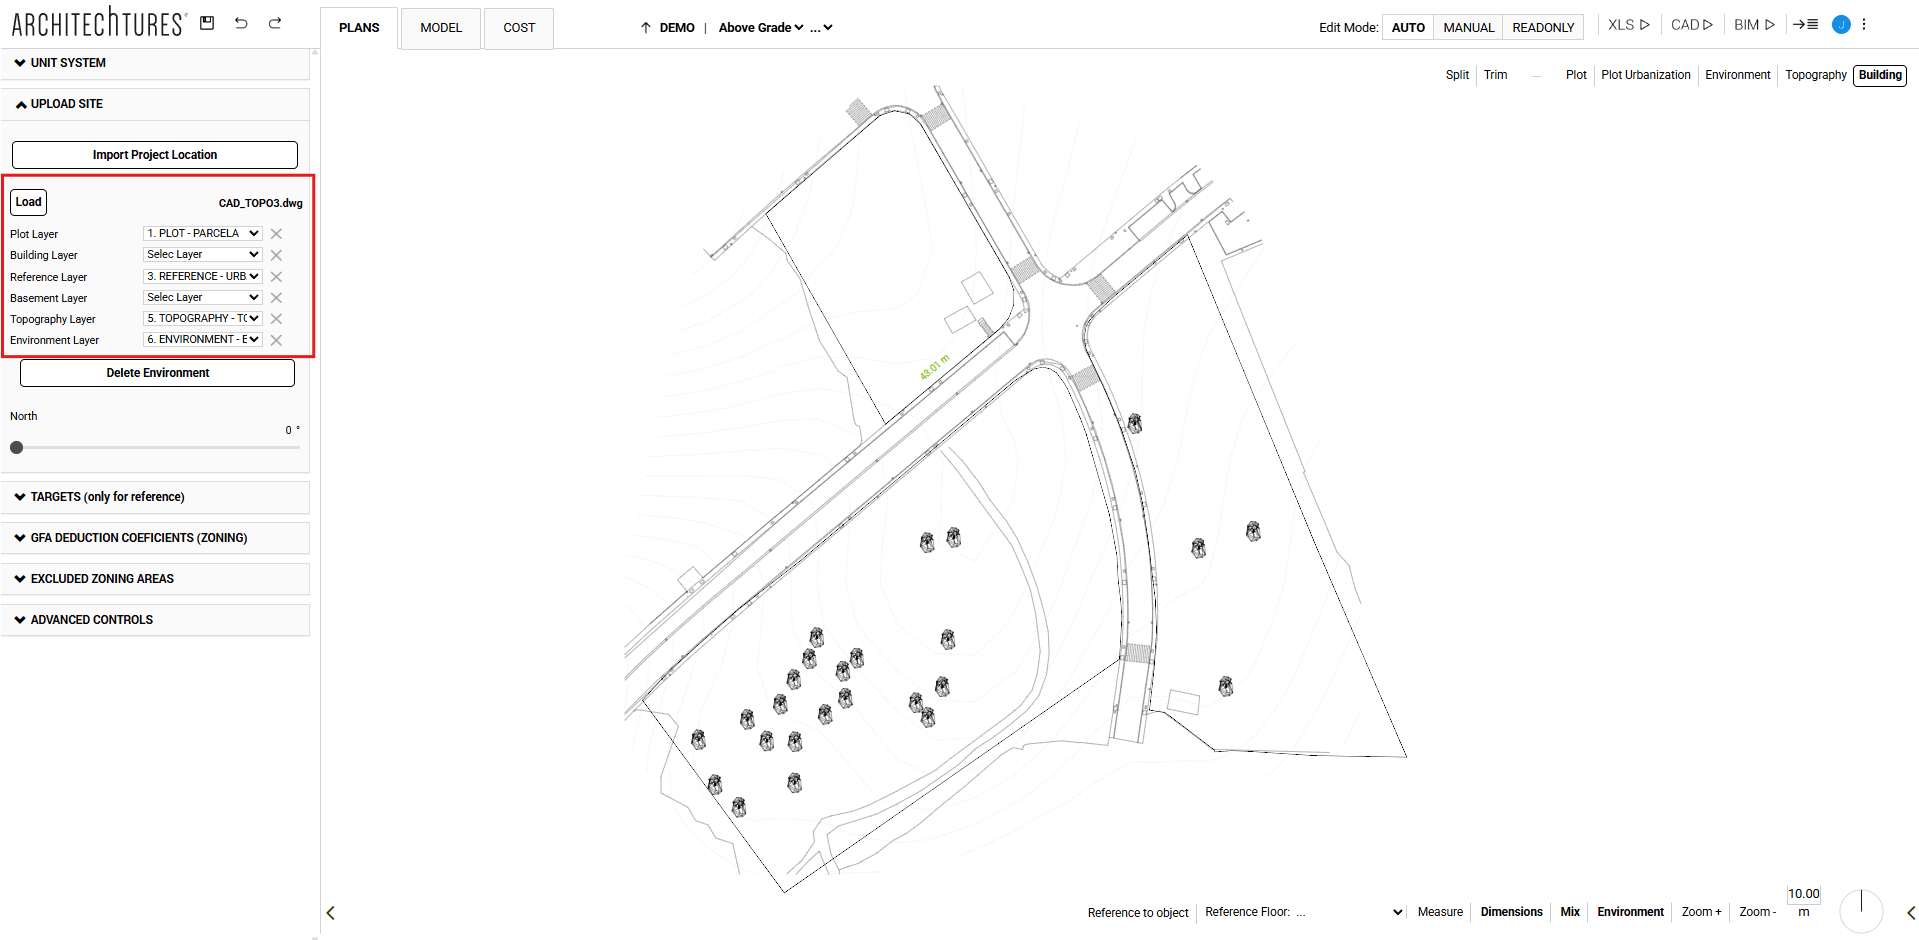
Alternatively, you can upload a CAD file (.DXF or .DWG). However, make sure the file is correctly scaled (in meters or feet), and that it follows the proper layer structure and includes the desired visuals. The required layers are: plot layer, building layer, reference layer, basement layer, topography layer, and environment layer.
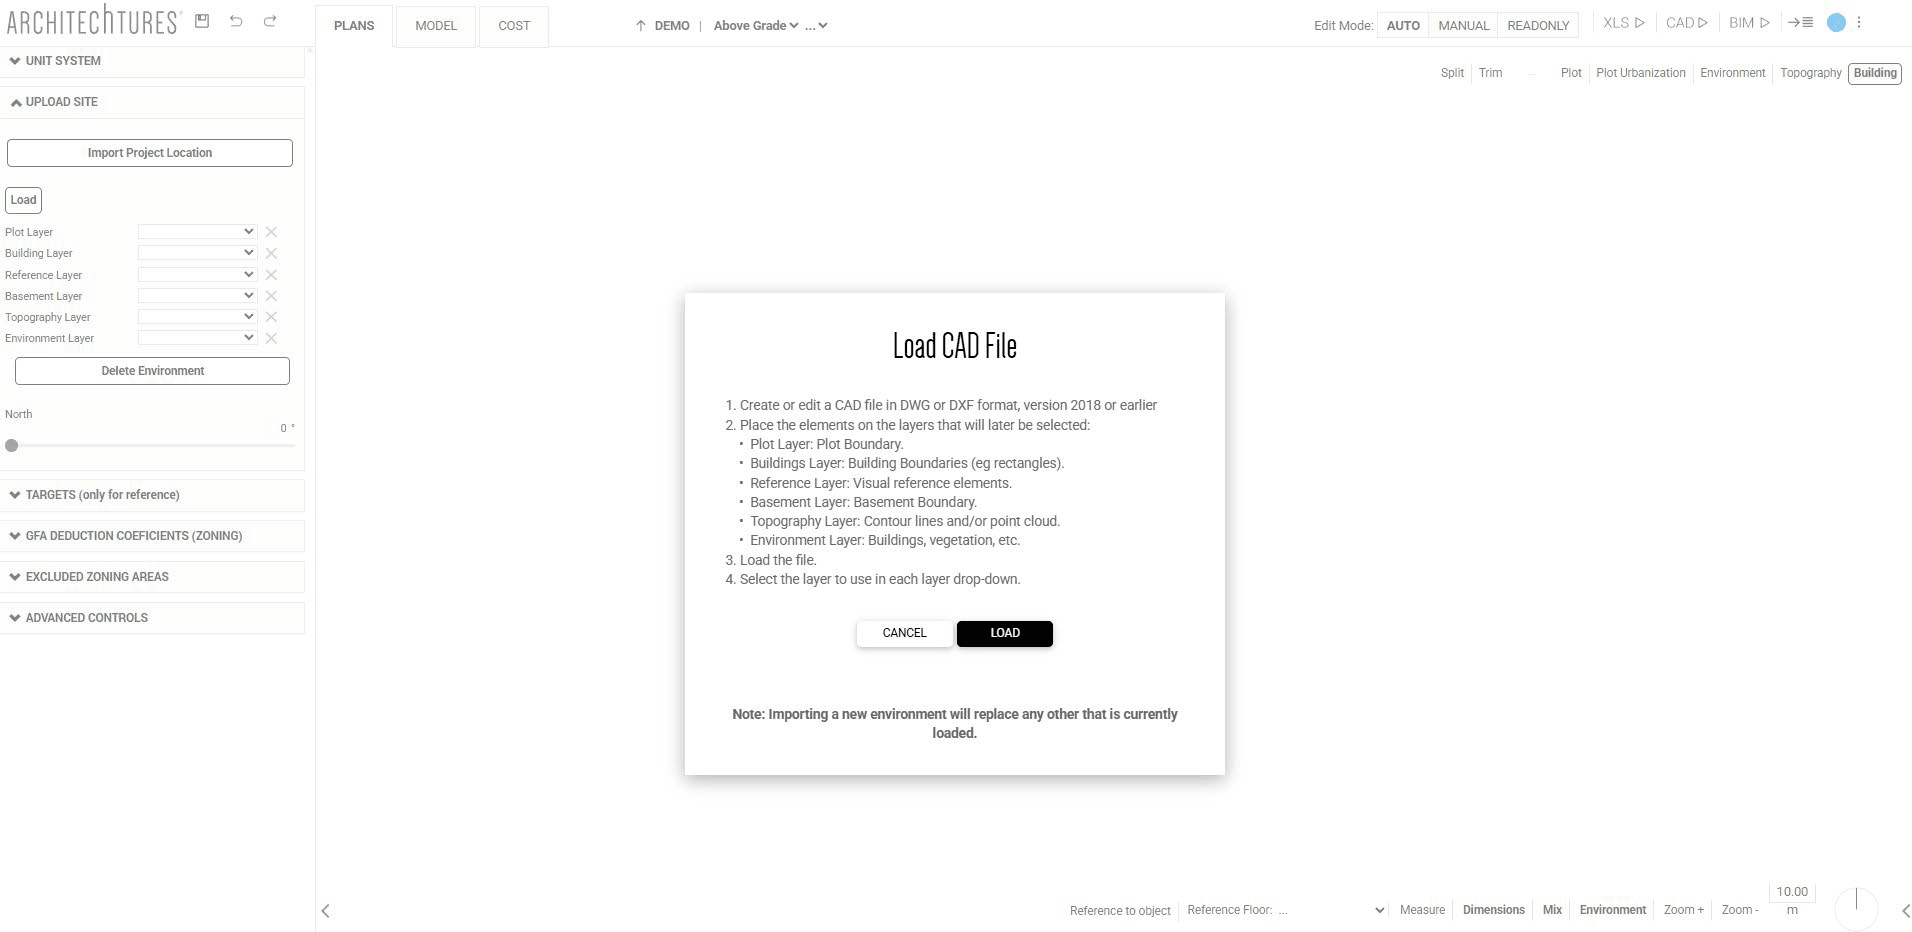
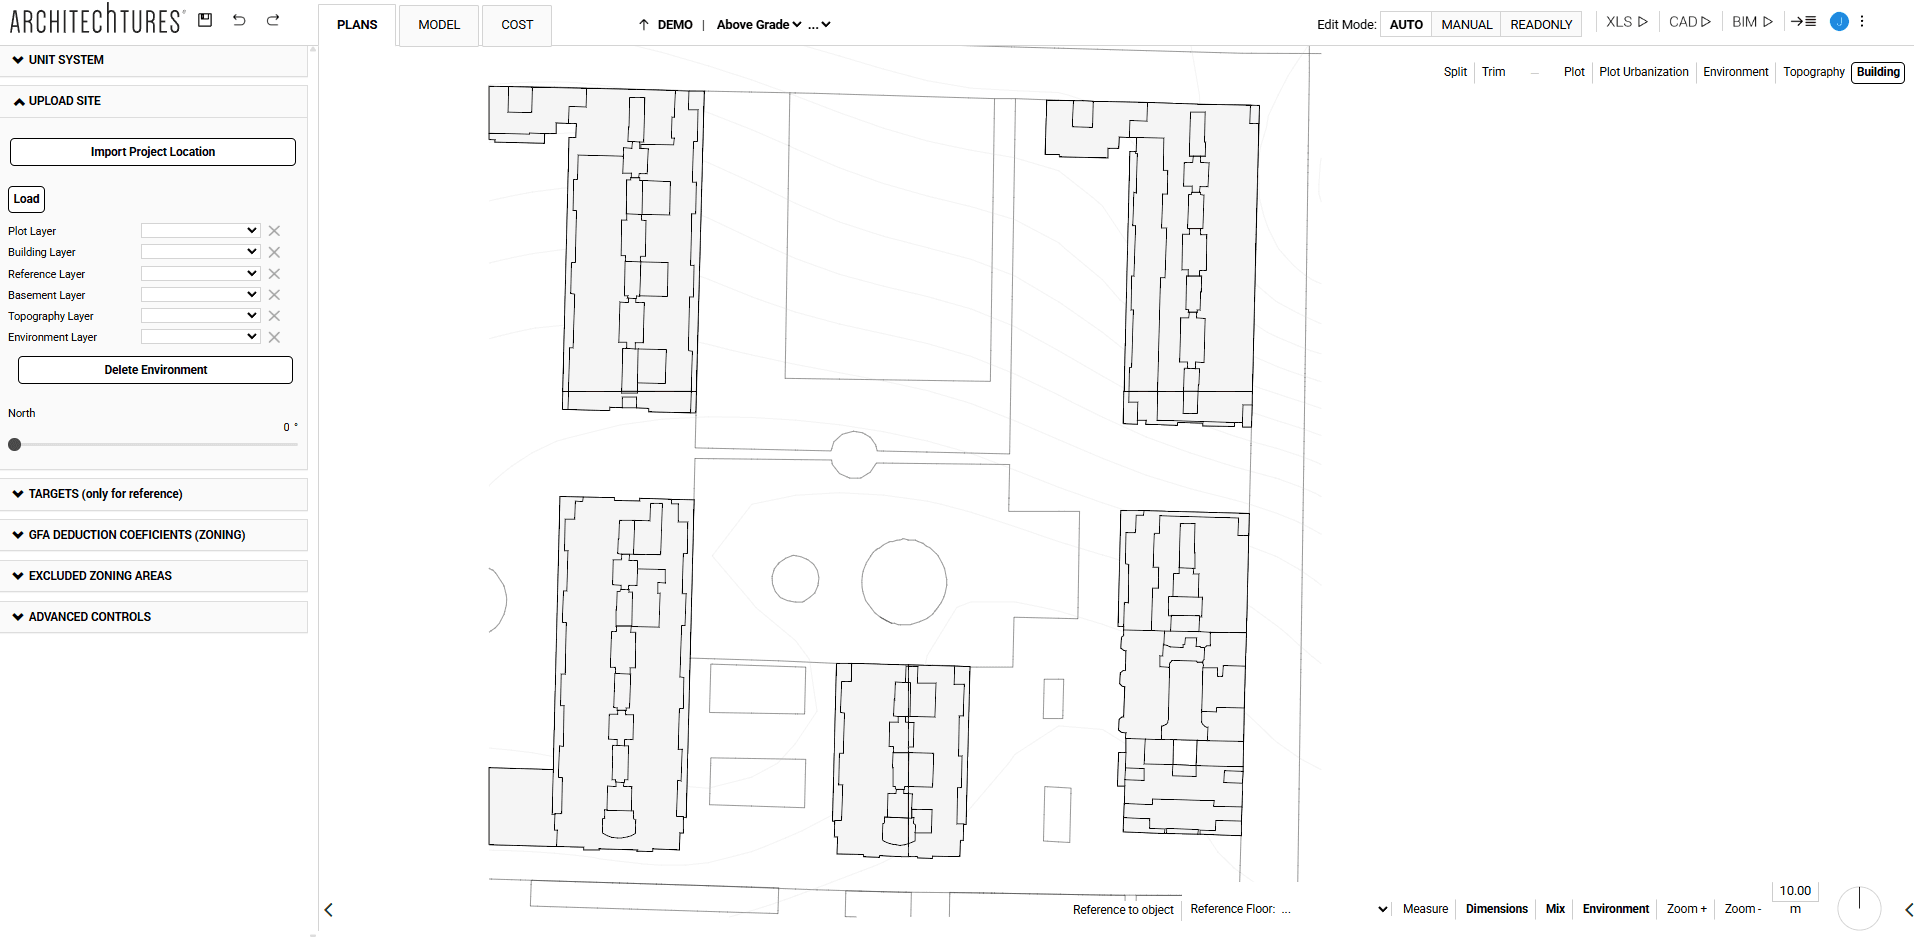
When clicking the “Load” button, a pop-up window will appear with instructions. Click the black “Load” button within the pop-up and select the file you wish to import from your computer. Once successfully imported, select the appropriate layer from the dropdown menu. The selected layer will then automatically appear in the central window.
Targets
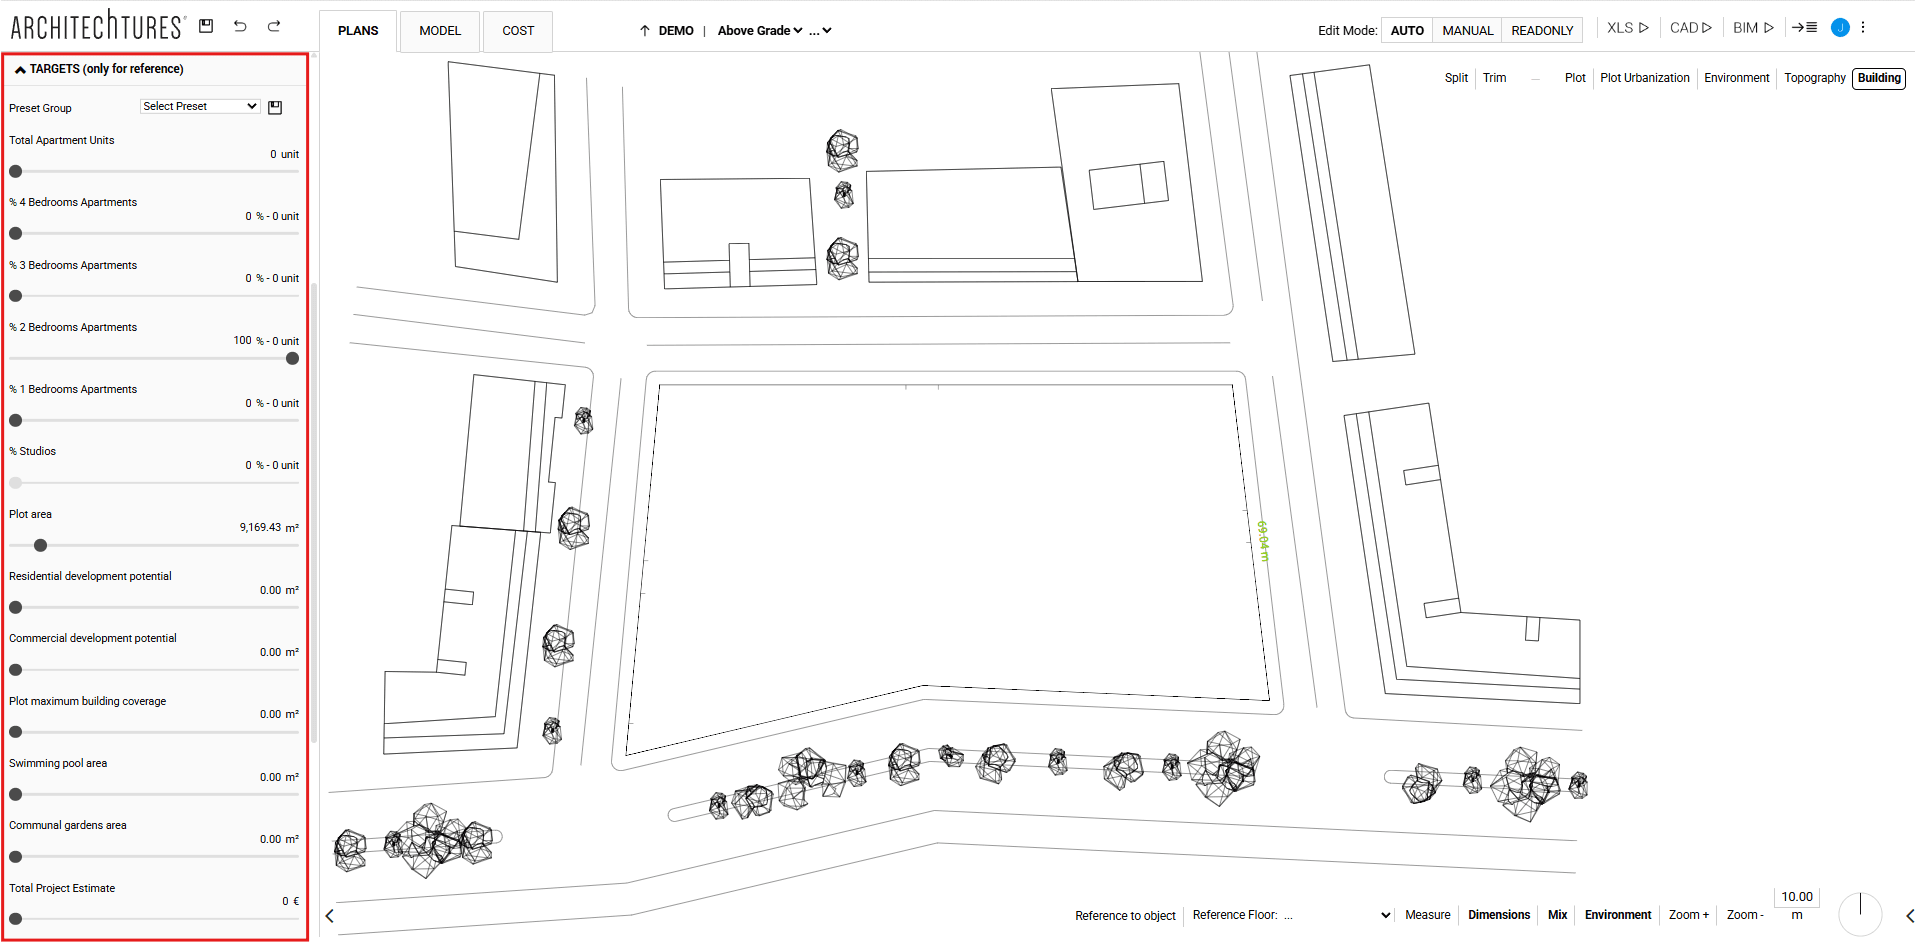
In this section we will define the reference data for our project by specifying the following metrics: Total apartament units, %4 Bedrooms apartaments, %3 Bedrooms apartaments, %2 Bedrooms apartaments, %1 Bedroom apartaments, % Studios, Plot area, Residential development potential, Commercial development potential, Plot maximum building coverage, Swimming pool area, Communal gardens area, Total project estimate, Total parking spaces and Total storage rooms.
From these data, we will be indicated how far or close our current project is to the marked objectives by means of a color code.
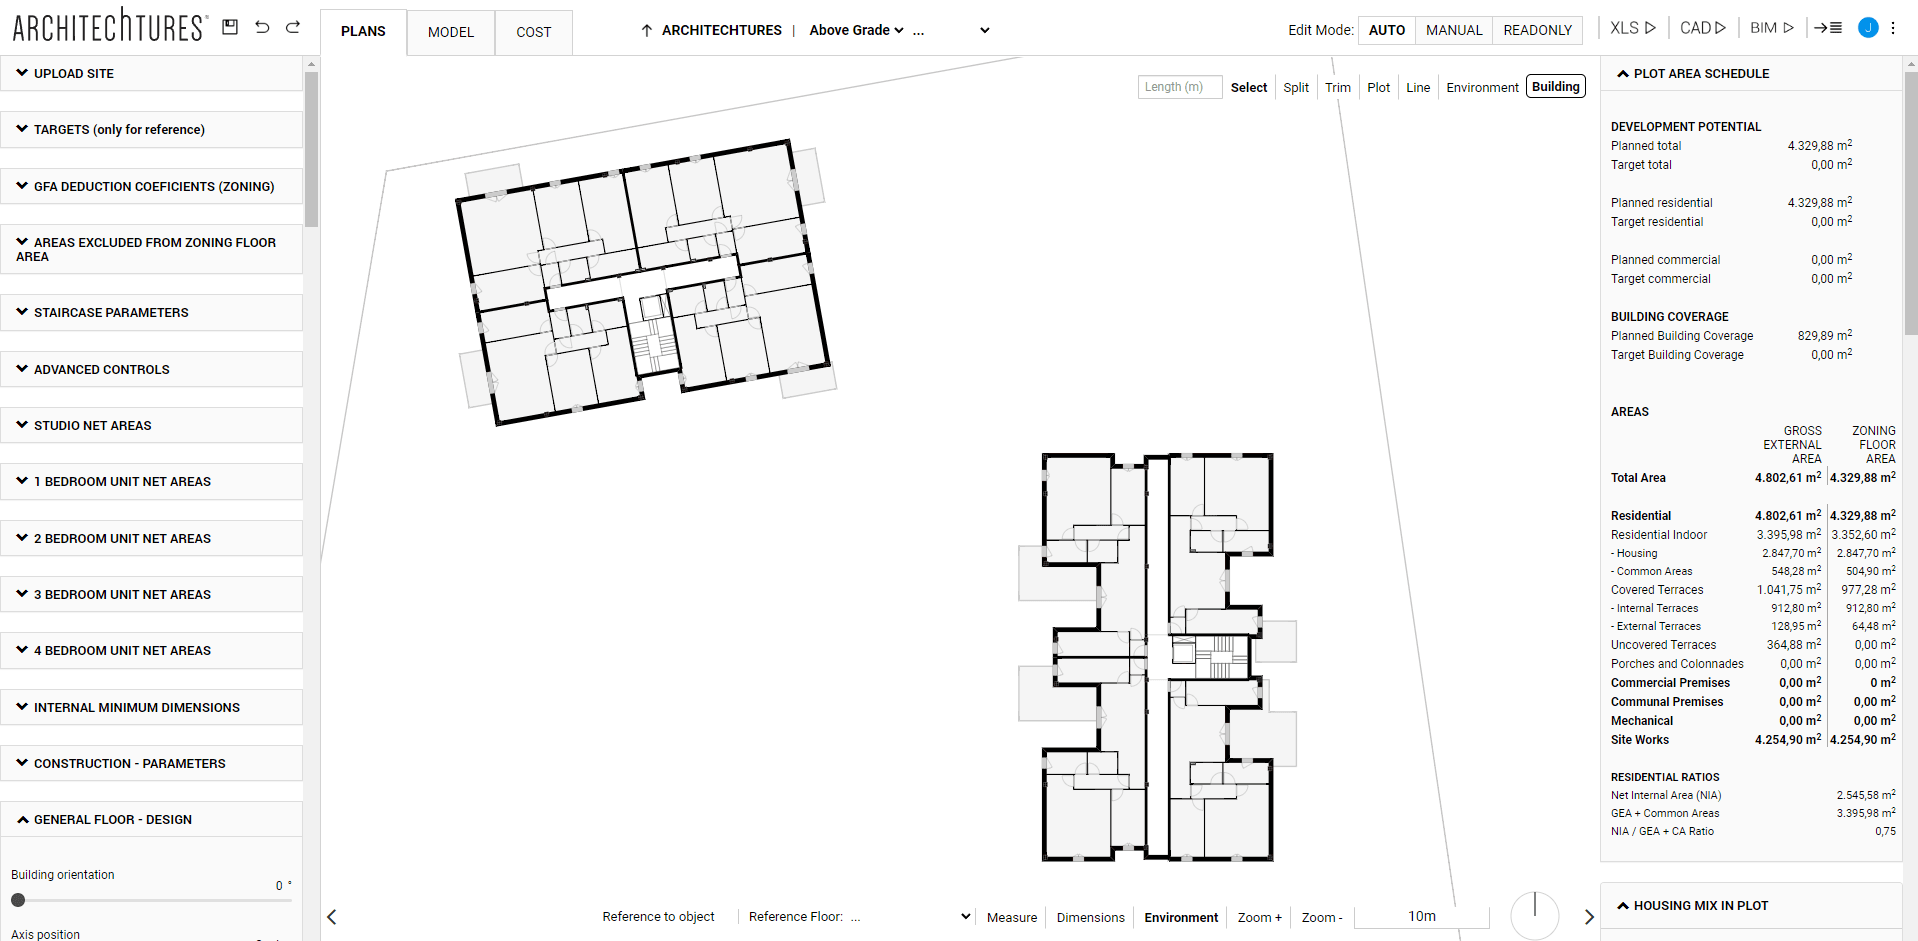
Drawing the first building: plan view
Once we have advanced the configuration we can start inserting the building. This will be done from the plan view, although we can switch to the model view at any time to see the result in 3D.
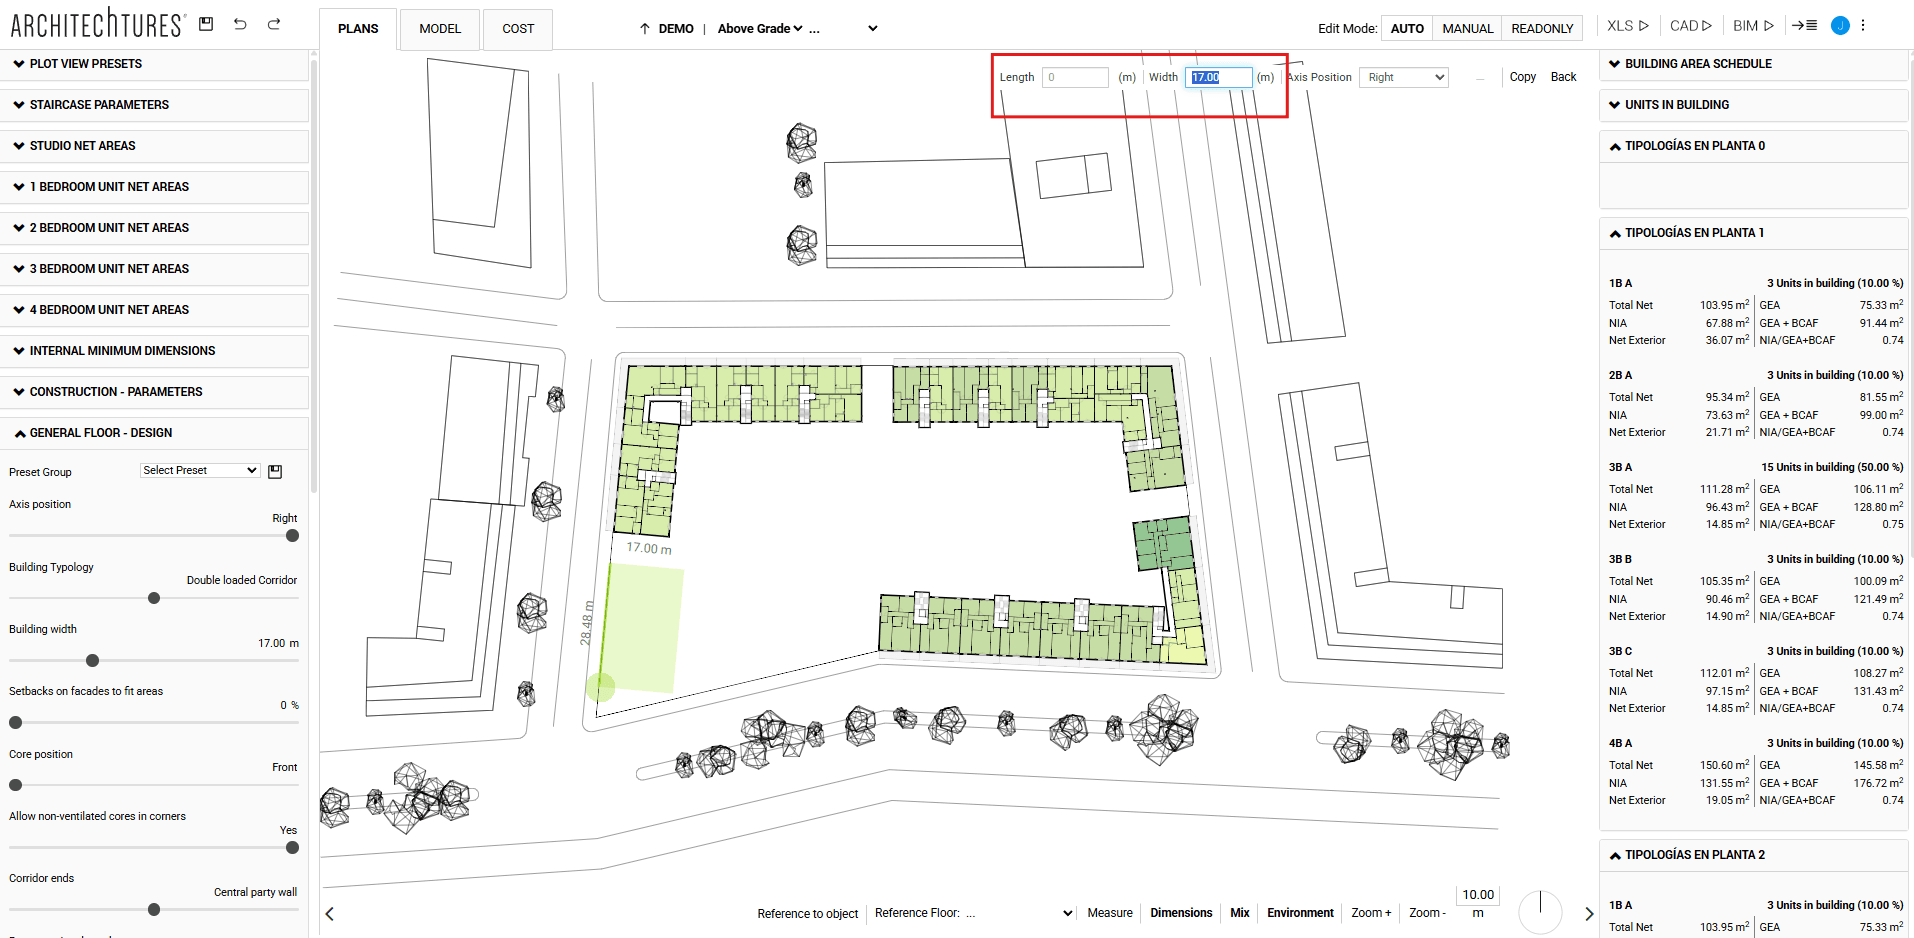
The procedure to generate a building is very simple. First we must click on the "Building" button, located at the right end of the top menu of the central window.
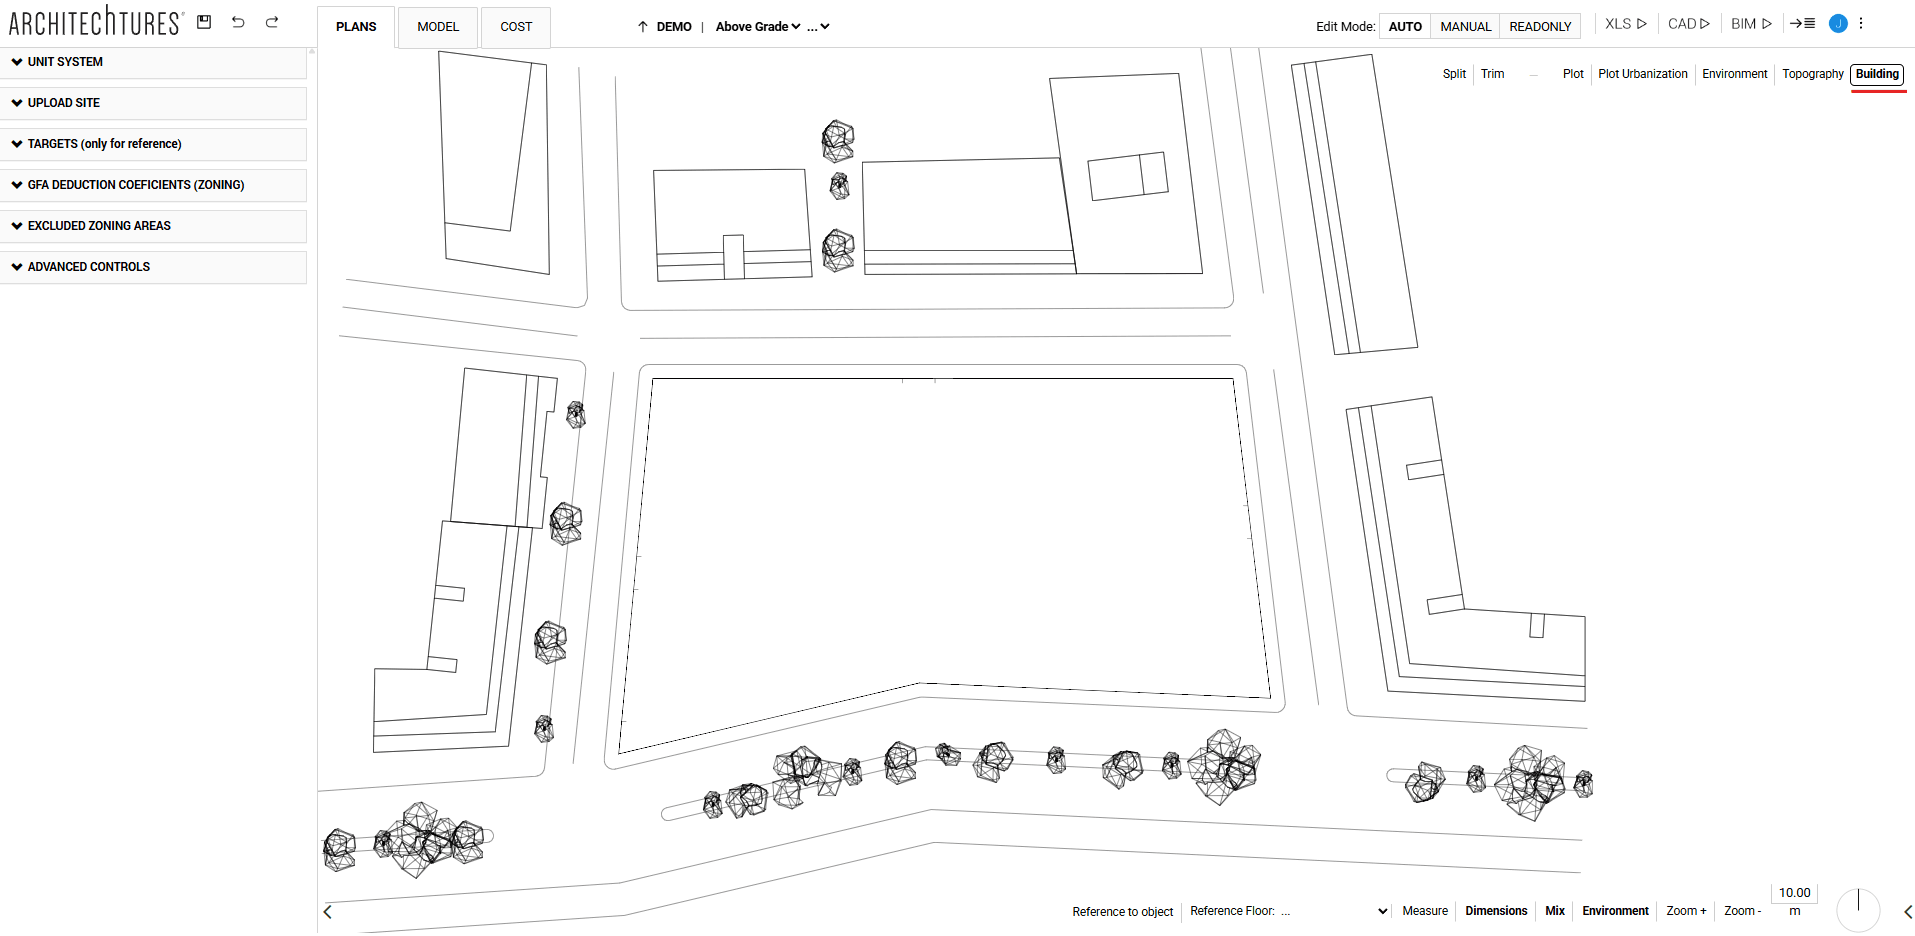
By clicking on it, the menu will change to modify some elementary aspects of the building, such as the width and the position of the axis; this last one is very important, because it will be the element that we draw and from which the building will be generated. The axis position options are: Center, Left and Right.
The Input Panel will also update, showing the tabs that affect the building’s configuration:
Housing program
When defining the housing program we must review and complete several sections of the input panel.
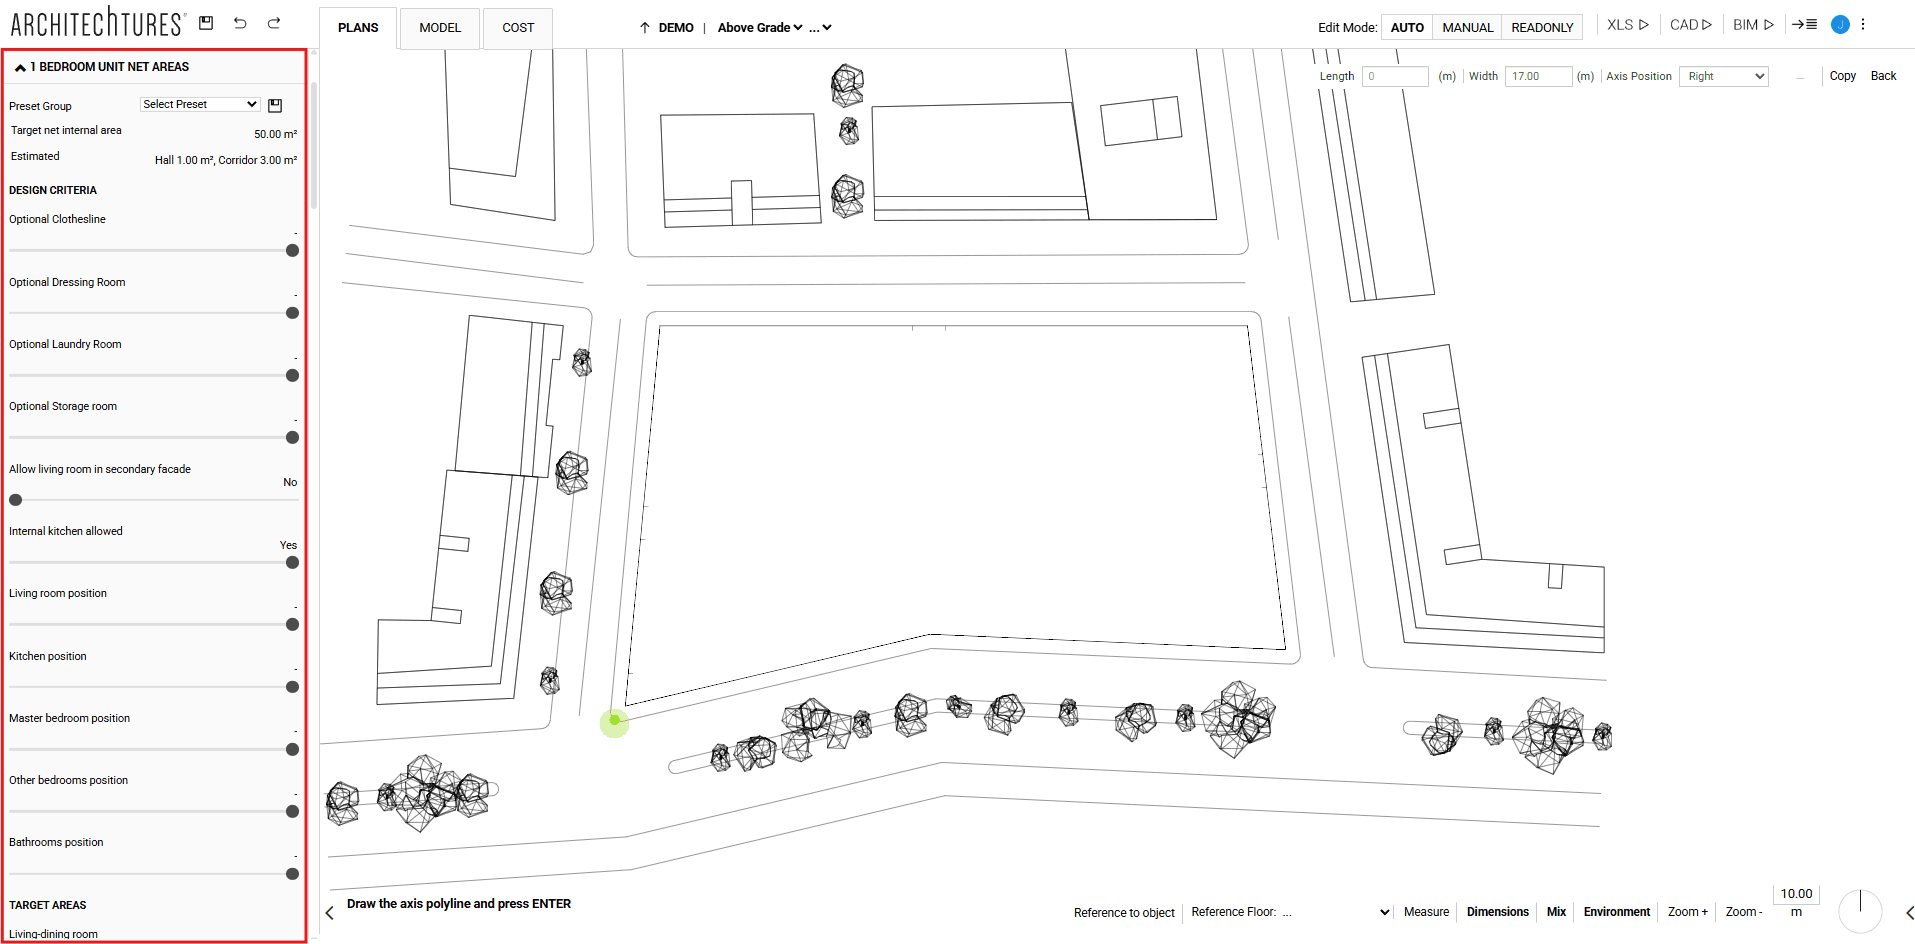
Net areas
We locate a drop-down for each type of housing, from studio to 4-bedroom units; in each of them we can define whether or not we want design options such as optional clothesline, optional dressing rooms, optional laundry room, optional storage room and outdoor clothesline position. As well as defining the target surfaces for each living space.
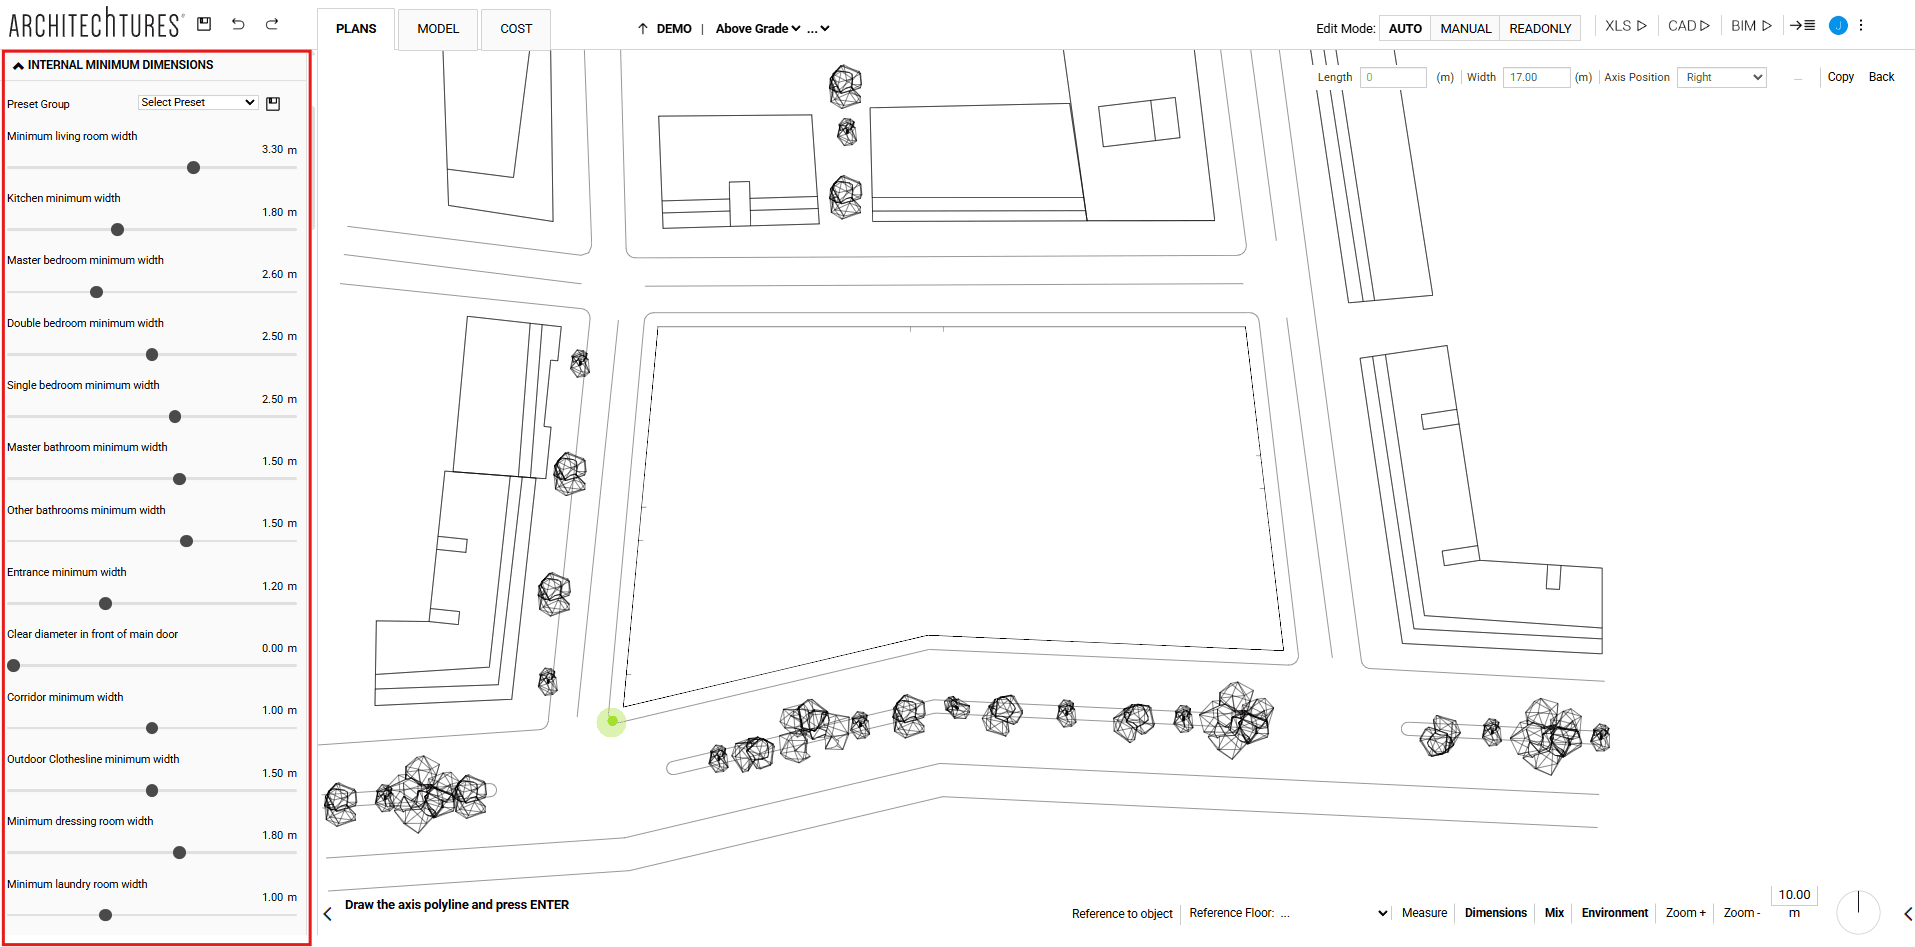
Internal minimum dimensions
This section must be completed according to the applicable regulations and the needs of the project, so it must be specified: minimum living room width, kitchen minimum width, master bedroom minimum width, double bedroom minimum width, single bedroom minimum width, master bathroom minimum width, other bathrooms minimum width, entrance minimum width, clear diameter in front of main door, corridor minimum width, laundrys minimum width, minimum dressing room width, minimum laundry room width, storage room minimum width, bedroom access minimum width, terraces access minimum width, solarium´s access minimum width and solarium strip minimum width.
In addition, private stair design options may also be defined in this section indicating: tread length, stair run minimum width, stairwell empty gap minimum width, stair slab minimum thickness, number of risers, number of compensated risers in corners and minimum height clearance.
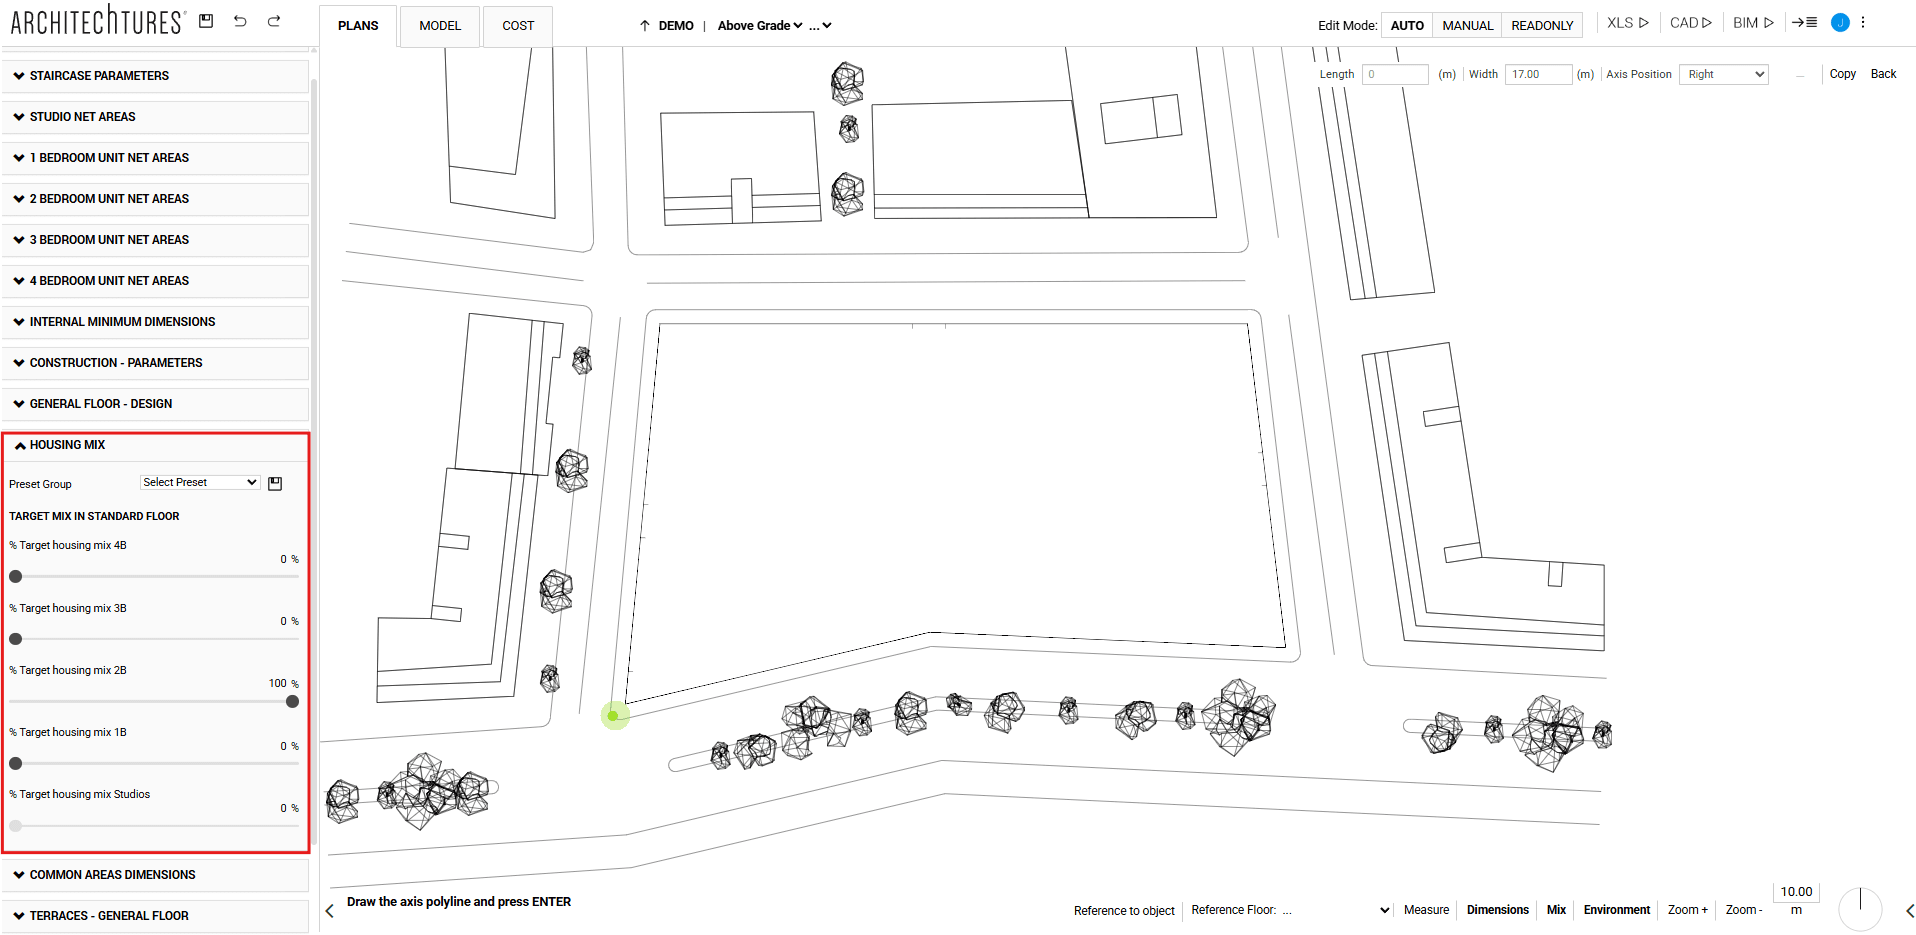
Target program in standard floor
Finally, we must indicate what percentage of each type of housing we would like to be generated in the standard floors. This data will be very useful for the AI when it comes to the layout of the dwellings, but it is not limited to it, it is an indicative value.
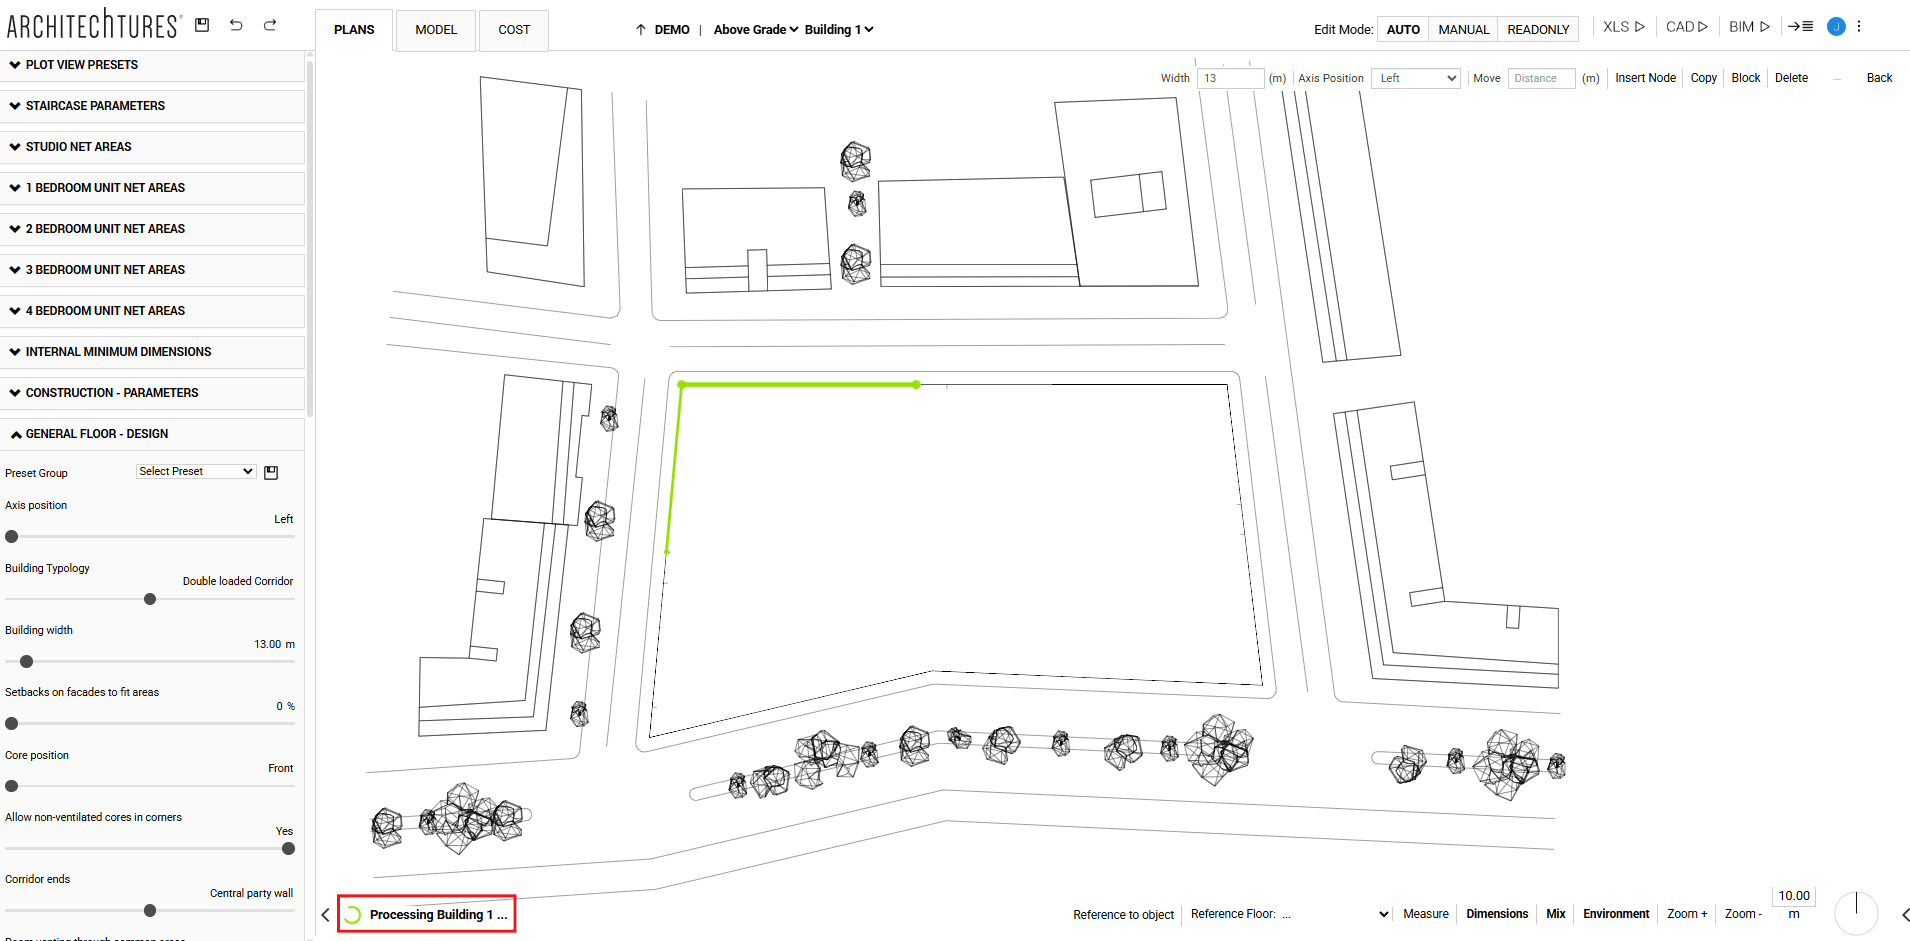
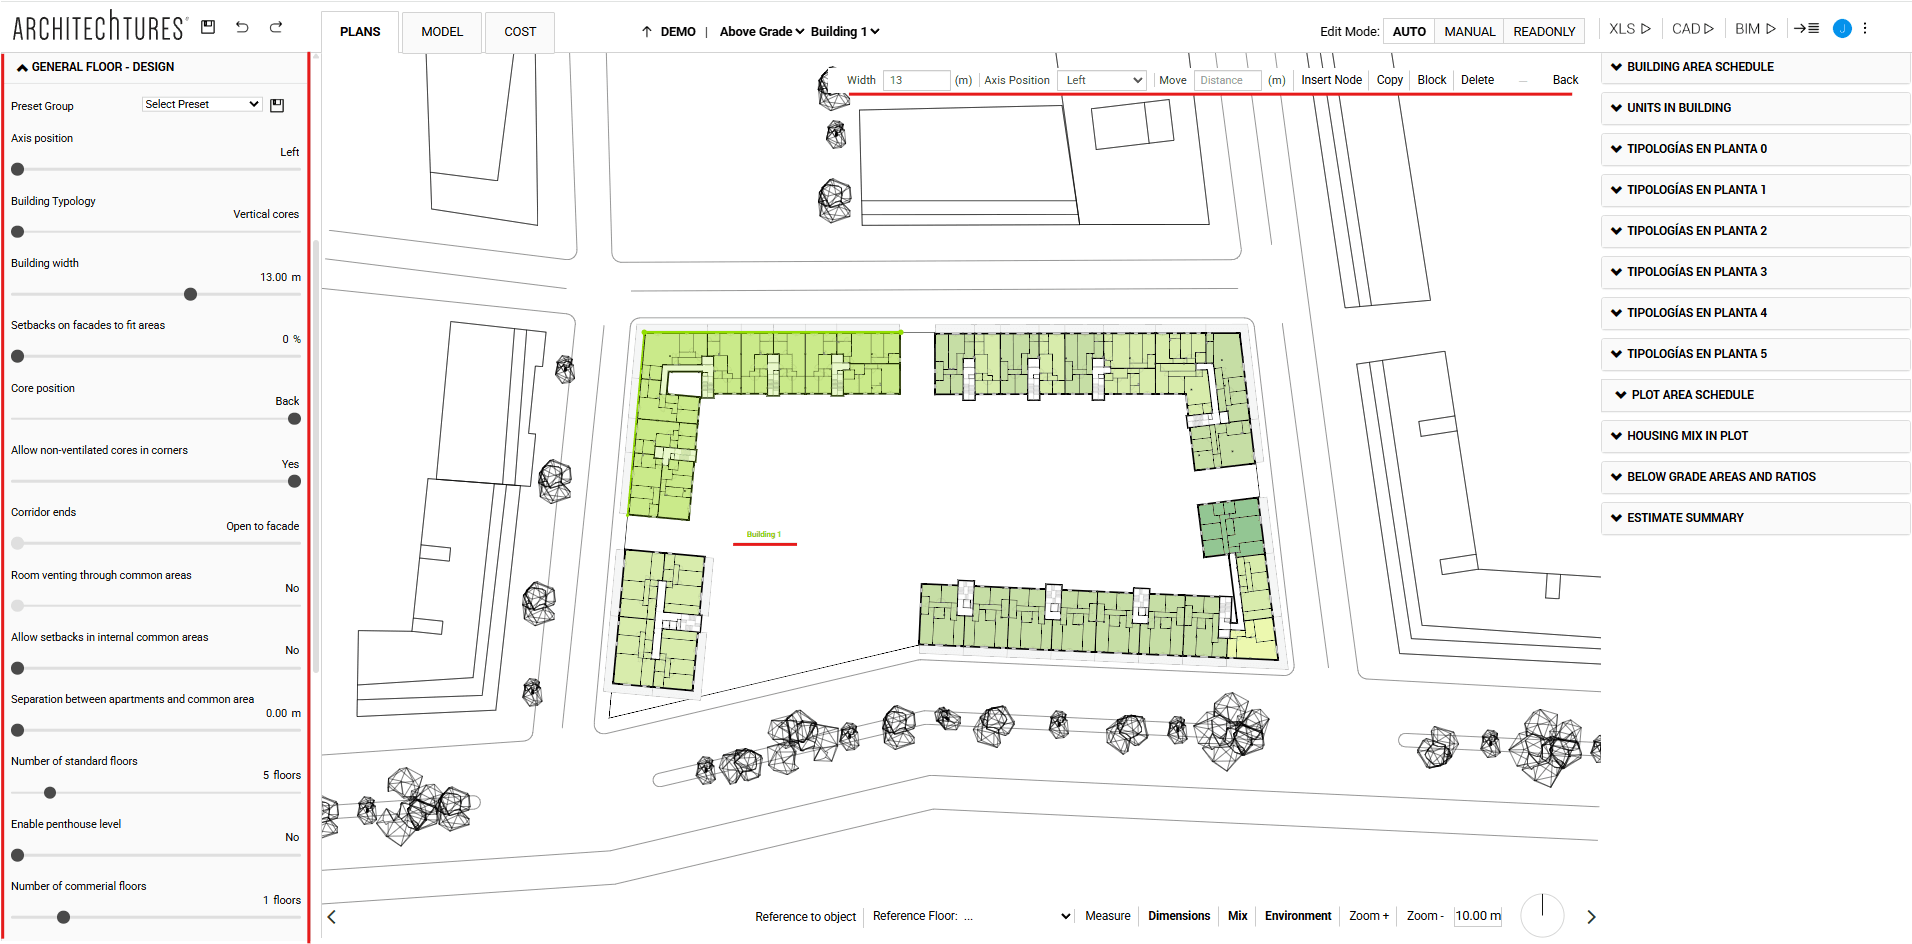
Once the user has modified the characteristics as desired, they can proceed directly to insert the building. In this case, we will keep the left axis position and a building width of 13 meters. Using the left mouse click, we will place the desired points to define the building footprint, and then press “ENTER” on the keyboard.

The building footprint will be displayed from the first click, and in a few seconds, the time it takes the tool to process, we will have the building defined.
We can insert as many buildings as we wish, and even modify aspects from one building to another. To insert a building with a different width, it would be enough to modify the corresponding field in the menu before marking the first point of the axis. Also, once a first point has been inserted, we can indicate an exact distance for the axis by typing it on the keyboard.
In a matter of minutes we can have a project composed of several buildings with different characteristics, which we can continue editing and defining.
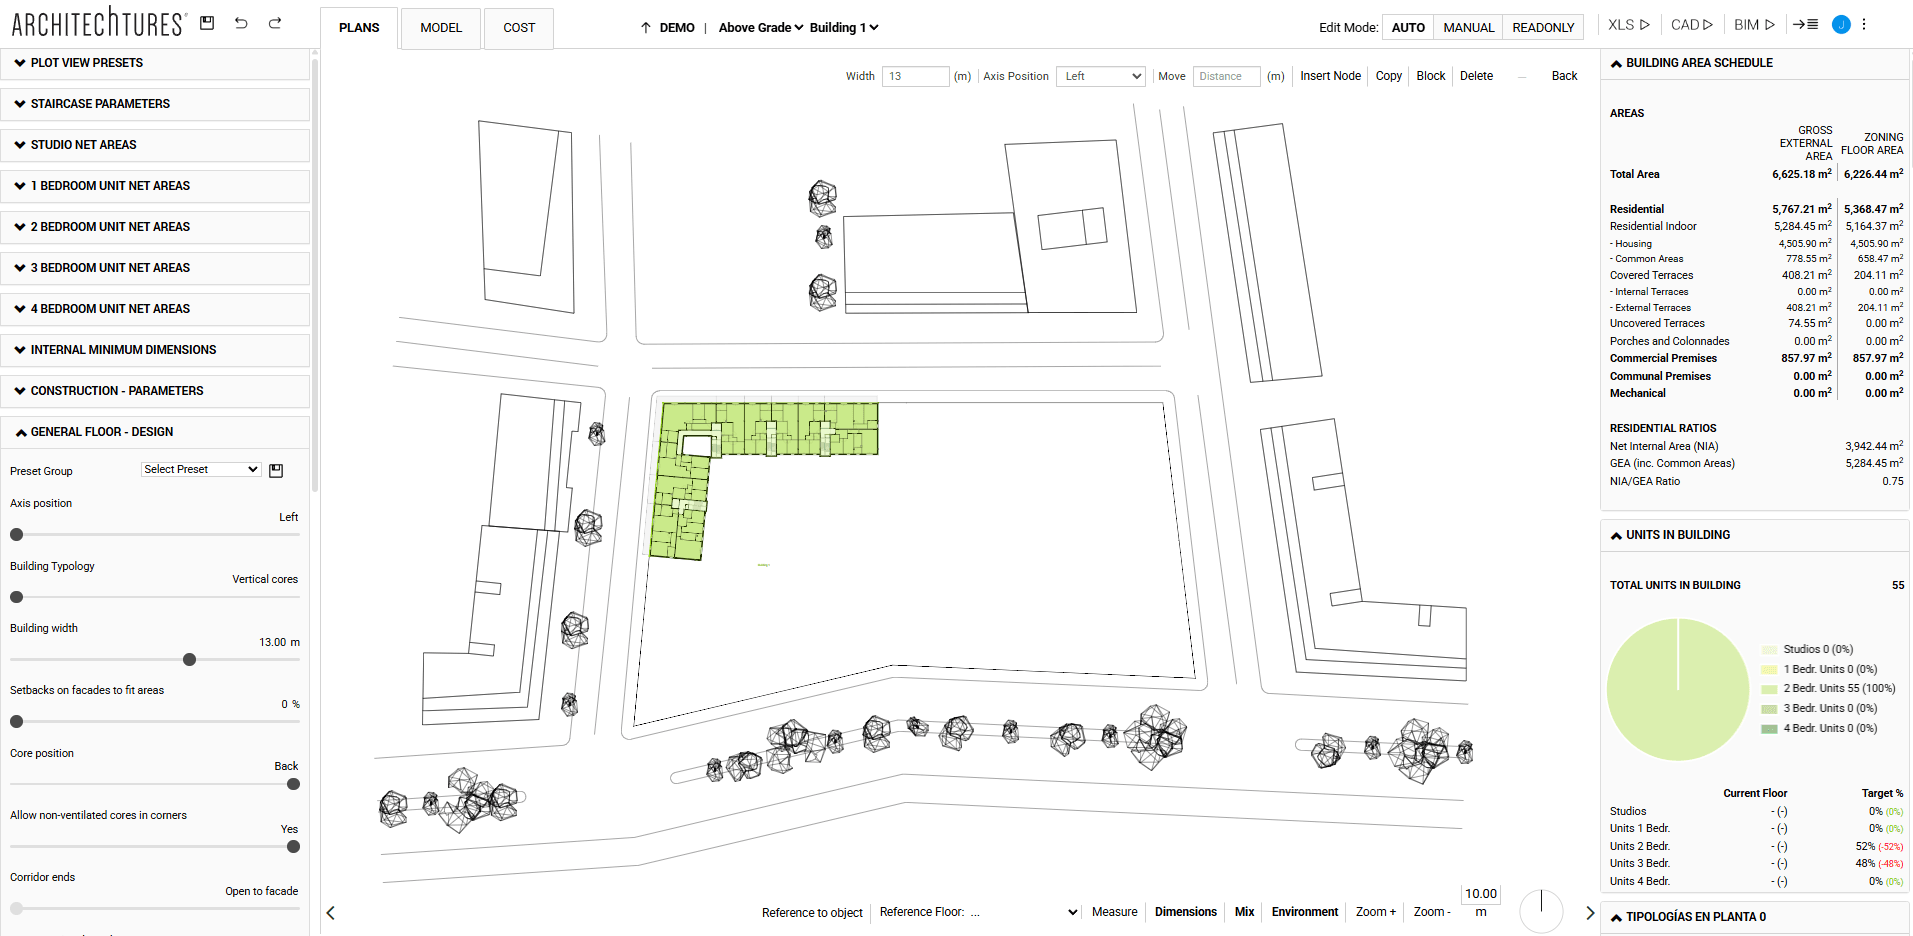
On the other hand, we can analyze the project from the "Data Panel", on the right side of the central sale. This will show some data or others depending on the level at which we are in the breadcrumb. They will also be updated simultaneously when we make any change in the building.
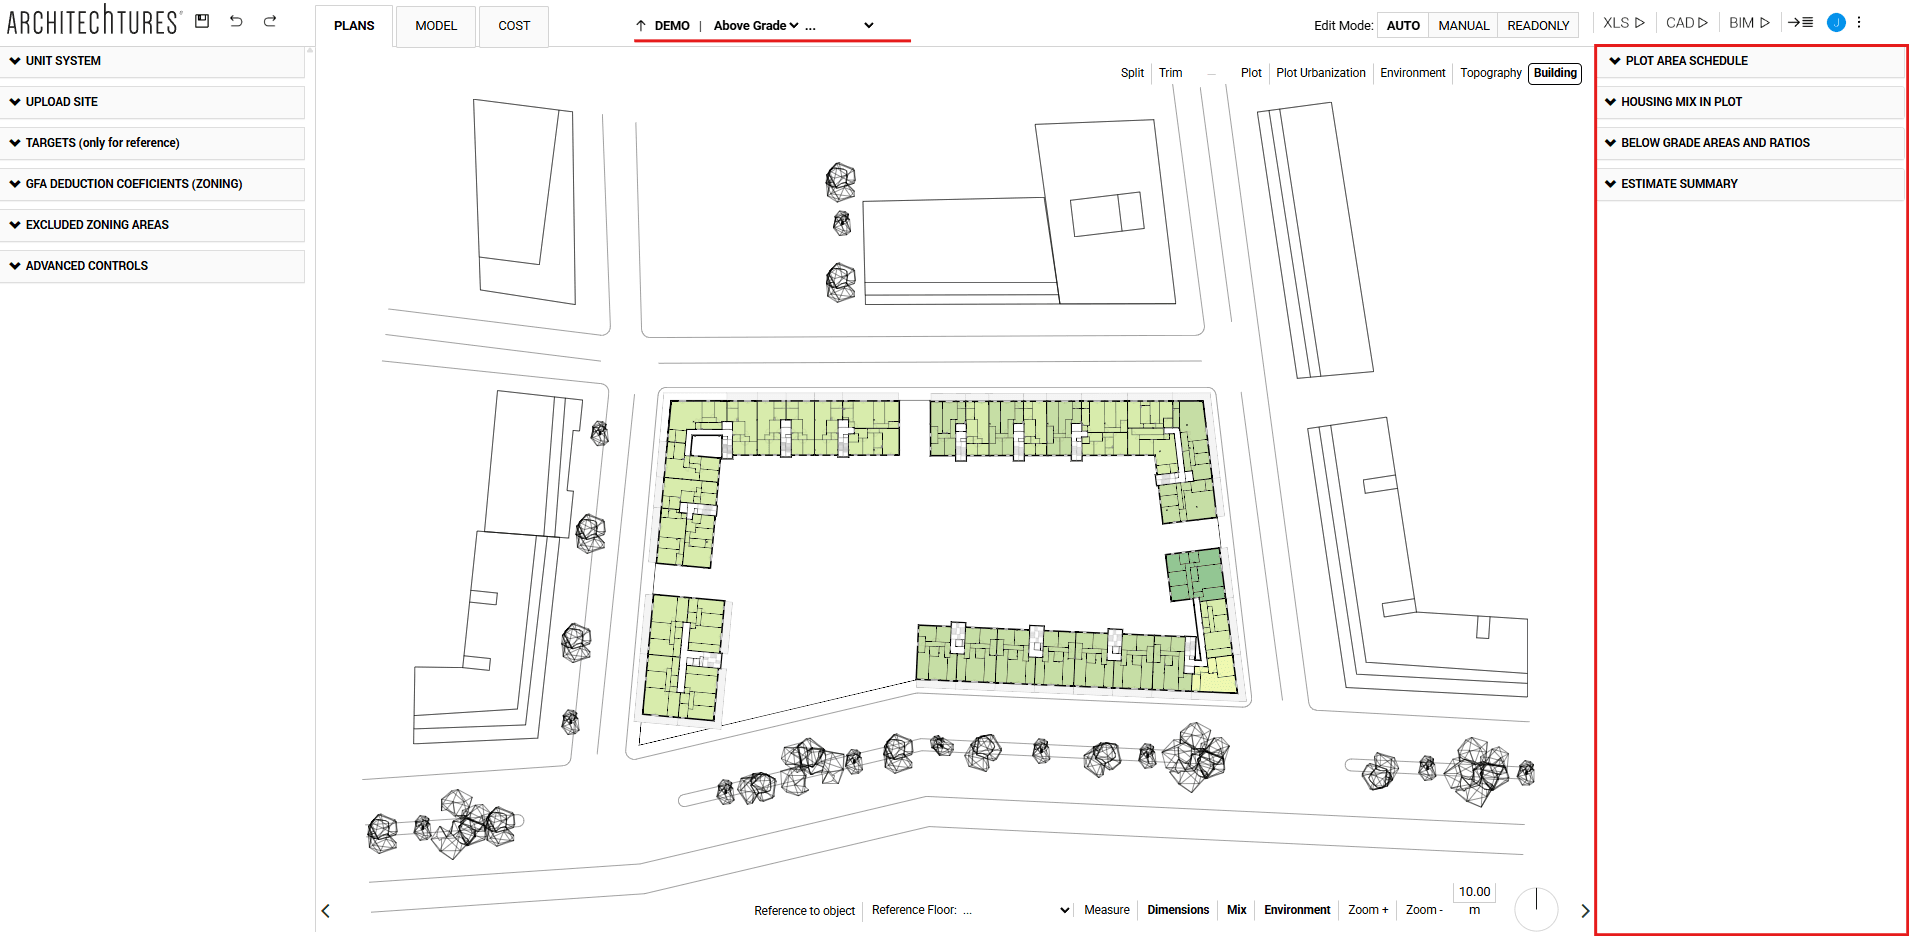
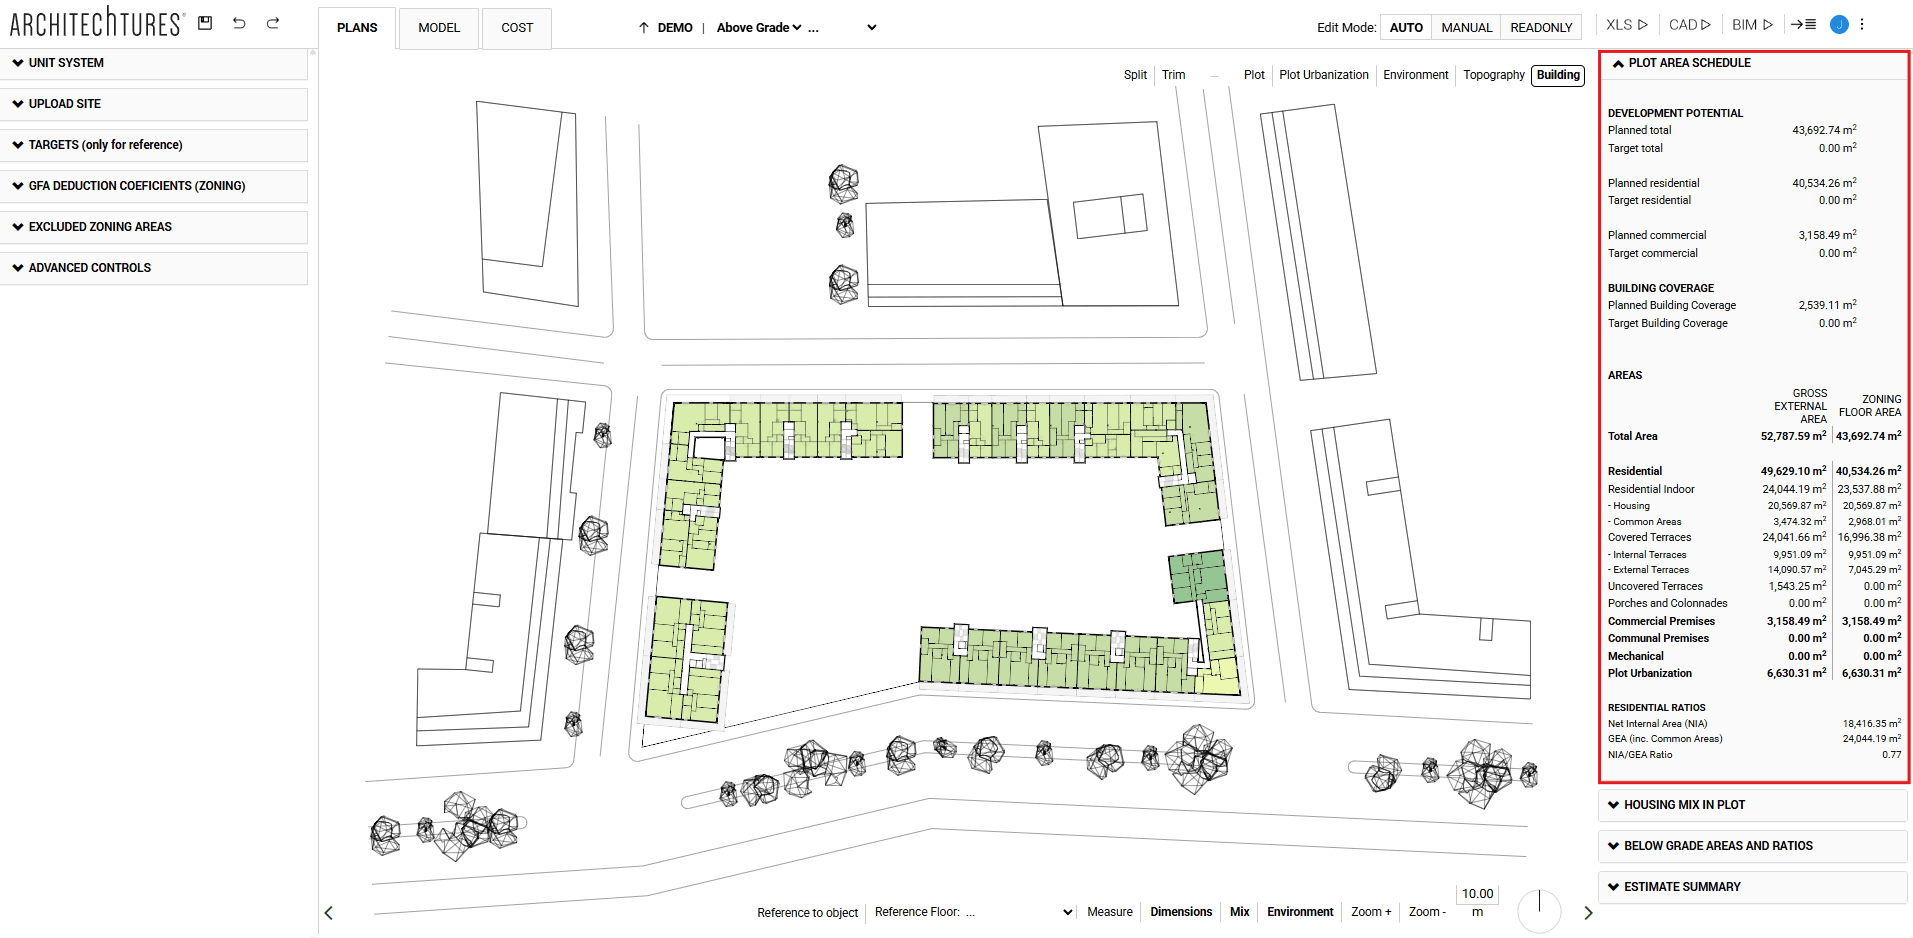
Plot area schedule
In this section we obtain the general data on the plot, such as the total buildability of the project, the residential and commercial buildability, the occupancy, a breakdown of built and computable surfaces, etc.
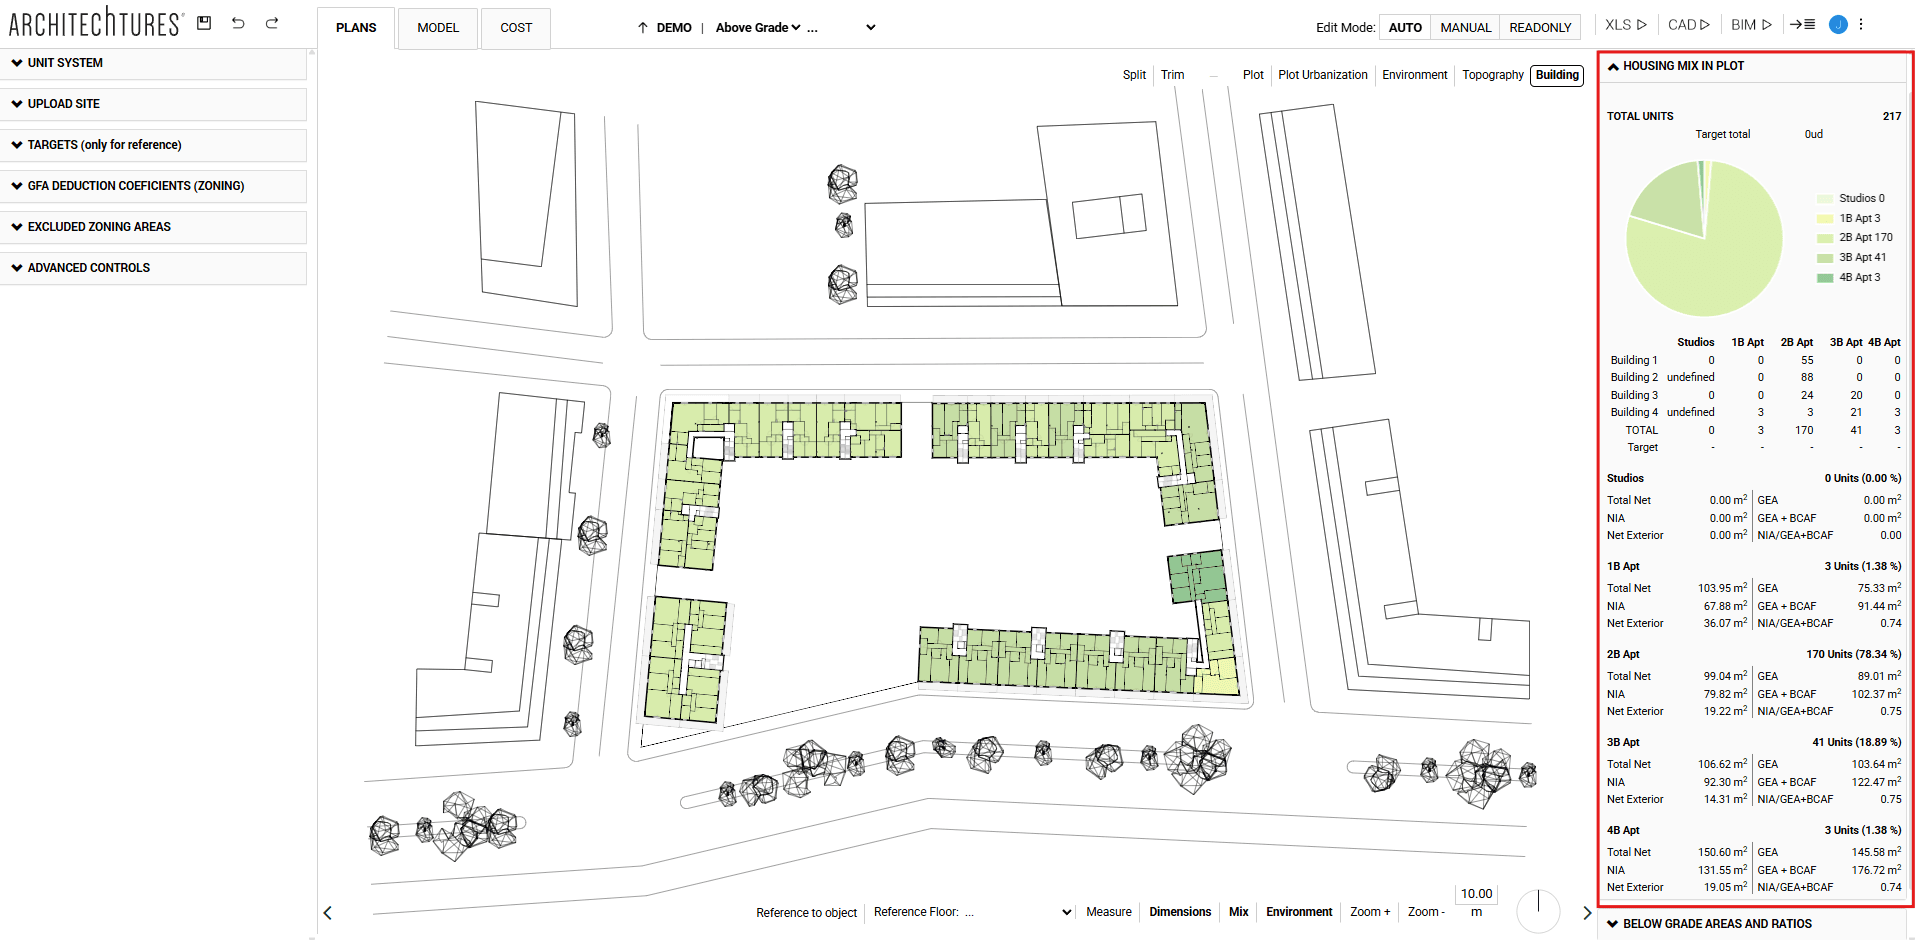
Housing mix in plot
In this section we will obtain the total number of dwellings and a breakdown of them according to the number of bedrooms, indicating the total net, NIA, net exterior, GEA and GEA + BCAF.
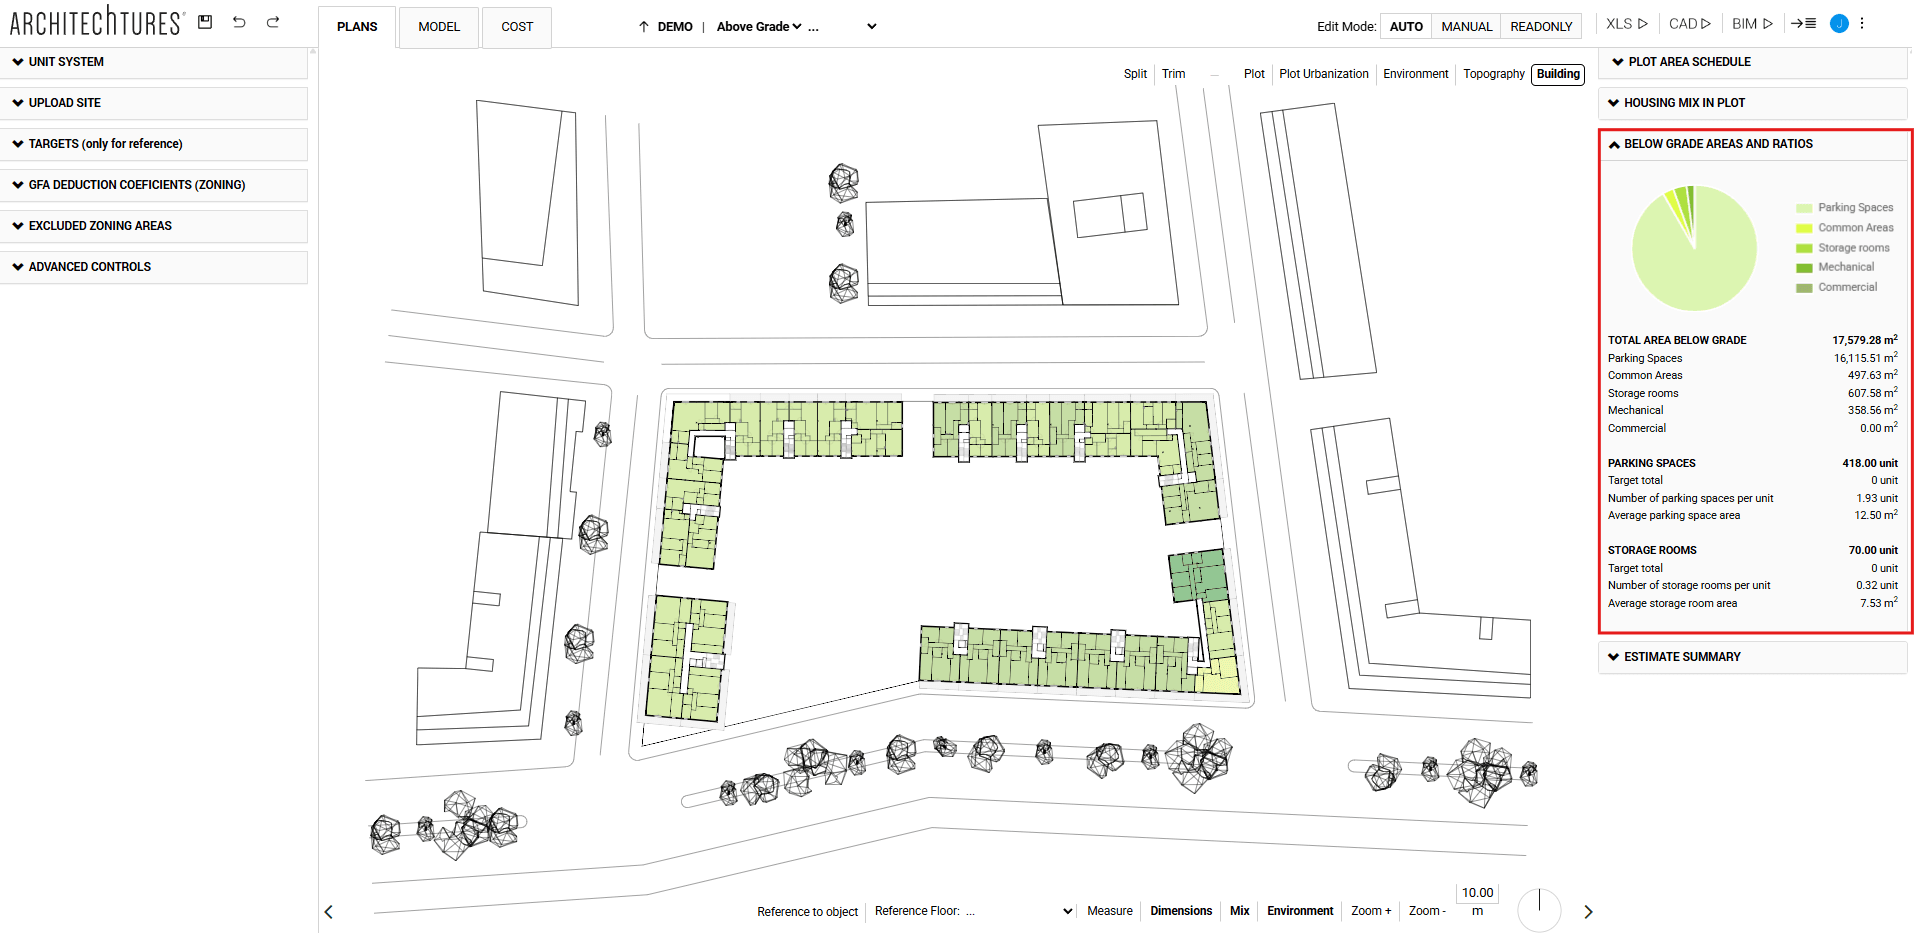
Below grade areas and ratios
This section provides a breakdown of below-grade areas as well as a count and the ratios per dwelling of parking spaces and storage rooms. On this occasion they appear empty because we have not yet included any element below ground level.
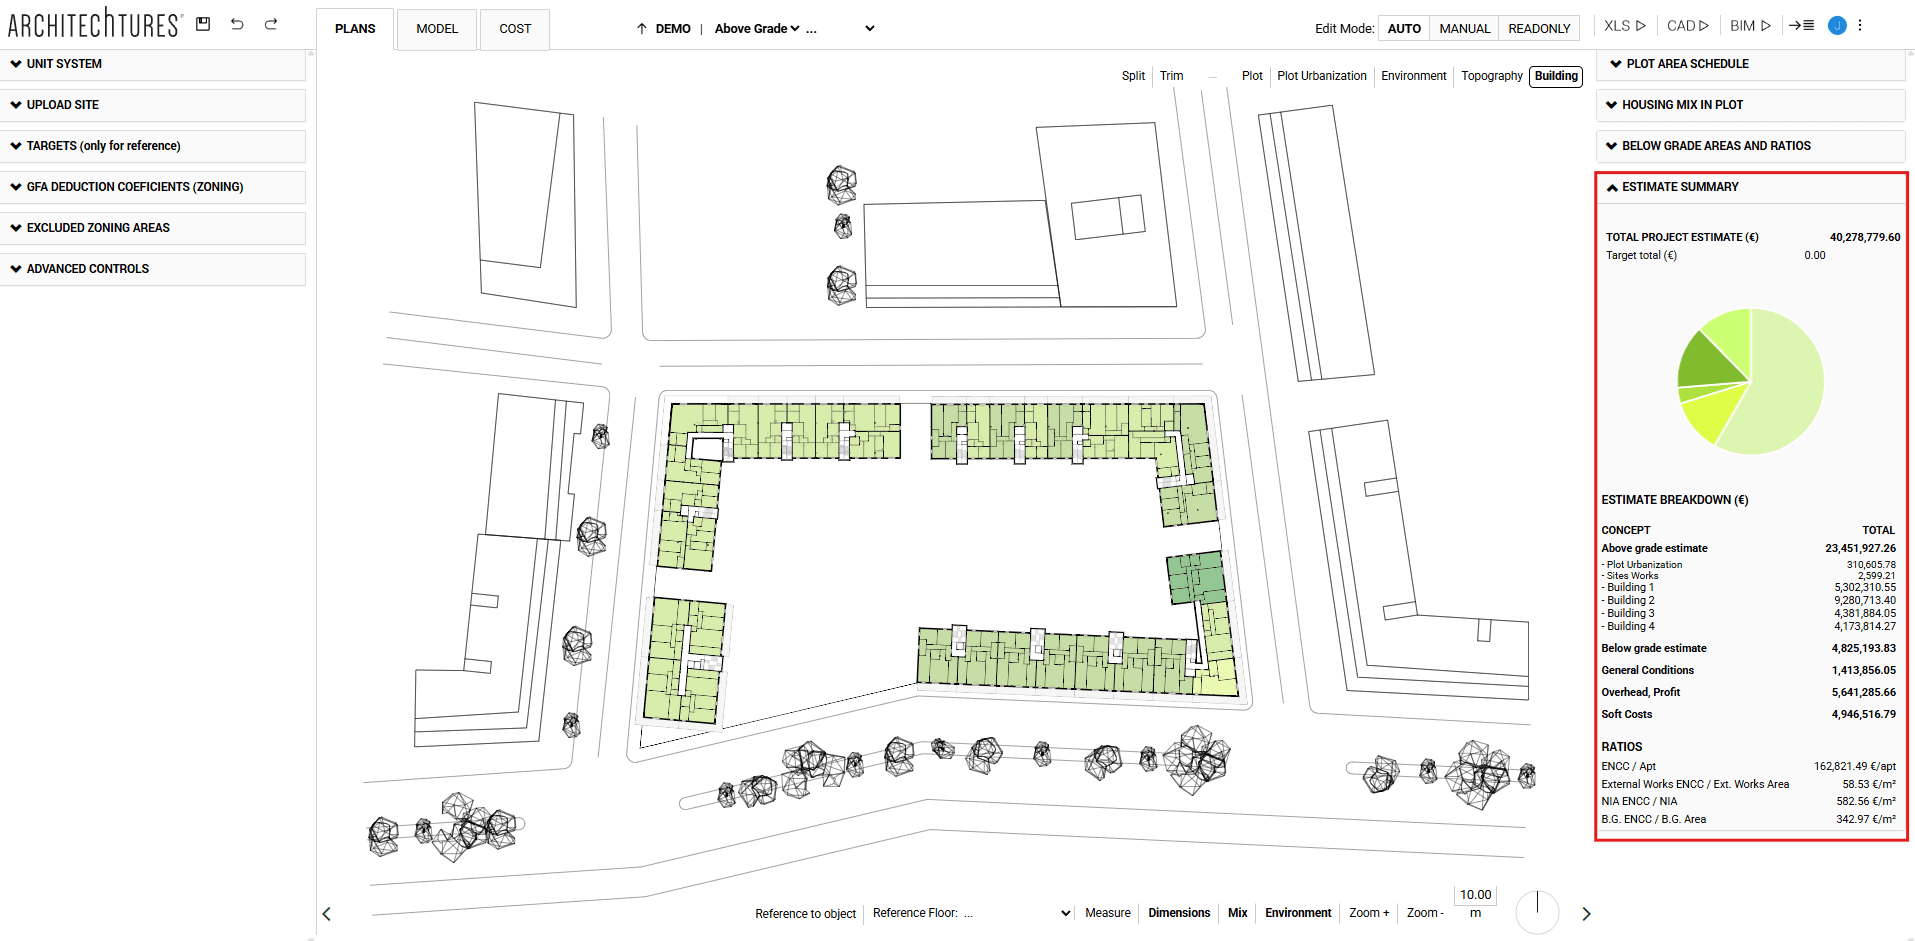
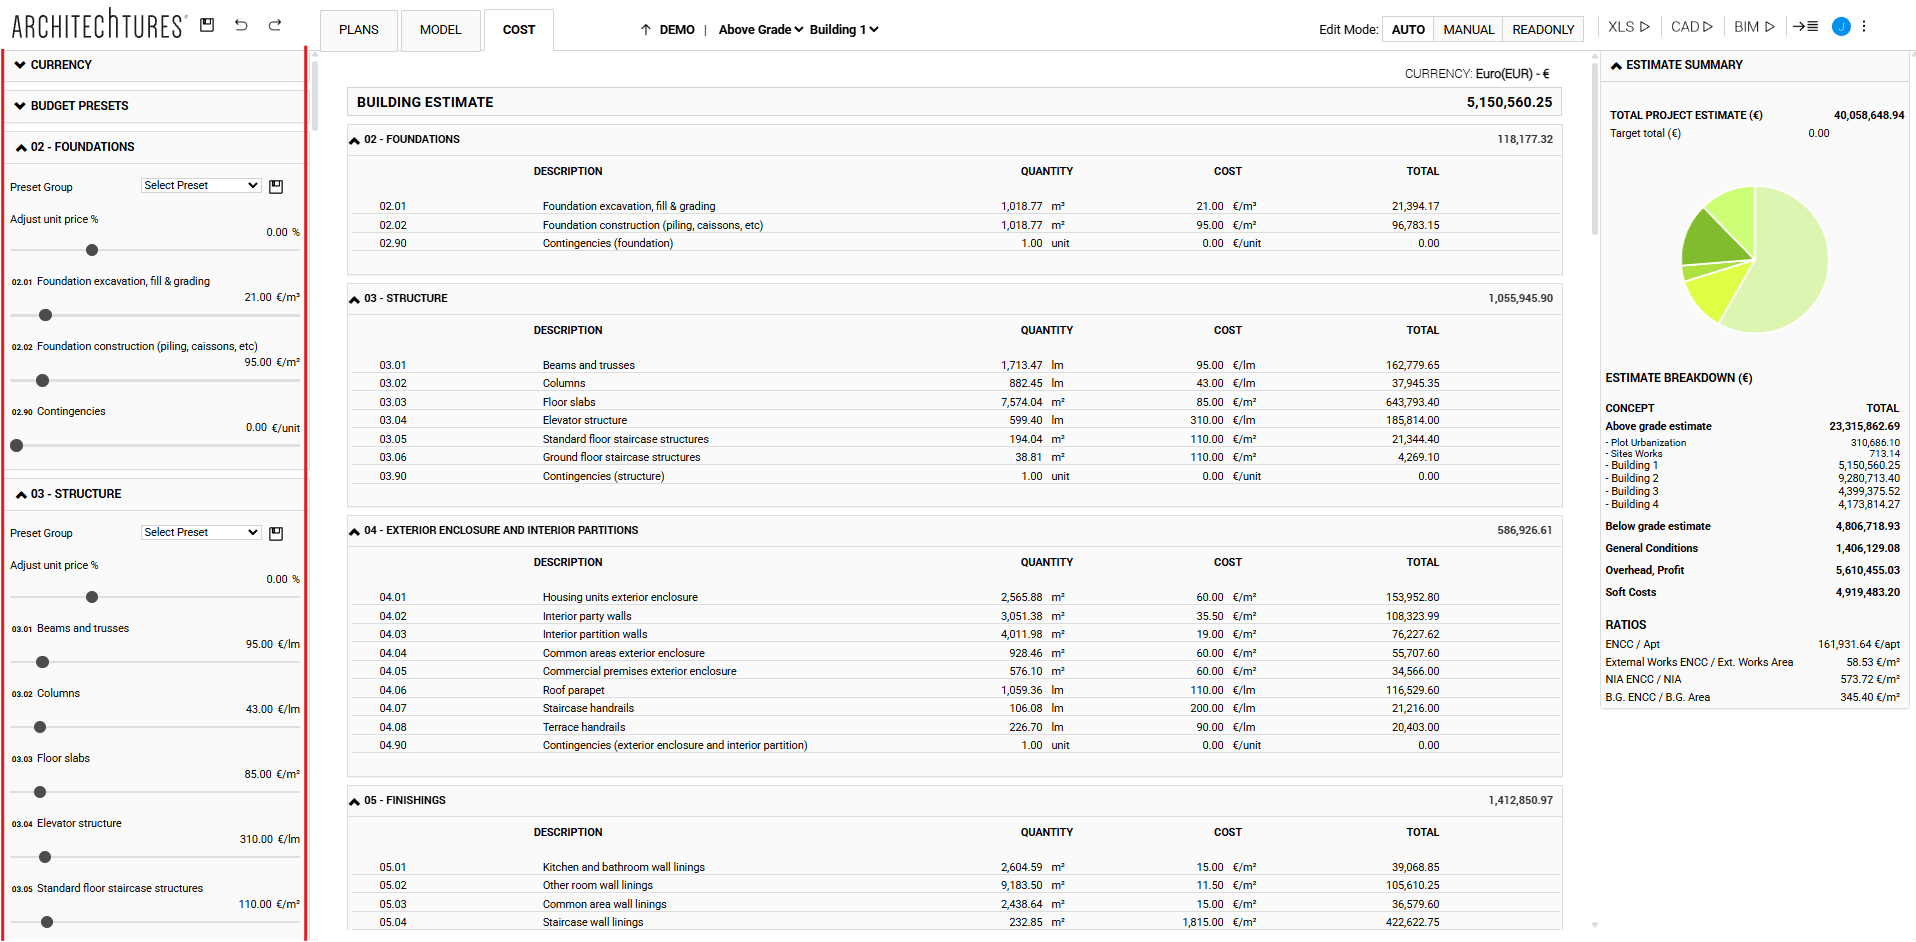
Estimate summary
As its title indicates, this section provides a summary of the budget in which concepts such as the cost above ground for the urbanization and for each of the buildings, general expenses and industrial profit, etc are broken down. Also included are some ratios that may be of interest, such as the ENCC/Apartment.
Remember that these data are only a summary of the budget, to go deeper into it we must access the cost view.
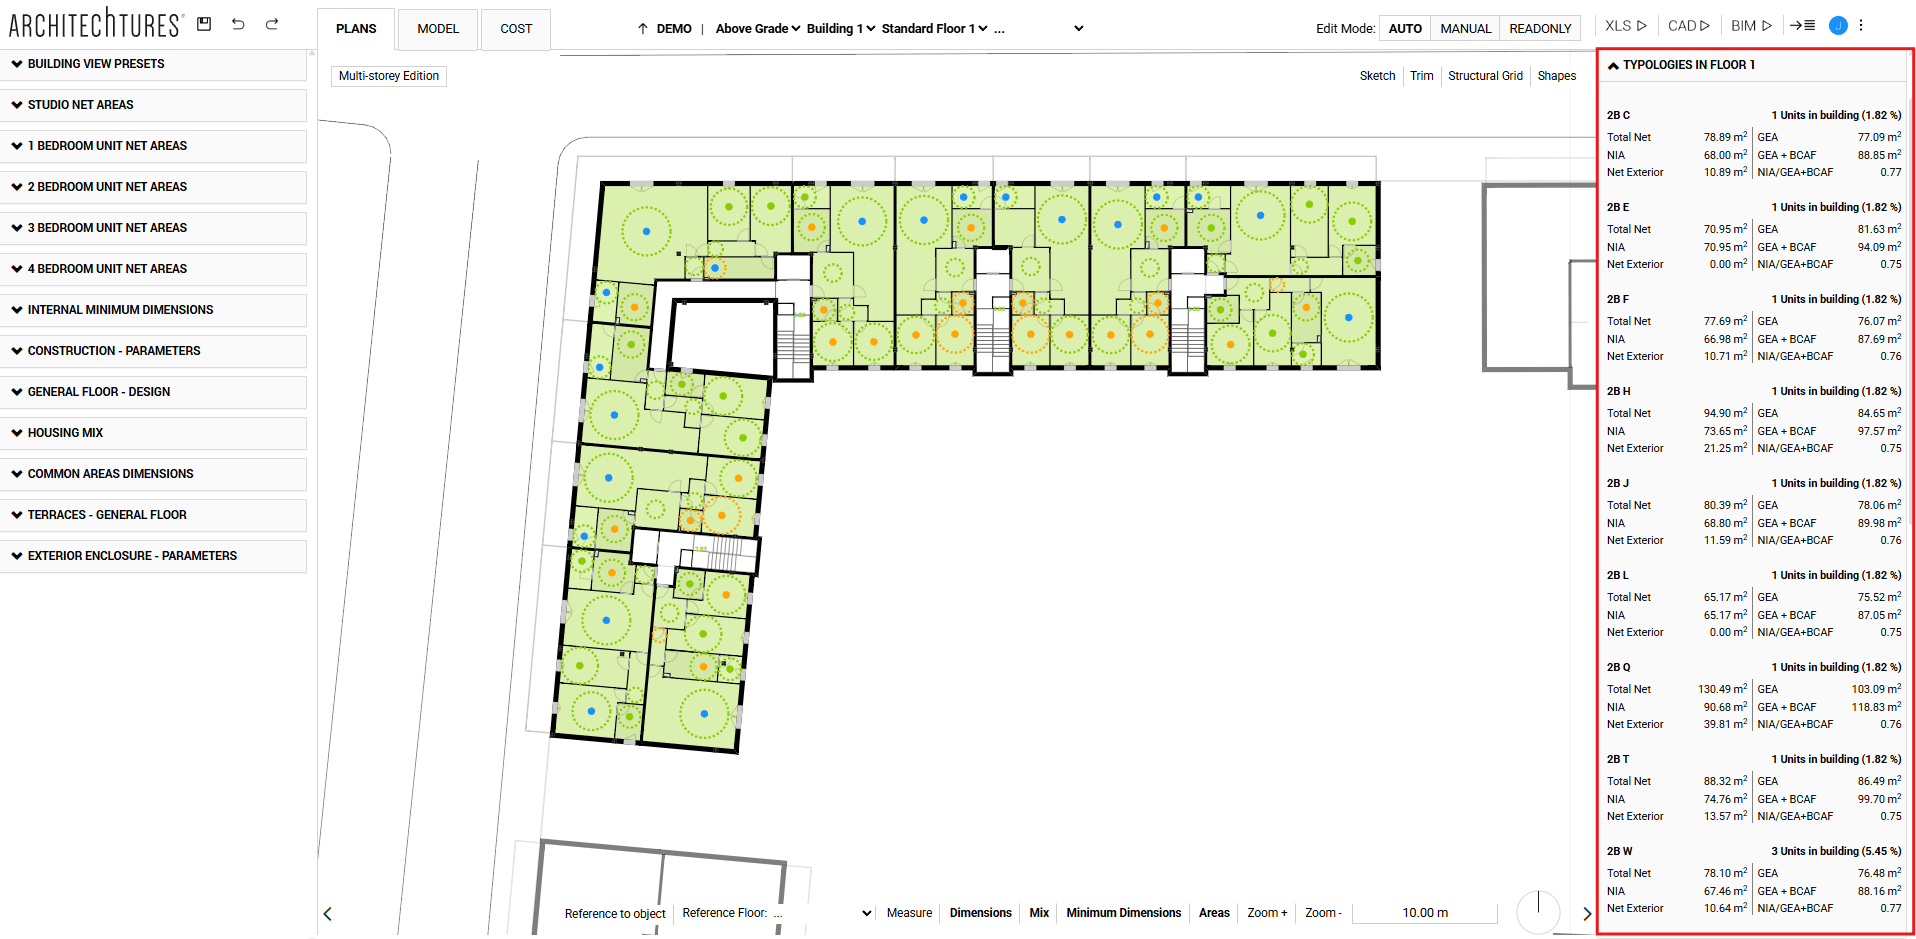
Typologies in floor X
This section provides data on the surface areas of the different dwellings located on the floor plan, organized by type.
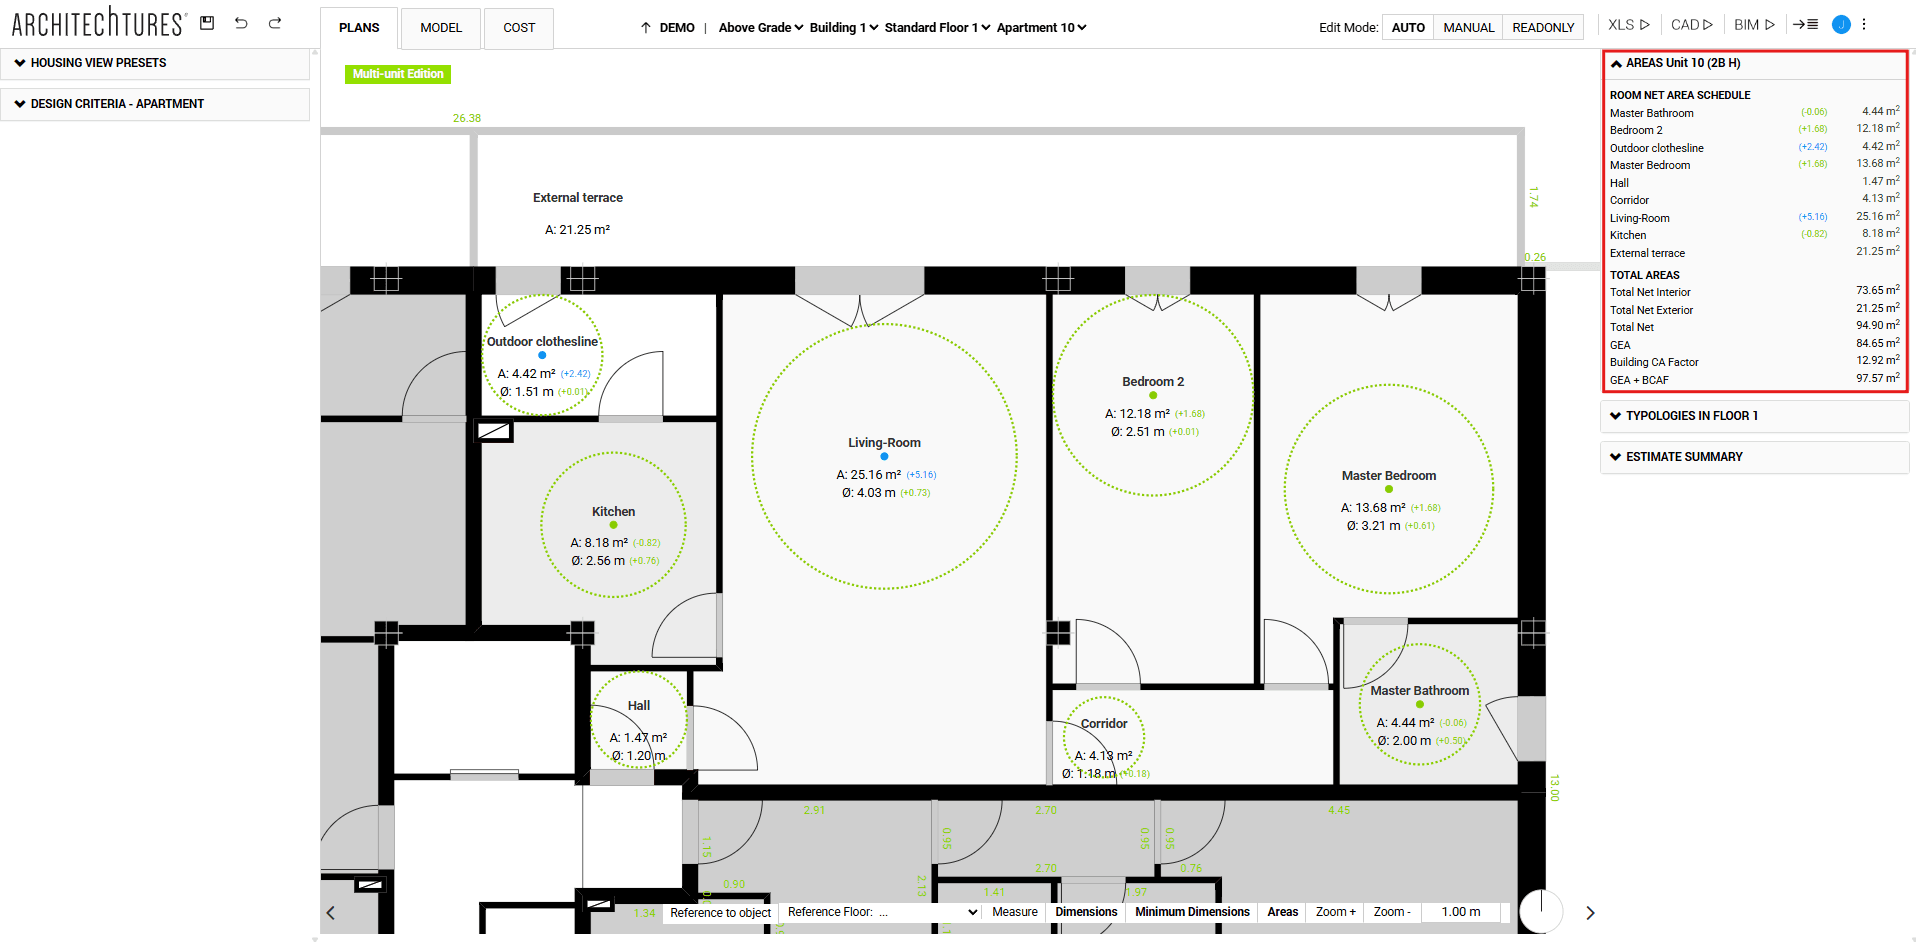
Areas Unit X
Here we will have a breakdown of the usable areas of the dwelling, organized by spaces; as well as a summary of the total areas: total net interior, total net exterior, total net, GEA, building CA factor and GEA + BCAF.
Building Editing
Once we have created a building, both the building and its requirements can be modified, obtaining the geometric update and its data in seconds. This greatly facilitates the design process and helps in decision making.
To edit the building from the site view, the building’s axis must be selected. To do this, simply click on the building. This selection will be reflected in the project breadcrumb and will update the input panel tabs accordingly.
When selecting the axis of the building, the edit menu is enabled in the upper right part of the central window. There we can modify the width of the building and the position of the axis in relation to the building, we can move it parallel indicating a specific distance, lock it to prevent it from being modified and delete it.
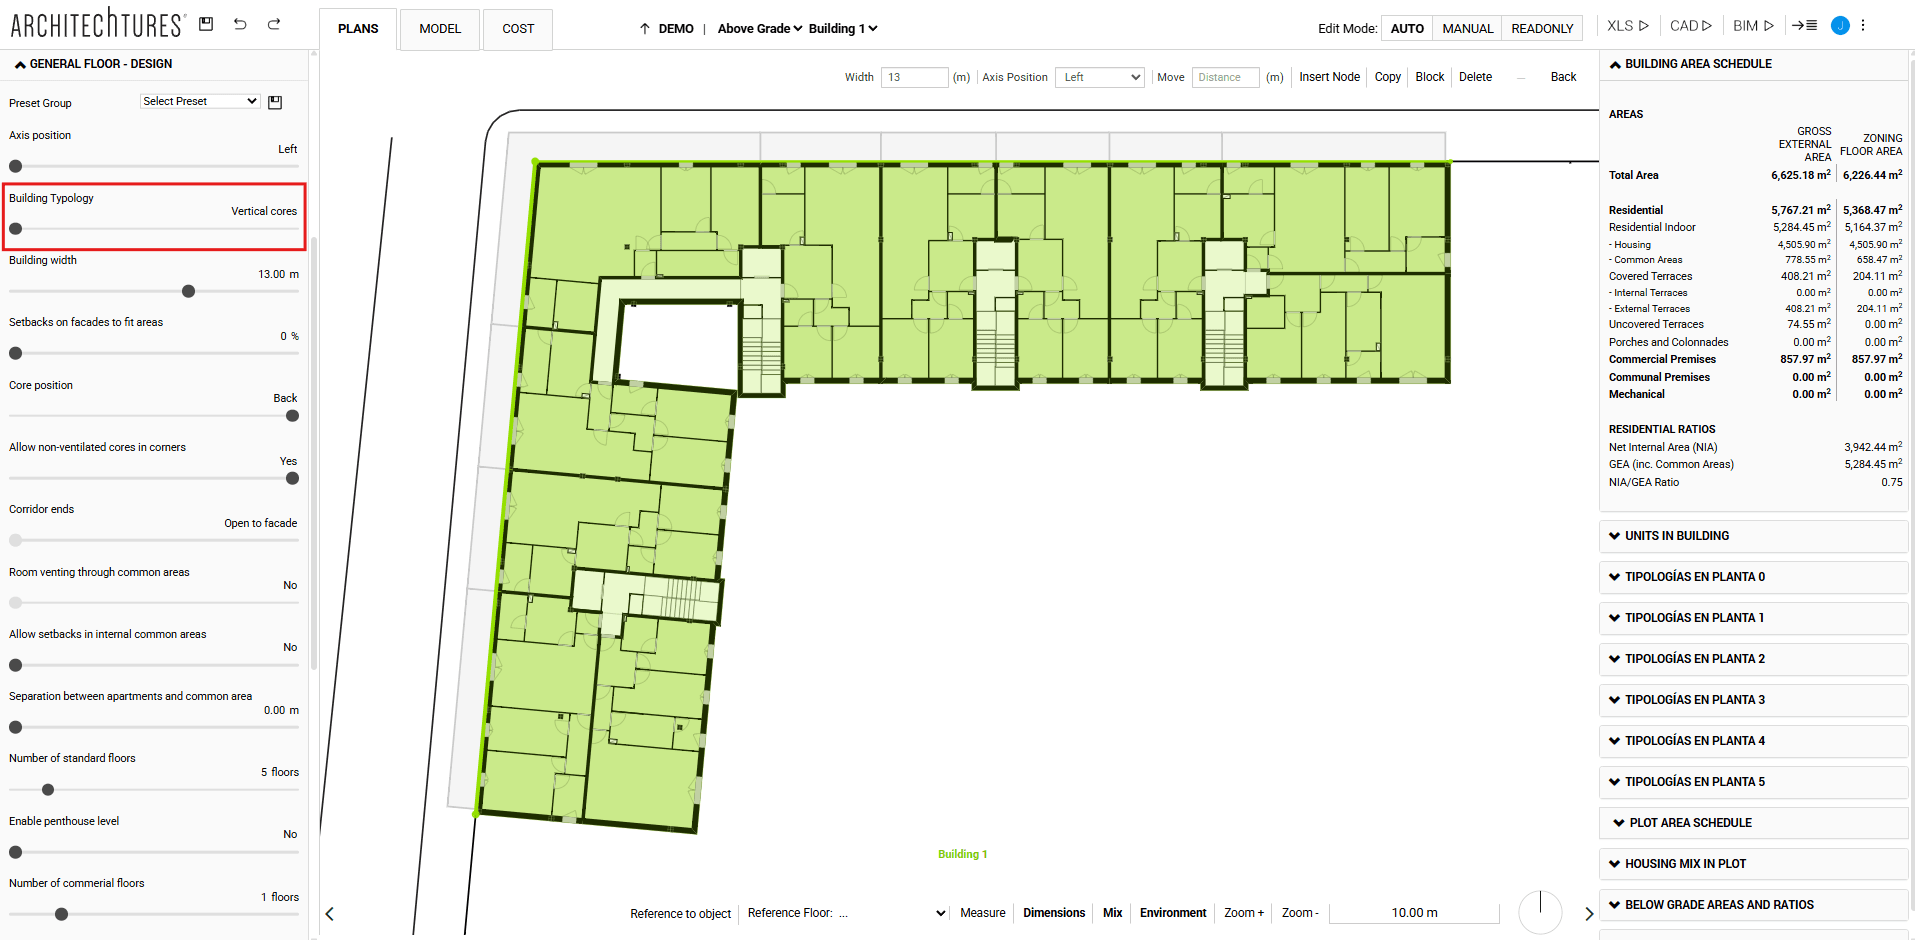
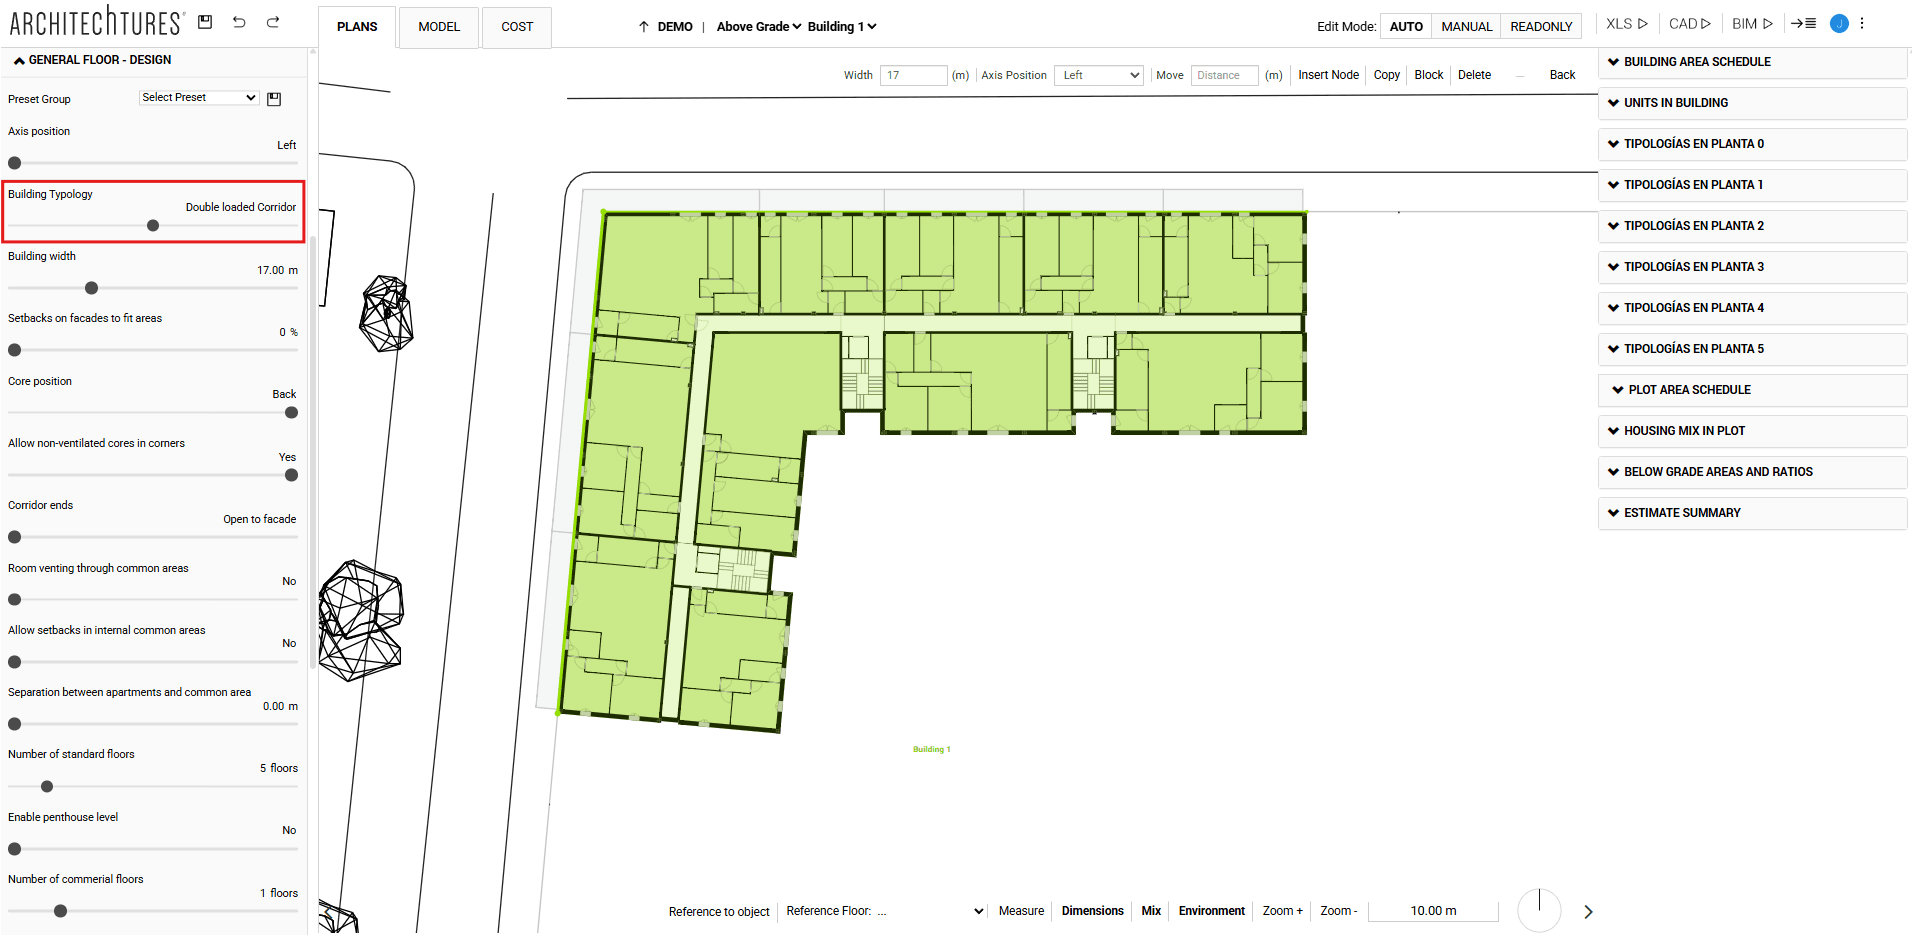
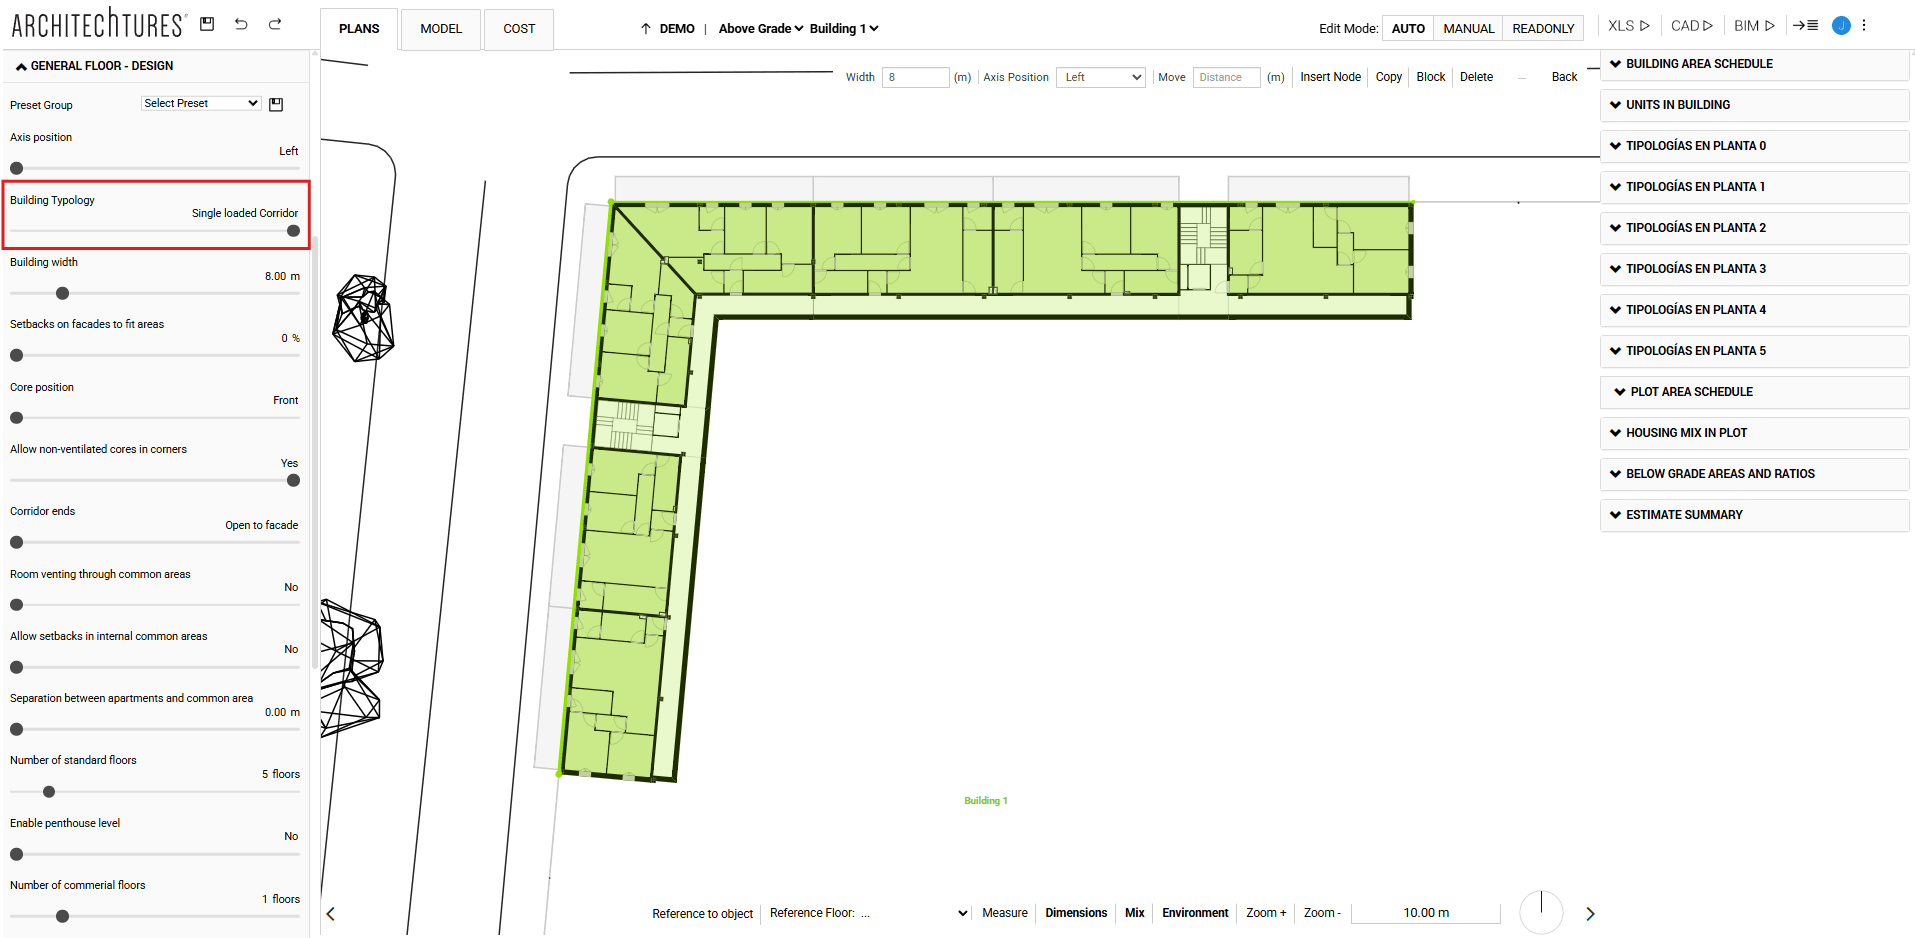
On the other hand, from the input panel, we can adjust and modify all the available sliders. Particularly useful is the "General floor plan - design" section, where we can modify the axis position, building typology, core position, setback on facades to fit areas, number of standard floors, etc.
Vertical cores:
Double loaded corridor:
Single loaded corridor:
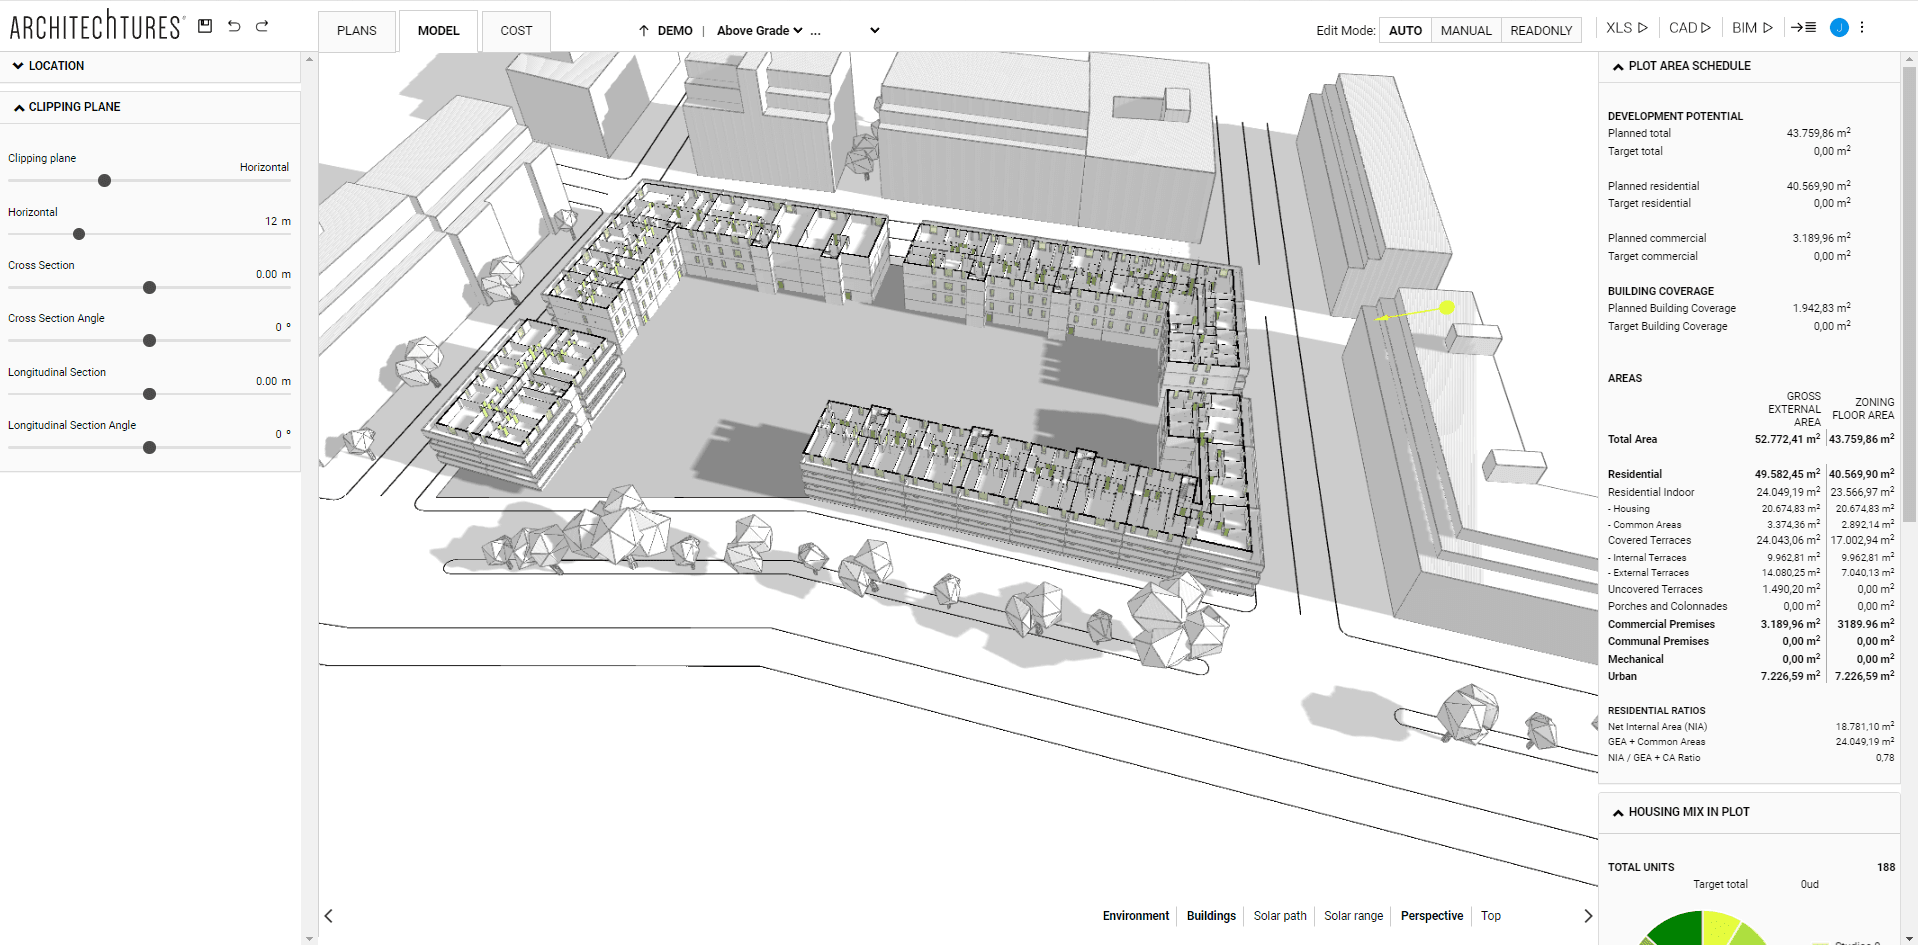
Model view
In this tab, besides visualizing the 3D of our project, which is very useful to check the changes made in the plan view, we find:
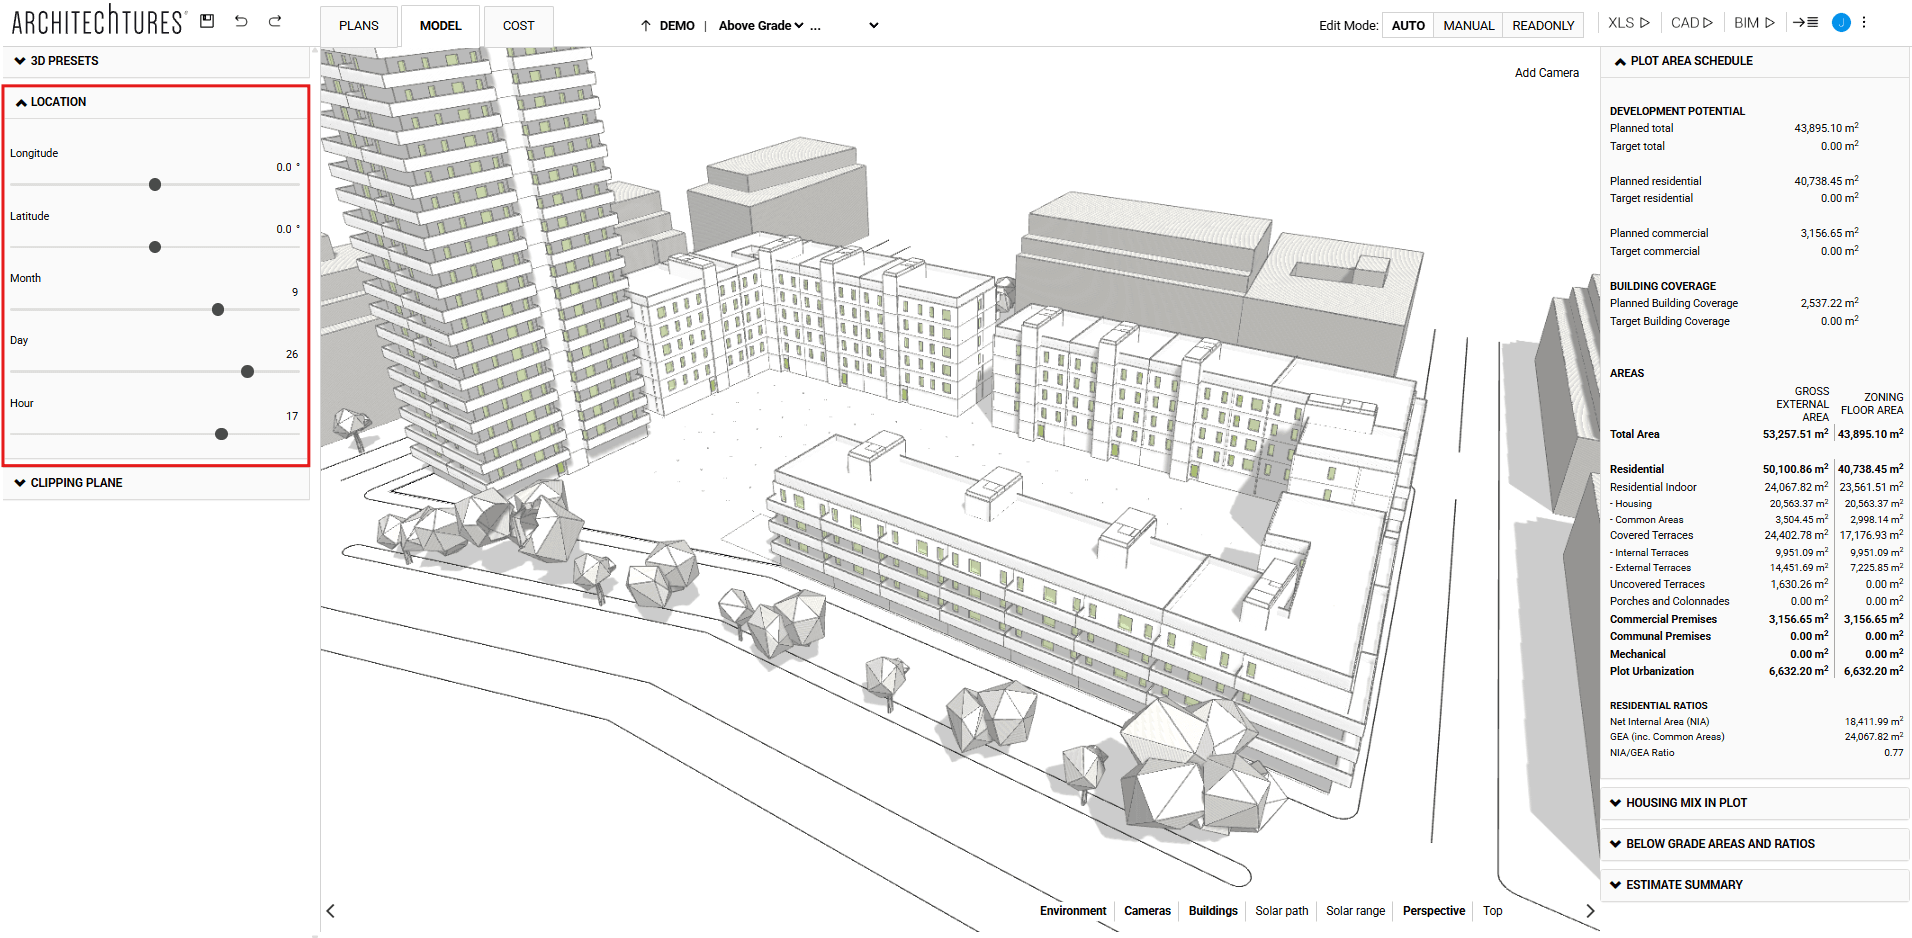
Location
Here we can locate our project geographically indicating its longitude and latitude, as well as at a specific time of the year indicating month, day and hour.
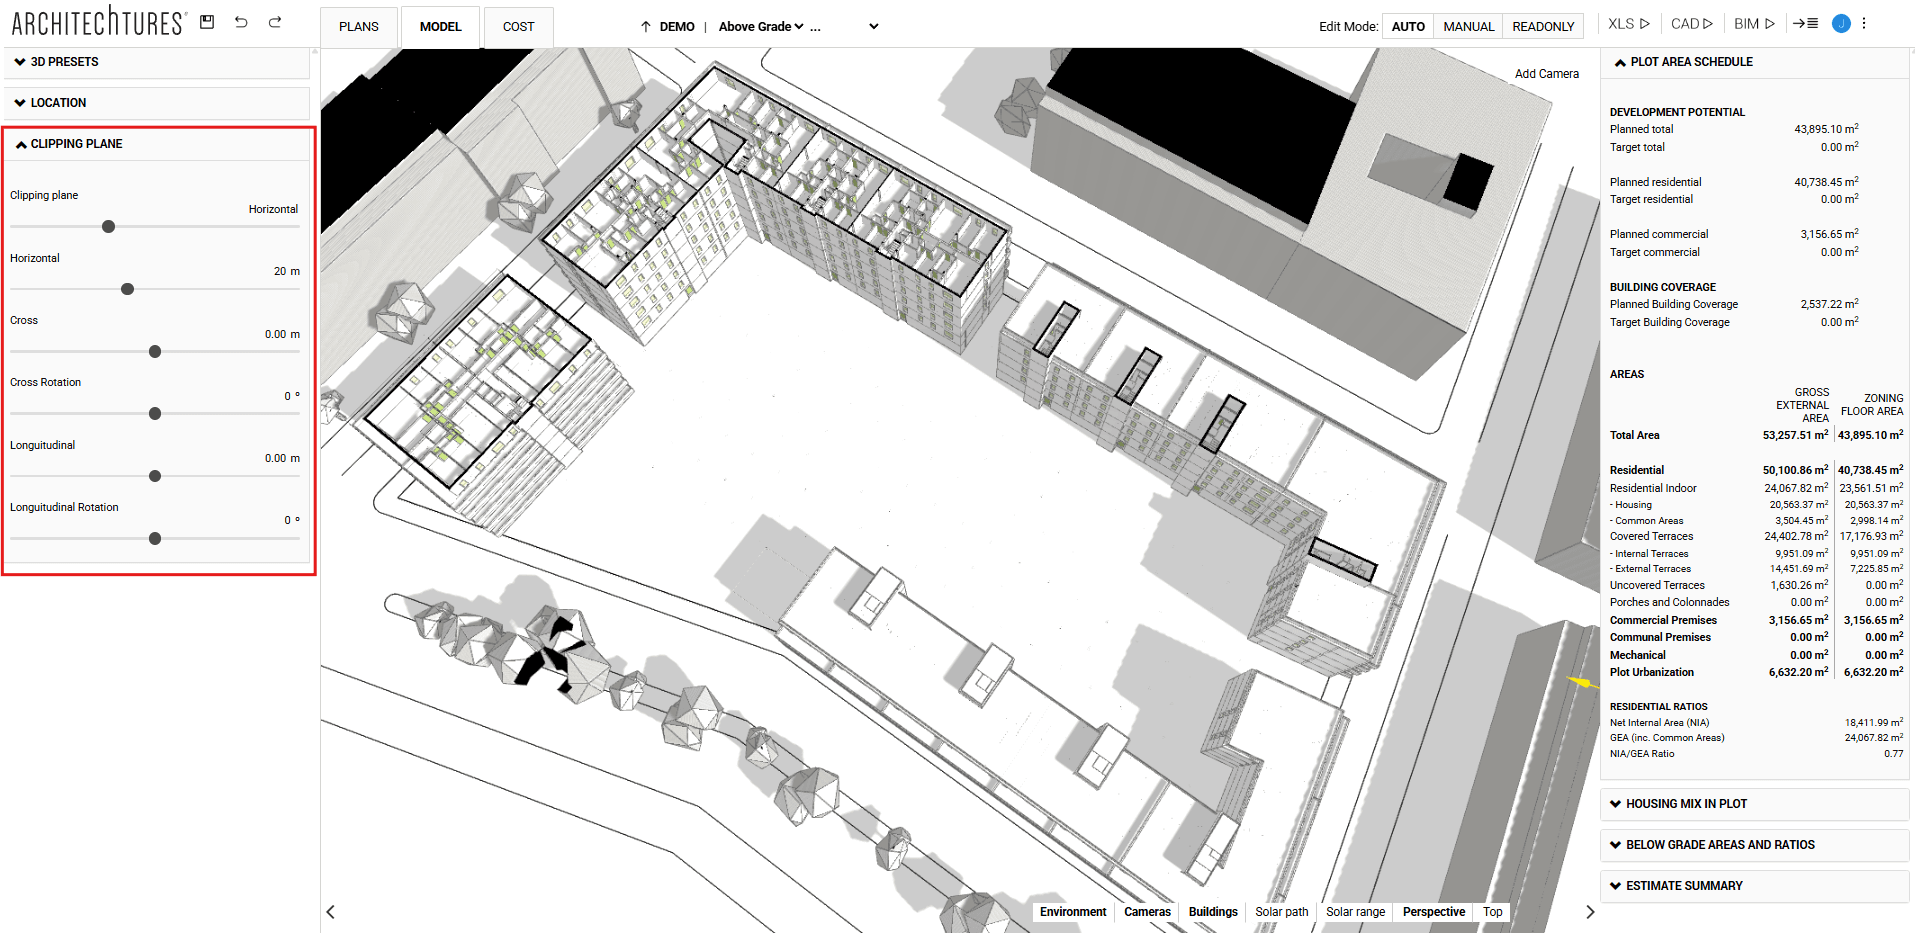
Clipping plane
From the sliders located in this tab we can create vertical and horizontal sections of our projects.
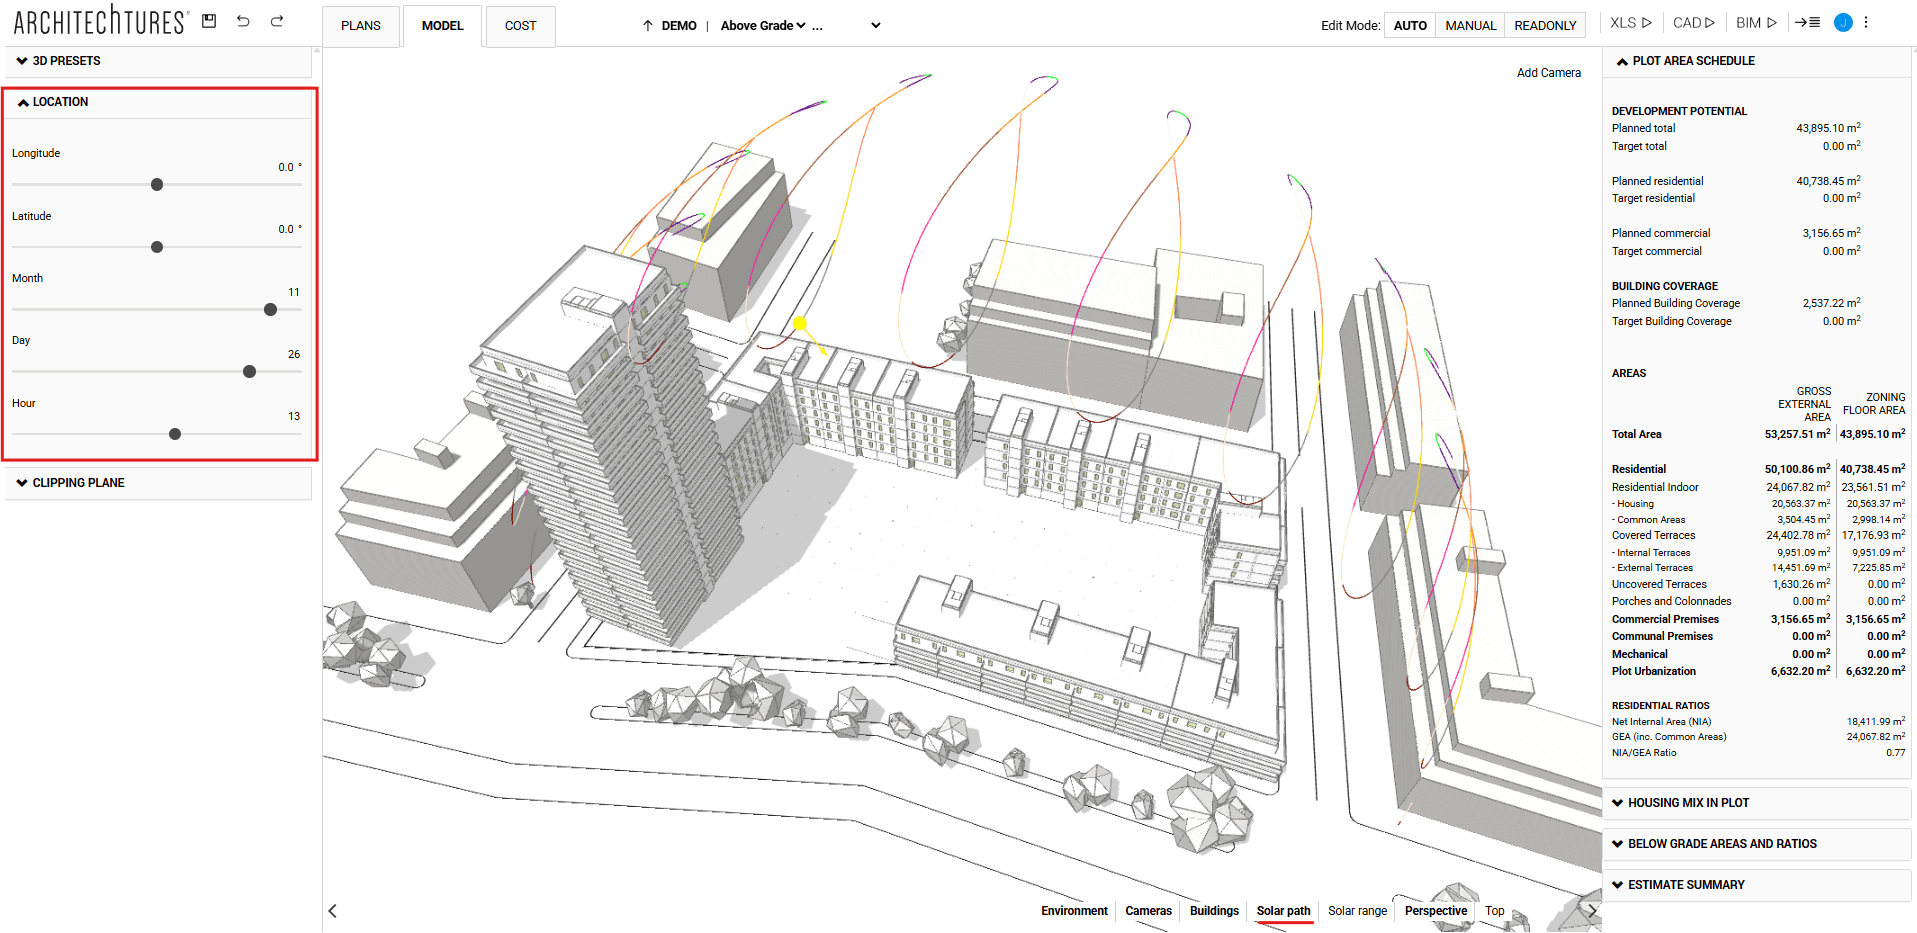
Solar path
The solar path works as a visualization layer, being possible to activate or deactivate it, and has its development depending on the location tab. It will be very useful to perform solar studies.
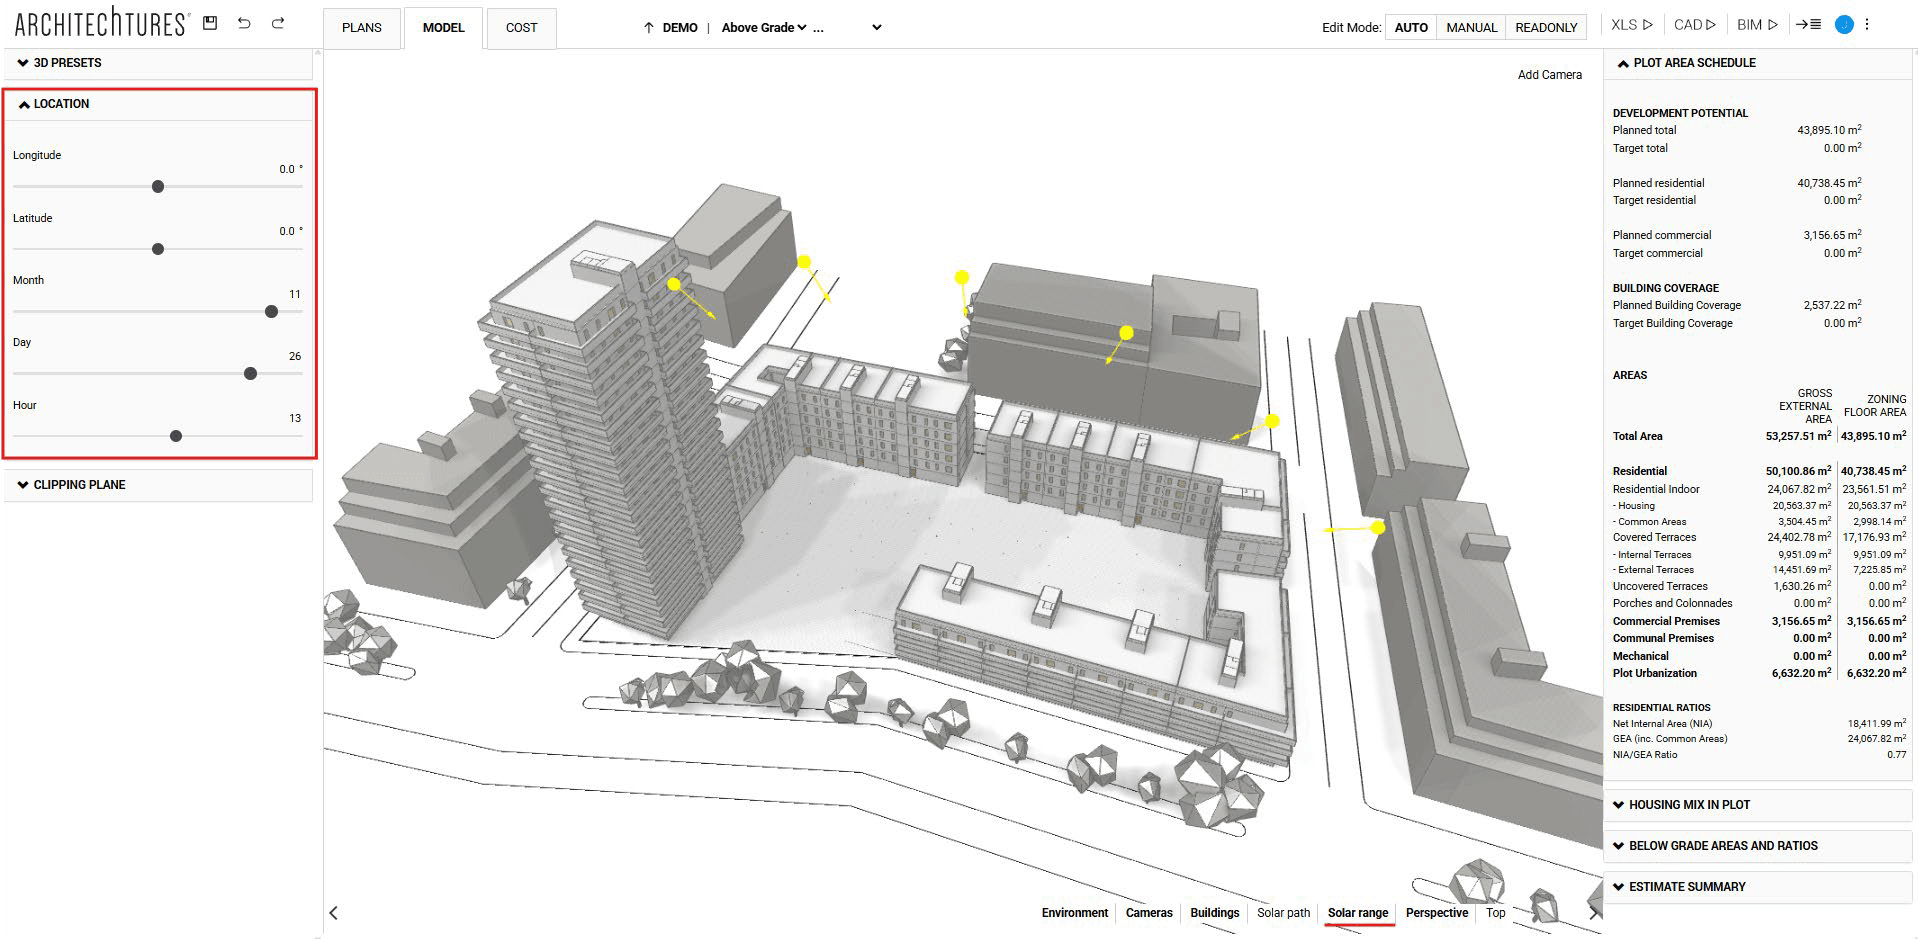
Solar range
As in the previous case, the solar range works as a visualization layer that we can activate or deactivate; it is very useful for sunshine studies; but unlike the solar path, with the solar range we can simultaneously visualize the solar influence on a specific day of the year.
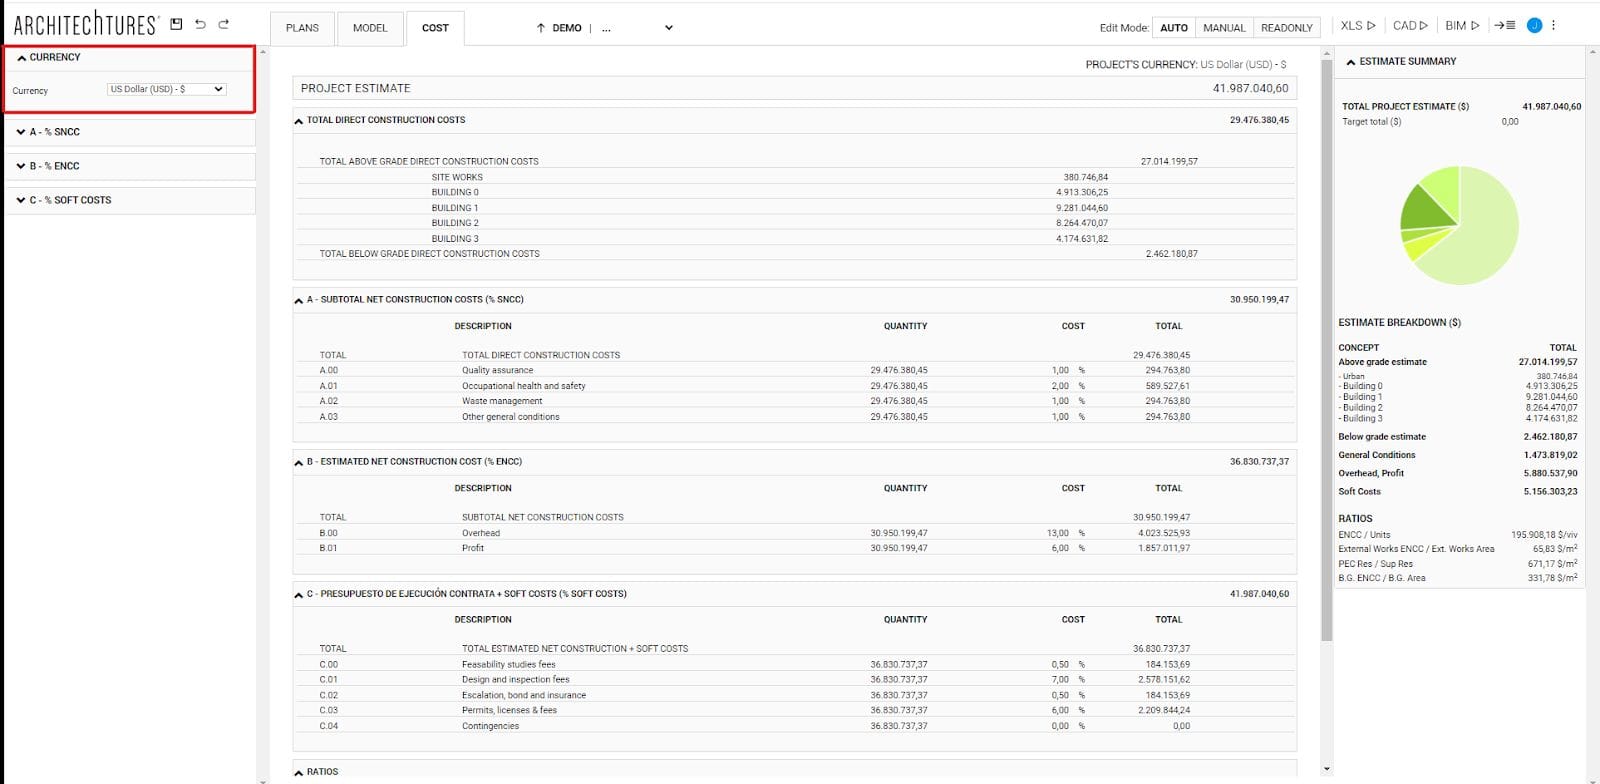
Cost view
Here we will work on the economic part of the project. From the beginning we will have some predetermined values, which will have to be modified and adapted to the specific characteristics of the design.
Currency
In this section we will select the currency we want to work with in our project.
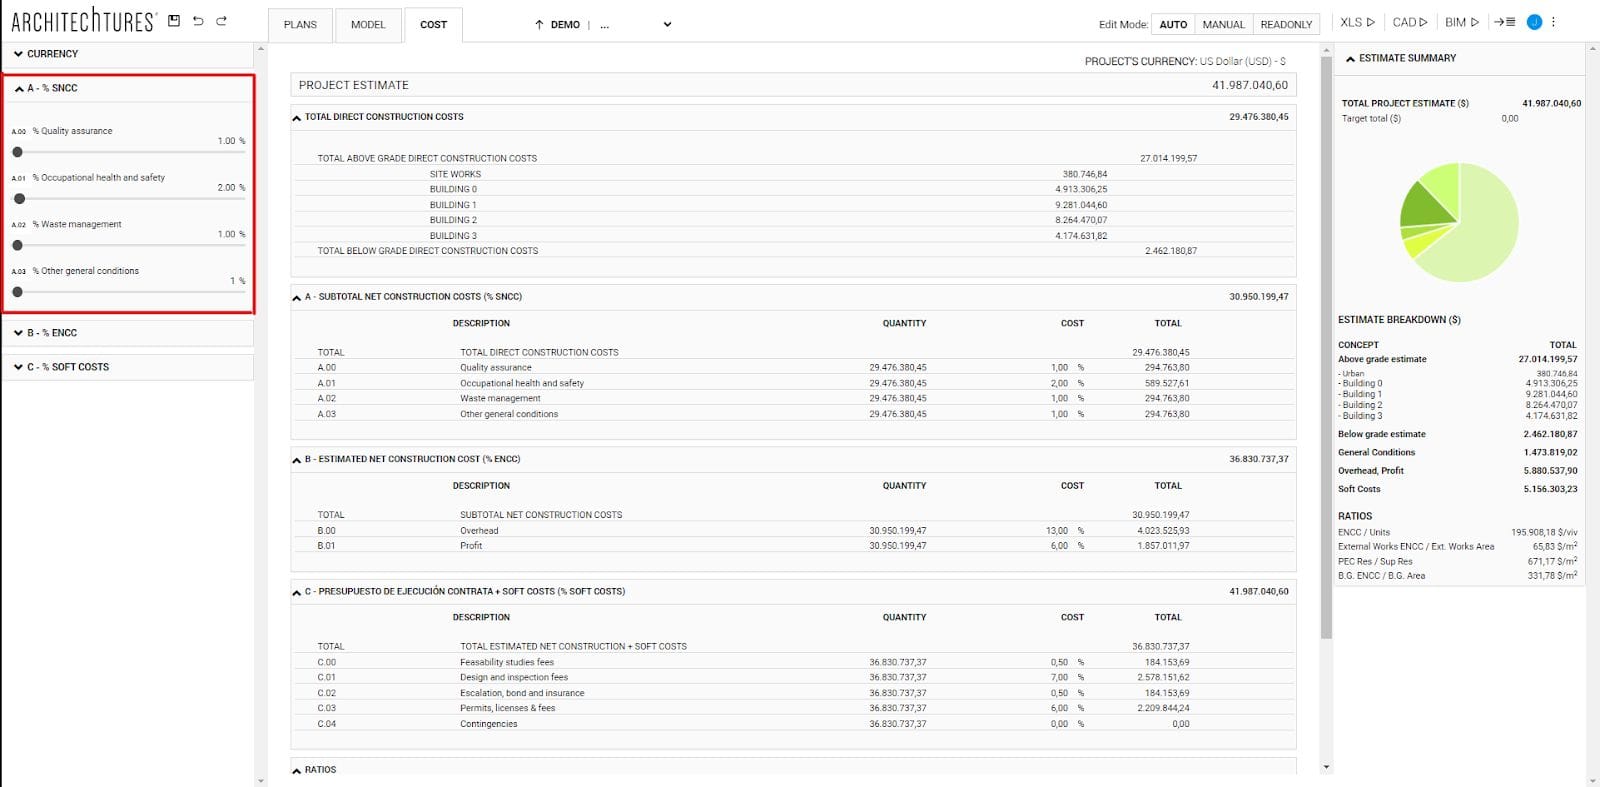
Subtotal net construction cost
In this section we will establish, at the general level of the project, the percentages to be applied to the Direct construction costs to value quality assurance, occupational health and safety, waste management and other general conditions; thus obtaining the SNCC.
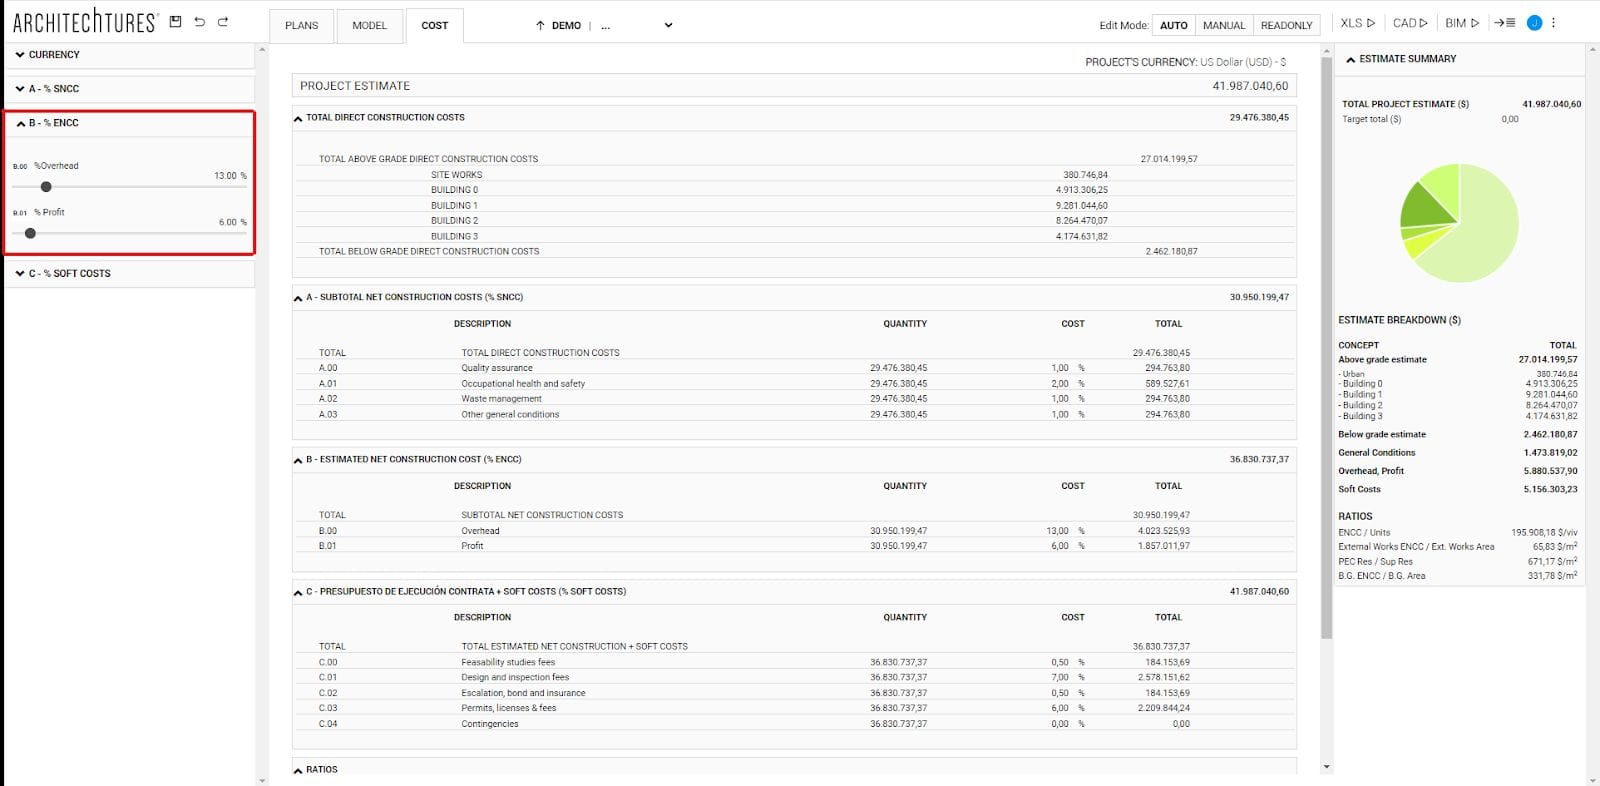
Estimated net construction cost
In this section we will establish, at the general level of the project, the percentages to be applied to the subtotal net construction cost to value overheads and profit; thus obtaining the ENCC.
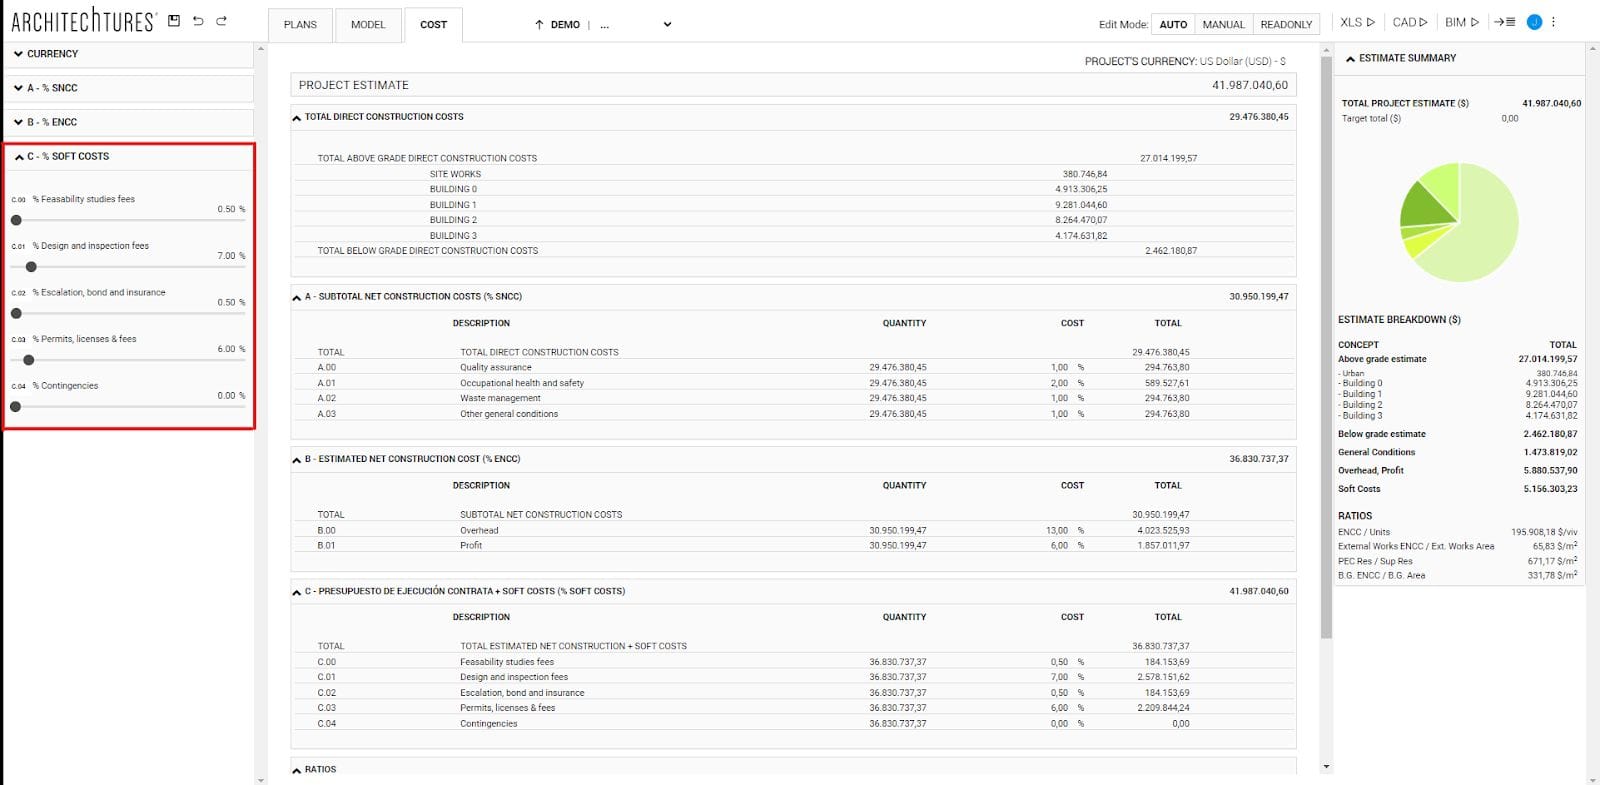
Soft Costs
In this section we will establish, at the general level of the project, the percentages to be applied to the estimated net construction cost to value feasibility studies fees, design and inspection fees, escalation, bond and insurance, permits, licenses & fees, and contingencies.
Budget breakdown by building
To define the value of all the elements that make up our buildings, we will have to review and update all the sliders that make up each chapter of work in the budget.
These could be different depending on the selected building of the project.
TUTORIALS LISTING:
3. Creating our first building with ARCHITEChTURES
4. Deepening the design options
5. Editing modes: Auto and Manual