Creation of below-grade parking
Posted 02/19/2024 in Education
With ARCHITEChTURES, the creation of underground parking is done automatically with a few simple steps. Here you can learn about the procedure to follow, the highlighted elements, and certain considerations to make the most of the space.
An architectural design program would be incomplete without a floor planner for parking lots; that's why at Architechtures we have automated its design to streamline the entire process.
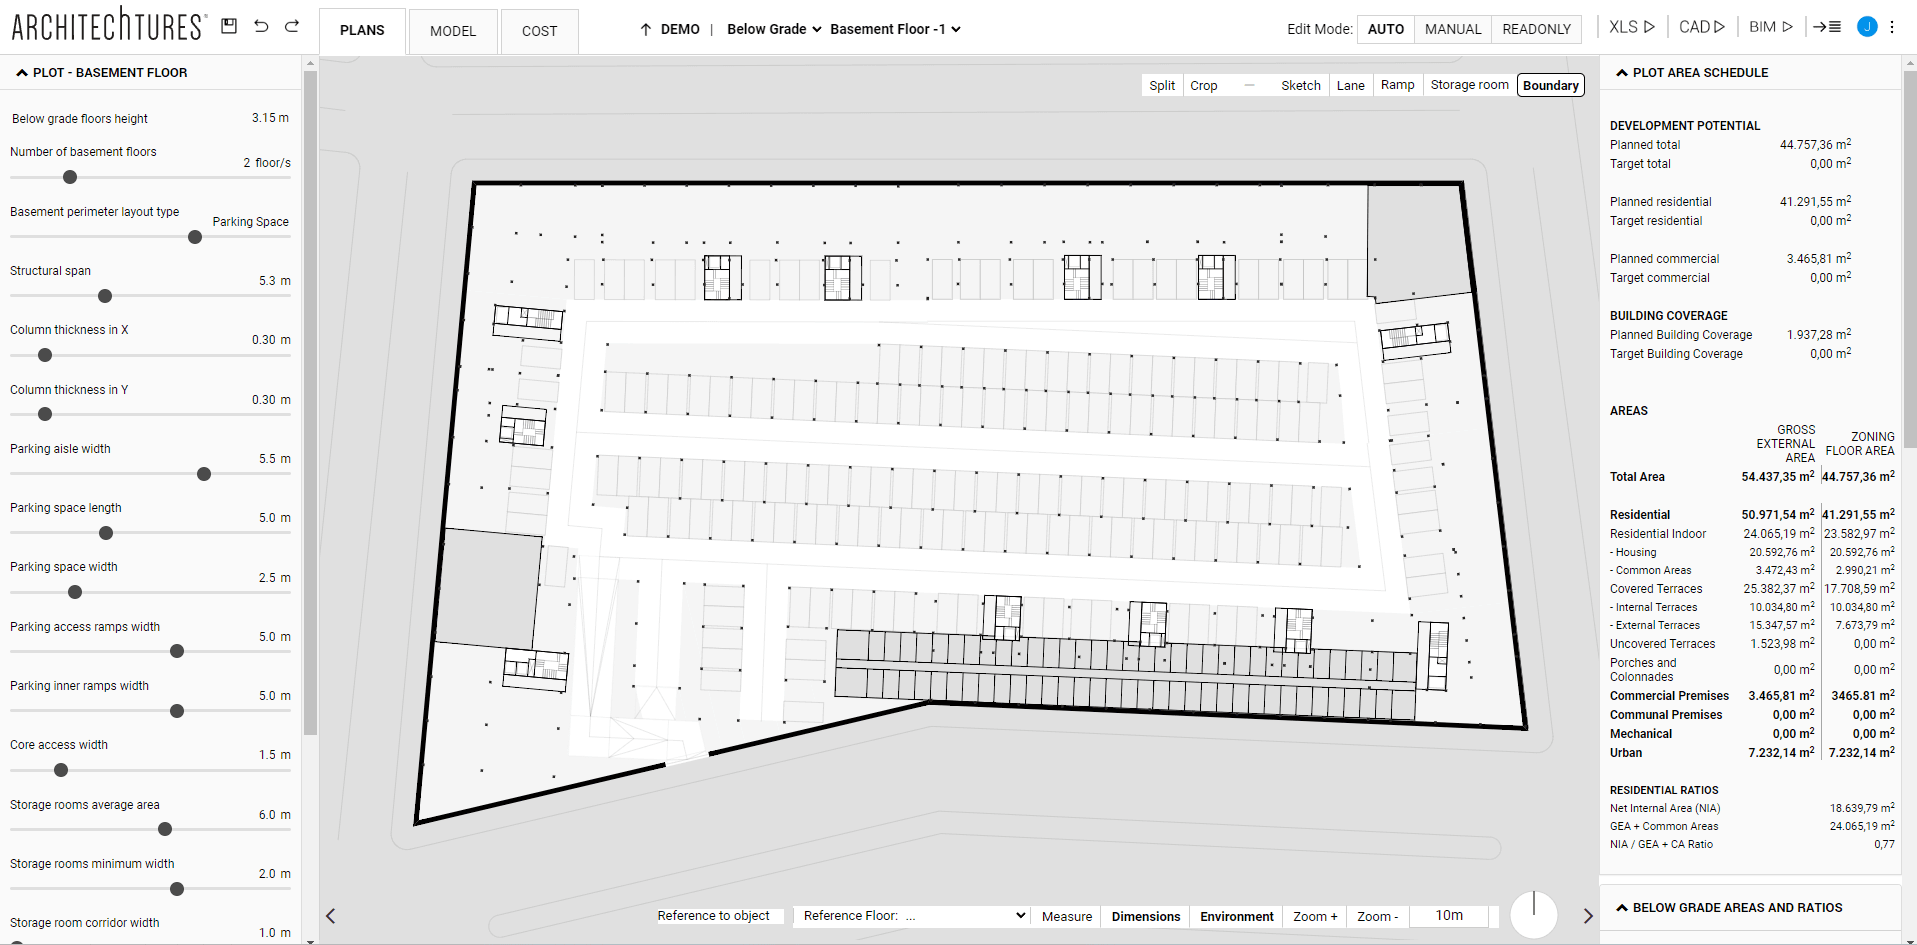
To develop it, you must start from the “Below Grade” site level in the navigation bar. Keep in mind that any changes made above ground in Auto Mode that trigger a regeneration of the building will also cause the underground building to regenerate; therefore, the parking lot should be developed once the above-ground building is finalized.

Auto mode: AI-assisted
The most immediate way to generate the parking is by assigning a basement layer containing a closed polyline, imported from a .DWG or .DXF file. After loading the file and assigning the corresponding layer, we must position ourselves at the "Below Grade" level and the AI will automatically make a proposal for the resolution of the parking lot. A possible alternative to importing files is to create the outer perimeter ourselves with the corresponding tool.
The proposal offered by the platform will not be complete until the user draws the vehicle access and, if desired, storage spaces such as storage rooms or utility rooms are defined. To do this, the menu located at the top right of the central window is available, where we can differentiate between surface and linear elements:
Surface Elements
- Editing the perimeter: As explained above with the editing of buildings above grade, we can make modifications using only the mouse. In this way by dragging the nodes and the axes of the perimeter walls we can increase or decrease the surface of the parking lot.
We can include perimeter walls or segment the existing ones, and it is also possible to create an inner perimeter, that is, to create a void within the parking area. For the AI to recognize the perimeter in either case, the polyline that forms them must always be closed.
- Adding storage rooms: There are two types of storage rooms: storage rooms, which are created in sets or bags, and mechanical or commercial rooms, which are created individually. In both cases, the user must make sure to close the polyline correctly.
Linear Elements
- Add ramp: There are two types of ramps: the access ramp, to communicate the first floor of the project with the first basement level, and the interior ramp, to connect the different basement levels with each other.
To incorporate them we must draw their axis on the lower floor, after processing it, it will be drawn on both basement levels.
- Add lane: Although the traffic lanes are generated automatically as well as the parking spaces, the user can edit them and add new ones to adapt the design to the real needs of the project. To do this, with the "Lane" tool we must draw the axis of the lanes.
Auto mode: editing with Sliders
In the "Below Grade" levels, Manual Editing of the elements is not enabled, however, we have numerous sliders in the Input Panel to be able to adjust our project to the desired design. Mainly we find configuration options classifiable in two types, of design or distribution, such as the type of basement perimeter, and of sizing, which include options such as the number of basement floors or minimum dimensions of the different elements that make up the basement.
The most prominent are:
- Below grade floors height: to define the height of the floors below ground level.
- Number of basement floors: to indicate the number of floors below ground level.
- Basement perimeter layout type: to define if the perimeter is formed by lane, storage room, parking space or parking space + storage room.
- Structural span: to indicate the span between columns in the load direction.
- Column thickness in X and Y: to set the dimensions of the columns.
- Parking aisle width: to indicate the width of the interior traffic lanes.
- Parking space length and width: to indicate the dimensions of the parking spaces.
- Parking access and interior ramps width: to indicate the width of the ramps type.
- Storage rooms average area and minimum width: to set the dimensions of storage rooms.
- Ramps walls width, mechanical and storage rooms walls width: to indicate the thickness of certain enclosures.
Other considerations
The rules governing the relationship between one mode and the other are very similar. Changes made in the Assisted phase will be lost if any modifications belonging to the Auto mode are made. Manually added elements (ramps and storage rooms) do not interact with the design generated through the previous phase; therefore, again, these changes should be the last ones.
Data Panel
In it are located the same sections as in the site view except for the housing count section. In Below Grade Area some of the metrics offered are ratios per dwelling, such as the number of parking spaces or storage rooms per dwelling. If we are interested in complying with regulatory requirements related to this metric, it is logical to configure the parking when we have created at least the appropriate number of dwellings for the project.
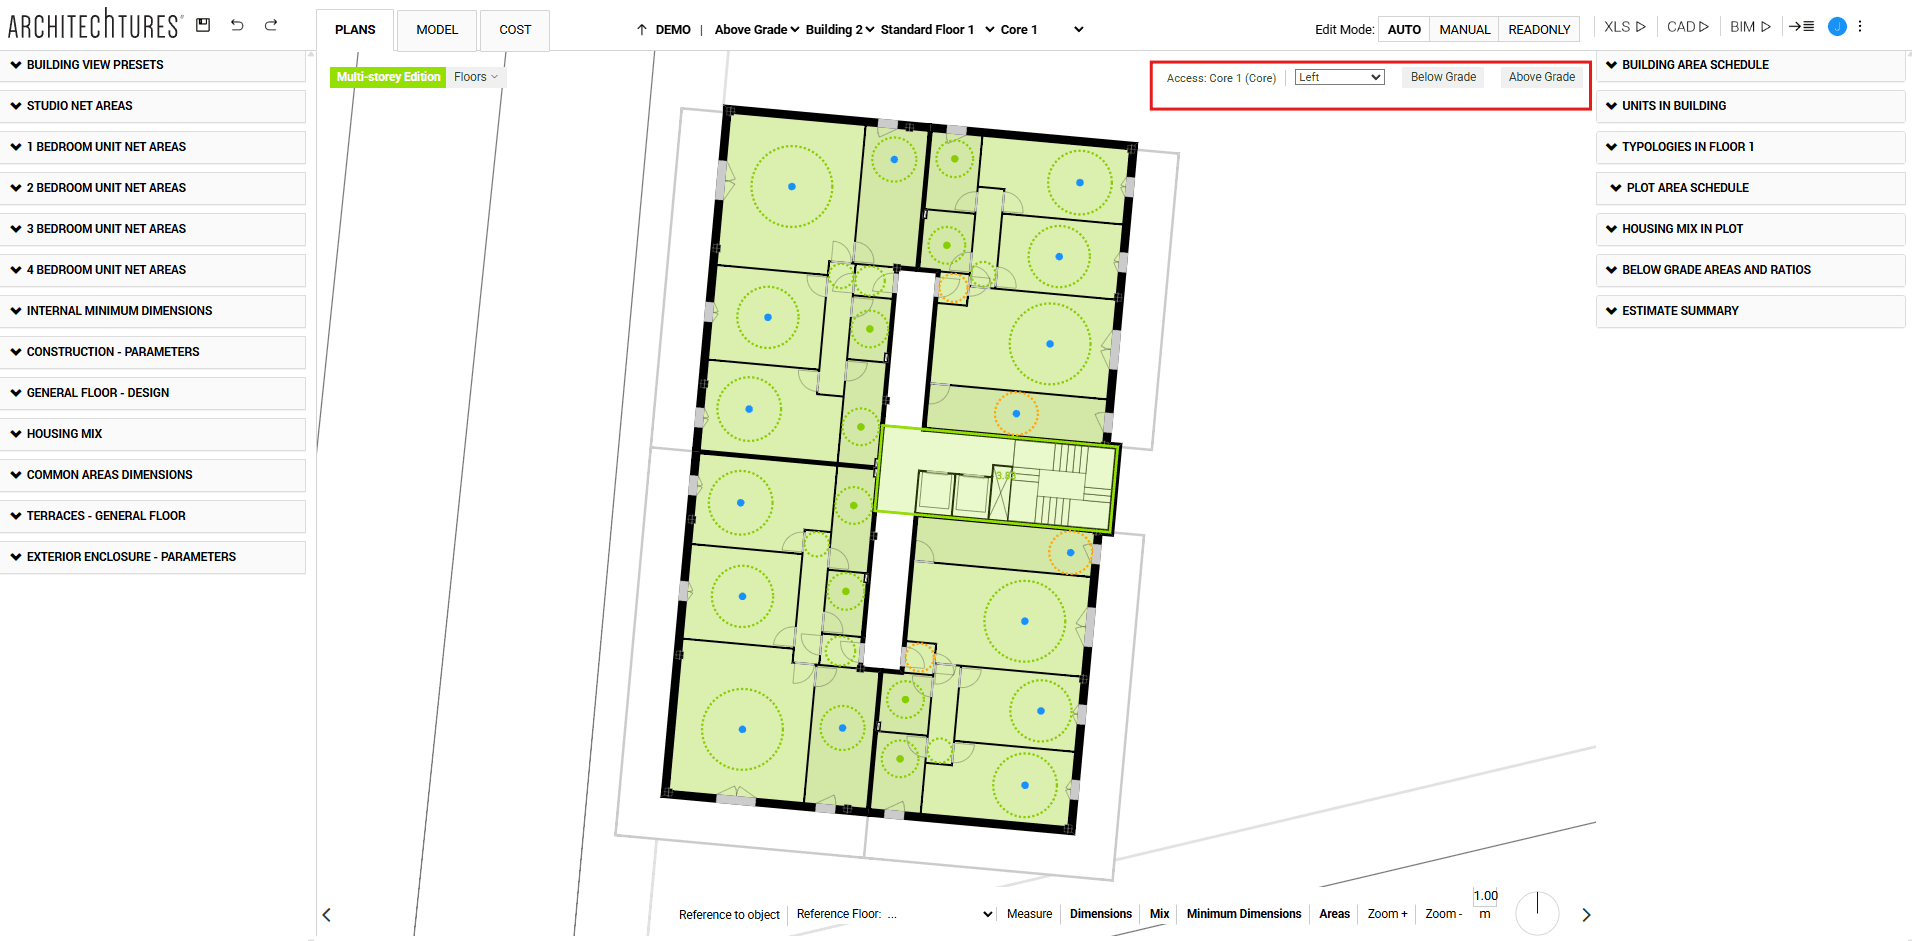
Relationship with the rest of the building
We can configure the accesses to the basement from the vertical communication cores.
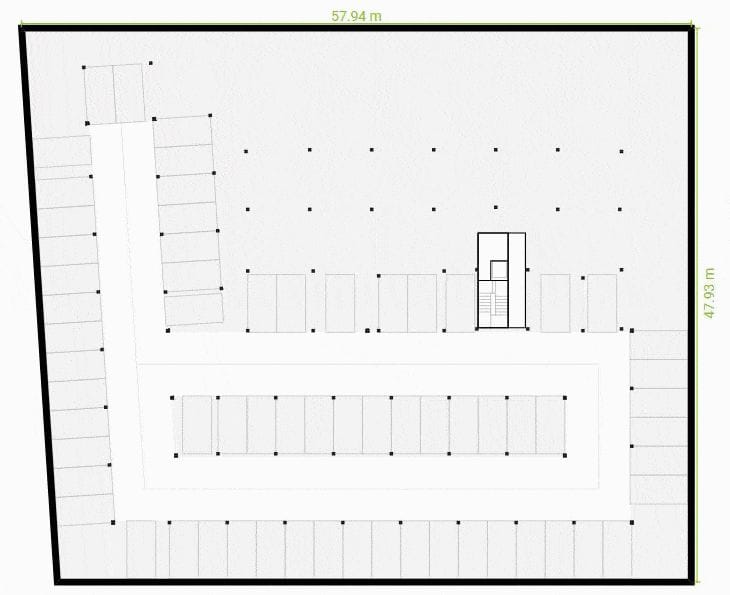
Initial lane layout
Taking into consideration the dimensioning and layout requirements of the Input panel and the outer perimeter and geometry of the buildings defined in the central window, the AI will generate a layout automatically.
Any changes to these elements will cause a recalculation of the basement layout by redefining the initial lane layout; this means that certain changes made to the basement in Assisted mode will be lost. If we had added elements manually, these elements will not be taken into account in the layout re-setting and their position may now be inappropriate.
Problems of automatic layout generation in small basements
When creating relatively small basements with respect to the building, it is possible that no lanes are generated in the initial layout. This can be avoided or solved in several ways by understanding how the distribution algorithm works.
The algorithm starts by calculating the position of the perimeter rail based on the contour and perimeter type of the basement. If we ask for perimeter lane type, the lane will be immediately against the outer contour. On the other hand, if we ask for perimeter type storage and parking, the lane will be much more towards the inside. This is because it needs more space to accommodate the storage and parking spaces.
Subsequently, the distribution of the rest of the basement is calculated. In cases where the position of these perimeter rails falls inside the buildings themselves or in some other specific cases, no rails will be generated, leaving the basement blank. We can fix this in several ways, by moving the basement outline away from the buildings until sufficient space is generated, or by selecting in the input panel a basement perimeter type that places the perimeter lane closer to the basement outline.
Finally, we can always create lanes ourselves with the lane tool from the manual tools menu in the upper right corner of the center window:
TUTORIALS LISTING:
3. Creating our first building with ARCHITEChTURES
4. Deepening the design options
5. Editing modes: Auto and Manual